This crock-pot dish only takes about 6 hours to slow cook at medium heat setting and is wonderful for any time of year. This recipe is adapted from the Six O’clock Solutions Weight Watchers magazine cookbook, and found on page 30 of the “Make Ahead” section. While the original recipe called for adding the pepper with all the ingredients, I opted to leave it out until the end of cooking. In addition, you will notice that there is no salt in this recipe. The ham adds enough salt so there is no need to add any additional amount to the recipe. Sorry, I never did get any photos of this one.
Yield: 12, 1-cup servings
| Ingredients |
| 7 |
Cups |
Chicken stock |
| 3 |
Cups |
Onion, large diced |
| 2 |
Cups |
Lean ham, diced ¼ inch |
| 1 |
Cup |
Carrots, sliced ¼ inch |
| 1 |
Tbsp |
Fresh rosemary leaves, chopped |
| 2 |
Tsp |
Fresh sage leaves, minced |
| 1 |
Lb |
Lentils |
| 4 |
Cloves |
Garlic, minced |
| 1 |
Each |
Bay leaf |
| To taste |
Pepper |
| 2 |
Tbsp |
Fresh parsley, chopped |
| Procedure Steps |
| 1. |
Combine the chicken stock, onions, ham, carrots, rosemary, sage, lentils, garlic and bay leaf in the electric crock-pot slow cooker. Turn heat setting to medium and cover with the lid. Allow to cook for about 6 hours, or until lentils are tender. |
| 2. |
Discard the bay leaf and season to taste with the pepper, then garnish with the parsley. |
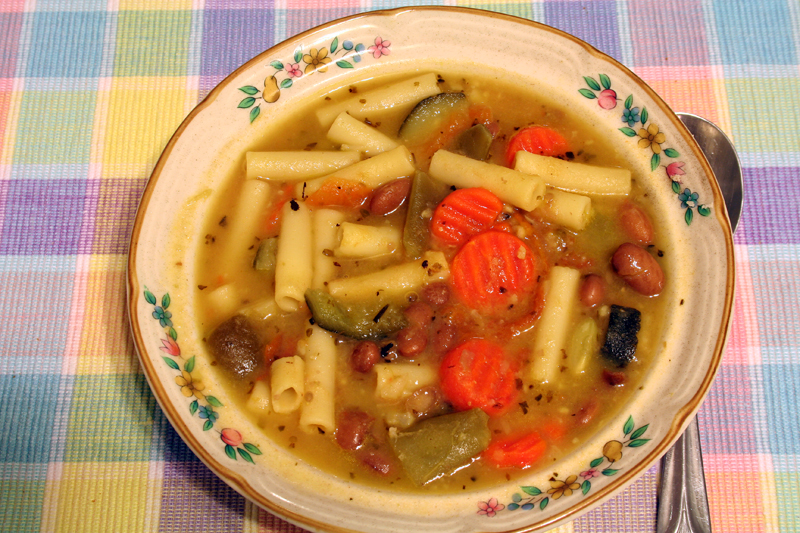
This soup took about 25 minutes to prepare, it is not only quick, but easy to make too, and is another one of the Weight Watchers recipes adapted in our kitchen from the Simple and Classic Home Cooking cookbook, found on page 166 in the soups section.
As many of you know, in our kitchen we like to modify recipes to suite our own cooking style and preferences, so with this one we used dried pinto beans that we pre-cooked a few days before, and followed the rest of the recipe closely. We also increased the garlic amount by triple the original quantity. While the recipe calls for some frozen vegetables, they really are not that bad at all, in fact, it makes the soup go together quite quickly. Yet, if you prefer fresh vegetables, you could add sliced fresh zucchini, yellow squash, cauliflower, broccoli, Italian green beans, red peppers, carrots, baby lima beans in any combination that yields a pound. Therefore, if you are looking for a quick soup, this one will fit that need in less than thirty minutes. At only 143 calories per 1-cup (8-ounce) serving, when accompanied by a fresh salad this makes for a very light dinner.
| Ingredients |
| 2 |
Tsp |
Olive oil |
| 6 |
Cloves |
Garlic, minced |
| 6 |
Cups |
Chicken stock, heated |
| 1 |
Lb. |
Italian style vegetables, fresh or frozen (see note above) |
| 2 |
Cups |
Pinto beans, cooked, rinsed and drained |
| 2 |
Cups |
Roma tomatoes, peeled, seeded and diced |
| ¾ |
Cup |
Tubetti or other small tubular pasta |
| 2 |
Tsp |
Italian seasoning |
| 3 |
Tbsp |
Parmesan cheese, fresh grated |
| To taste |
Salt and white pepper |
| Procedure Steps |
| 1. |
Heat the olive oil in a large stockpot over medium high heat and sauté the garlic for a minute or until lightly browned. Add the chicken stock, vegetables, beans, tomatoes, pasta, and Italian seasoning. Bring to a boil, then reduce heat and simmer, uncovered for 15 minutes or until pasta is tender. Season to taste with salt and white pepper |
| 2. |
Ladle into individual serving bowls and sprinkle with the fresh grated parmesan cheese, about ½ a tablespoon in each bowl. |
| Yield: 10 1-cup servings |
According to the Weight Watchers nutritional analysis, this recipe has a 2-point value per serving and 143 calories, 23.9g carbohydrates, 1.9g fat, 3.3g fiber, 6.2g protein, 1mg cholesterol, 509mg sodium (however, with fresh chicken stock this would be mush lower), 67mg calcium.
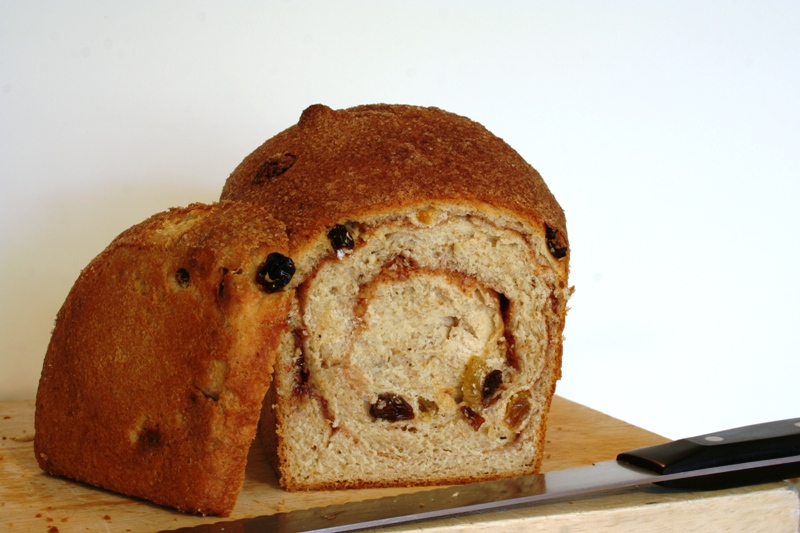
Resurrecting an interest in breads and baking this is the second yeast bread dough that has seen some action in the kitchen the past few weeks. It is adapted from the book entitled Bread by Joan Wiener and Diana Collier, from the 1973 edition.
The single batch of dough yields two medium loaves or one medium loaf and four mini loaves. This bread is similar to most of the cinnamon raisin breads you will find in stores today, and slightly larger than the typical, and great toasted with some butter, or even cream cheese smeared on top. Of course, plain is just as wonderful too, with the dark and golden raisins, cinnamon, and sugar spiraled loaf; any slice is just plain goodness.
| Ingredients |
| 1 ½ |
Cups |
Milk, warmed to 110° F. |
| ½ |
Cup |
Butter |
| ½ |
Cup |
Water, warmed to 110° F. |
| 2 |
Pkg |
Active dry yeast, (2 Tbsp.) |
| ¼ |
Cup |
Soy flour |
| ¼ |
Cup |
Wheat germ |
| 1 |
Cup |
Whole wheat flour |
| 6 |
Cups |
Unbleached, All-purpose white flour (approximate, divided) |
| ¼ |
Cup |
Light brown sugar |
| 2 |
Tsp |
Salt |
| ¾ |
Cup |
Golden raisins |
| ¾ |
Cup |
Dark raisins |
| 3 |
Lg |
Eggs, lightly beaten |
| ¾ |
Cup |
Sugar |
| 1 |
Tbsp |
Cinnamon |
| ½ |
Cup |
Pecans, walnuts, or other nuts, chopped |
| ¼ |
Cup |
Butter, melted |
| Procedure Steps |
| 1. |
In a saucepan or microwavable safe bowl warm the milk and butter until 110° F |
| 2. |
In a separate small mixing bowl warm the water to 110° F., then stir in the active dry yeast, and allow it to sit for 5 minutes or so to get the yeast activated. |
| 3. |
In a separate bowl of an electric mixer, combine the soy flour, wheat germ, and whole-wheat flour, 3 cups of the unbleached all-purpose white flour, light brown sugar, salt, and both raisins. Stir to mix well. |
| 4. |
Combine the milk/butter mixture with the lightly beaten eggs, and then combine this with the yeast mixture. |
| 5. |
Add the liquid ingredients to the dry ingredients and use a dough hook on medium speed of the electric mixer, beating until smooth. Add 1 cup at a time of the all-purpose flour until the dough forms a ball and releases from the sides of the bowl. |
| 6. |
Turn the dough out onto a floured surface and knead the dough until smooth and elastic, about 5-10 minutes. Grease a large bowl and add dough to bowl, turning so the dough is well greased. Place in a warm (100° F) draft free place until doubled in size, or about an hour or so. Meanwhile combine the ¾-cup sugar with the 1 tbsp cinnamon, and chopped nuts if desired. |
| 7. |
Turn dough out onto lightly floured surface and divide into two equal portions of dough that will weight about 2 pounds each. Roll each piece of dough in turn into long rectangle shapes the width of the size of the pan length, and then sprinkle the top evenly with the cinnamon sugar mixture. Roll up the dough jellyroll style and pinch the seams and ends together to form a smooth loaf. Then place the dough, seam side down in a well greased medium-sized loaf pan. Repeat the same for the other piece of dough. |
| 8. |
Brush the tops and exposed sides of the dough with the melted butter, then place back in the a warm (100° F) draft free place until doubled in bulk or about an inch from the top of the pan, or about an hour or so. |
| 9 |
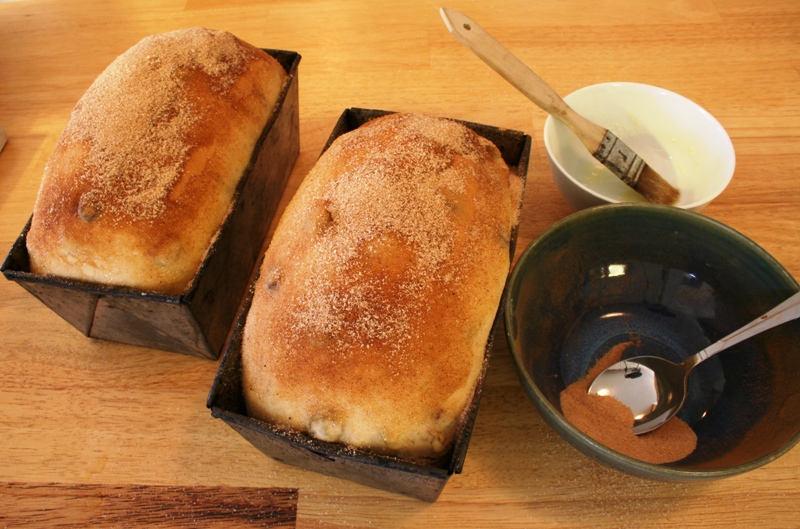
Preheat oven to 375° F, and brush the raised loaves again with more melted butter, then sprinkle more of the cinnamon sugar on top. Bake in the oven for 35 to 40 minutes or until they sound hollow when thumped on the bottom of the pan. Cool in the pans on a wire rack for about 10 minutes, then remove from the pans and allow cooling completely before cutting. |
 |
 |
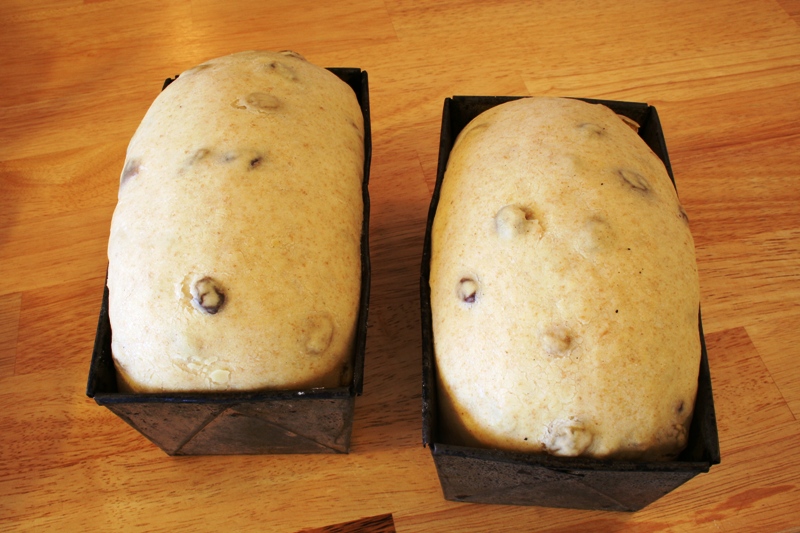
| Proofed raisin bread dough |
Butter wash with sugar & spice |
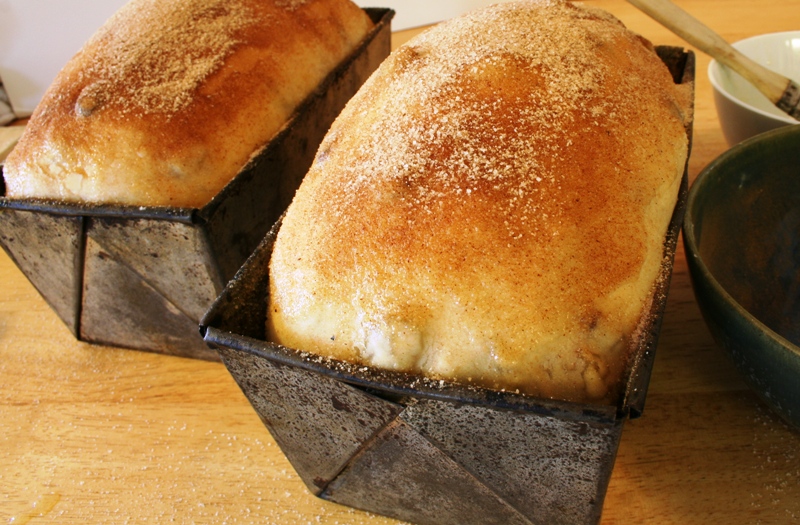 |
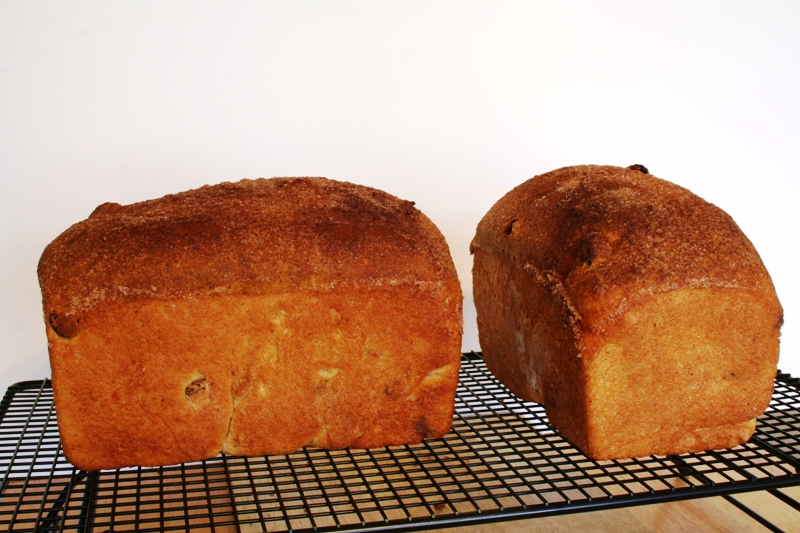 |
| Ready for baking |
Cooling on the rack |
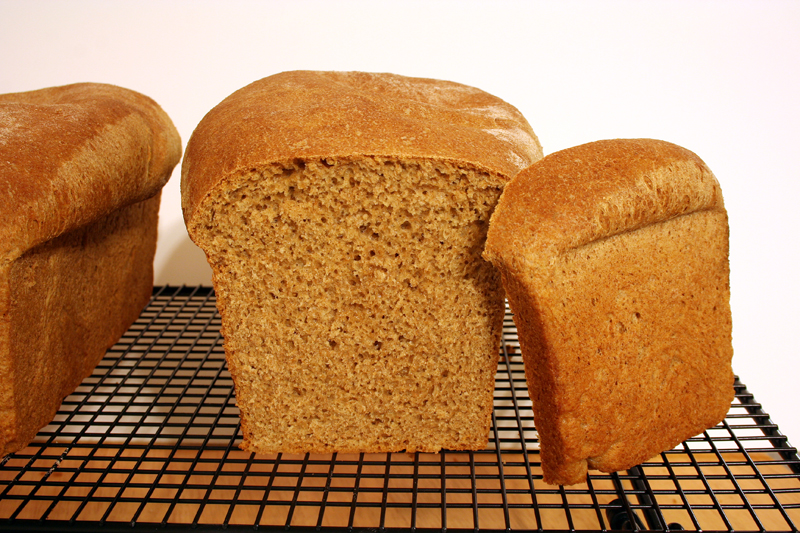
Bought a five pound bag of King Arthur Whole Wheat flour last week and have made one of their recipes from the back of the container, it is called No-Knead 100% Whole Wheat Bread and this is an amazing bread indeed. It has orange juice and molasses or maple syrup as part of the liquid ingredients, and they lend a slight sweetness and tanginess to the loaf. The first batch came out good, but the top flattened out and did not raise enough to form a nice crown. The second batch, featured in the photographs in this post, came out about as well as can be expected, but we are still striving for perfection.
The recipe from the back of the flour package is already available online at the King Arthur web site, and it displays a systematic procedure with images: No-Knead 100% Whole Wheat Bread. I doubled the recipe to yield the two loaves shown in this blog post.
Here are some tips on how I work to prefect my baking products and now shared them with you here.
Yeast Breads 101
While a complete class is typically taught, this is a short tutorial and lesson on some of the basics for working with yeast breads.
Yeast is an amazing living organism; it is a singular-celled fungus. There was a debate several years ago over it either being a living animal or plant, but that seems to have been quelled with the fact that it is actually neither, the fungus kingdom is separate from the plants, animals and bacteria. Not to get too deep in the biological taxonomy here, but in any case it is a living organism in your bread! The yeast utilized in baking and fermenting alcoholic beverages is actually the species Saccharomyces cerevisiae and is safe for human consumption.
Yeast feeds on carbohydrates and converts them into carbon dioxide and alcohol in an organic process known as fermentation, the basic formula below:
Yeast + Carbohydrates = Alcohol & Carbon Dioxide
Yeast is the secret ingredient that allows bread to rise and give it texture, the carbon dioxide gas that releases as the yeast digests the carbohydrates creates tiny pockets of air bubbles between the strands of gluten in the dough network. During baking the alcohol by-product of the fermentation process evaporates.
Like any living organism, yeasts have a certain temperature zone where they are dormant, active, or die.
Temperature ranges that affect yeast.
At 34° F (2° C) or below yeast is inactive
34 – 70° F (2 – 21° C) Slow activity
70 – 90° F (21 – 32° C) Best temperature for growth of fresh yeast
105 – 115° F (41 – 46° C) Best temperature for growth of active dry yeast
125 – 130° F (52 – 54° C) Best temperature for activating instant yeast
138° F (59° C) Yeast dies
Production Stages for Yeast Breads
Unbelievably there are up to ten stages in the general production of yeast-raised breads, some can be combined, and however the divisions are:
- Scaling ingredients
- Mixing and kneading dough
- Fermenting dough
- Punching down dough
- Portioning dough
- Rounding portions
- Shaping portions
- Proofing products
- Baking products
- Cooling and storing finished products
Did you know that there are two basic methods of mixing dough?
Yes, the two are Straight Dough Method and Sponge Method.
The Straight Dough method is the simplest and easiest in the all the ingredients are combined together and mixed in one-step. In some cases, the yeast is first activated in warm (110° F) liquid and then added to the ingredients, and kneading will also vary depending on the particular dough.
The Sponge Method of mixing yeast dough is broken down into two steps. In the first step, the liquid and yeast are mixed with about half of the dry ingredients including mostly flour to make a thick batter or sponge. The sponge is then allowed to rest until doubled in size. Then, in the second step, any fat, salt, sugar, and remaining flour are added to create the final dough. This dough is kneaded and allowed to rise again, giving the bread a different flavor and lighter texture.
Did you know that dough weights are typically associated with pan sizes?
This quick guide assists the baker in knowing the approximate weights of raw dough and the pans that they would typically fit into when preparing for baking.
| Pan |
Typical Size
(L x W x H) |
Weight |
| Sandwich Loaf |
16” x 4” x 4” |
4 lb. |
| Pullman Loaf |
13” x 4” x 3-4” |
3 lb. |
| Large |
9” x 5” x 3-4” |
2 lb. |
| Medium |
8” x 4” x 2-4” |
1 lb. 8 oz. |
| Small |
7” x 3” x 2” |
1 lb. |
| Mini |
5” x 3” x 2” |
8 oz. |
Proofing doubles your product!
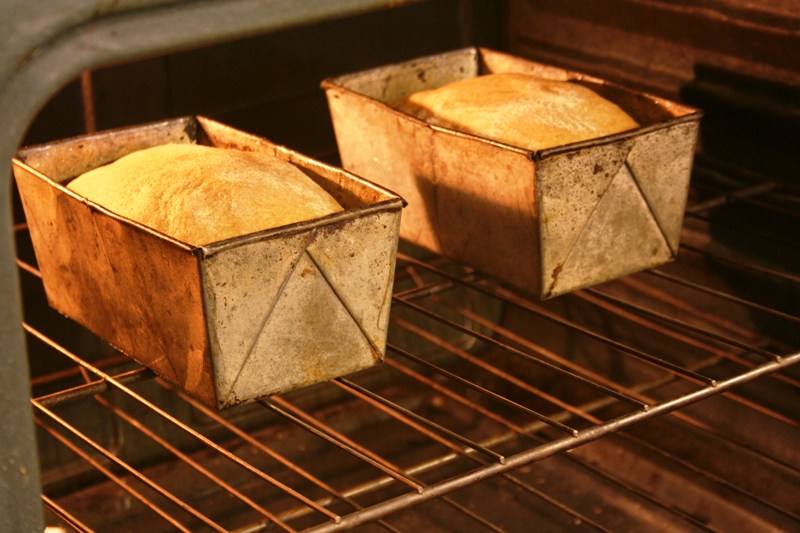
Proofing your dough product before baking ensures that you are getting the full effects of the yeast activity, letting your little organisms work for your dough’s benefit. Typically, in restaurants and bakeries a proofing box is utilized where the temperature and humidity are controlled, typically the perfect proofing environment is a temperature between 95° and 115° F (35-46° C) and a pan containing warm water also brings the humidity up near 80% or above to prevent thick crusts and keeps the dough from drying out. But remember, yeast dies above 138° F, so if you are using an oven at home as a proofing box, heat it to your lowest setting (typically 140-170° F) and then turn it off to cool some before adding your dough product to rise.
Continue to proof your dough product until it doubles in size and when slightly touched it should spring back. Too short a proofing results in lower volumes and too long a proofing time results in a sour tasting and paler color in the final product.
Did you know that different washes create varied finishing effects?
The type of wash brushed on or sprinkled onto the top of proofed dough will change and improve the outside appearance and crust texture of the finished product. The crust can be made shiny, or matte finished, hard or soft, lighter or darker depending on the wash.
The table below highlights the various uses and effects of certain washes. For example, French bread typically is coated with a water wash and even a hot pan of water in the oven to aid in building a crispy and crunchy crust.
| Wash |
Uses and Effects |
| Whole eggs and water |
Shine and color |
| Whole eggs and milk |
Shine and color with a softer crust |
| Egg white and water |
Shine with a firm crust |
| Water |
Crisp crust |
| Flour, oats, meals |
Texture and contrast |
| Milk or cream |
Color with a soft crust |
 |
| Cooling the bread after baking. |