Luxury Fall Dinner Party
Project Food Blog Challenge
Making it through to the third round of the Foodbuzz Project Food Blog challenge presented by Buick Lacrosse, is both humbling and exciting, but most importantly an honor to be among the next group of two-hundred food bloggers participating in the contest. I also want to thank everyone who has voted for me in each step of the way, your support is amazing, and I hope to continue to inspire with my contributions.

Feeling Fall in the air
Fall has finally caught up with the season of change here in our part of the country, temperatures are dropping, leaves are falling, and clear brisk air is whipping around. With the fall season comes a crop of seasonal bounty with fruits and vegetables, all which is the inspiration for the menu I have selected in the luxury dinner party challenge. From acorn squash, carrots, apples, in the soup, Vermont cheddar and fresh rosemary in the bread sticks, to pumpkin seeds, goat cheese, artichoke hearts, pears, and Belgian endive inspiring the entrée, and finally, bourbon, sweet potatoes and walnuts with the dessert.
I will also give you some organizing notes and tips at the end of the recipes that will help you in planning a similar menu for your home, some tips are recipe specific, and some are planning tips for multi-tasking in the kitchen.
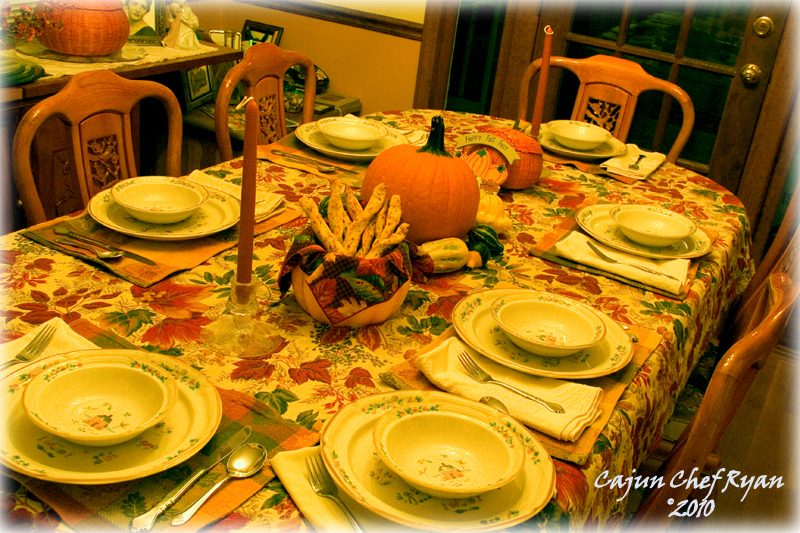
Monique’s beautiful Fall table setting
Monique decorated and set the table and decorations, the lovely Fall table cloth, place mats, napkins and seasonal decorations. When she pulls out the seasonal decorations it is a sure sign that the holidays are just around the corner. Thank you so much Monique for setting up a great dining room!

Friends and Family at the dinner table
So please sit back, relax, and enjoy the Cajun Chef Ryan Luxury Fall Dinner Party!

Luxury Fall Dinner Party Menu. (PDF, 1pp, 98KB)
This three course meal actually includes seven separate recipes to complete, so without further ado, I present you with the recipes for the Luxury Fall Dinner Party.
For the first course I chose to do a fall soup, Acorn Squash Soup to be exact, and once dinner was served the comments from the guests included how they could really taste the fall flavors in the soup, which, our guest Heather said it reminded her of how fall would taste if it were put into a bowl. These were such nice comments on this, the first course – soup.
Getting Started
Acorn Squash Soup
Roasted acorn squash, carrots, onions, leeks, Granny Smith apples, and holiday spices blended with cream and served with Vermont Cheddar Rosemary Bread Sticks
Acorn Squash Soup
| Ingredients |
| 3 |
Each |
Acorn squash, halved, seeds removed |
| 1 |
Tbsp |
Olive oil |
| 3 |
Each |
Carrots, chopped |
| 1 |
Each |
Granny Smith apple, cored and chopped |
| 1 |
Med. |
Onion, chopped |
| 1 |
Med. |
Leek, cleaned and chopped |
| ½ |
Tsp. |
Ginger, ground |
| ¼ |
Tsp |
Allspice, ground |
| 4 |
Cups |
Chicken or vegetable stock |
| 1 |
Cup |
Heavy Cream |
| To taste |
Salt and white pepper |
| 1 |
Tbsp |
Parsley, chopped |
| |
|
|
| Procedure Steps: Preheat oven 350° F. |
| 1. |
On a baking sheet, place the acorn squash, cut side down, and then add a little water and cover with foil, then roast until soft, about 45 minutes. Allow to cool, and then scoop out the squash flesh and set aside. |
| 2. |
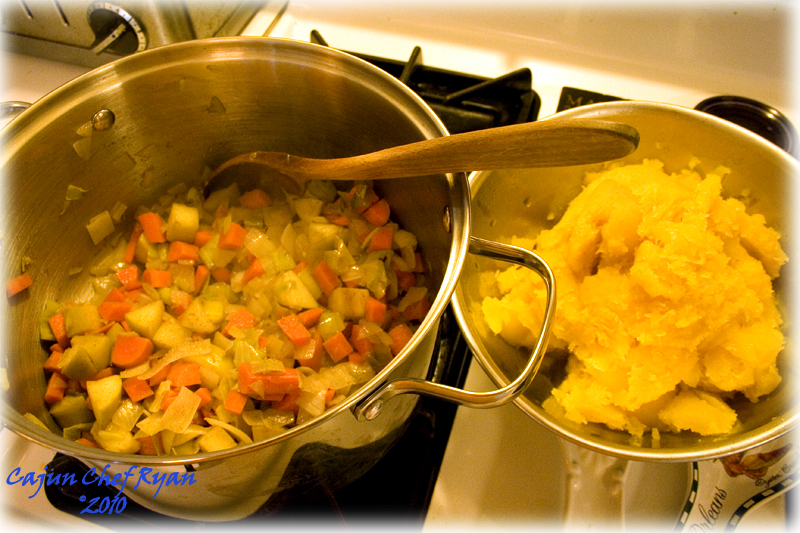
In a soup pot, heat olive oil over medium high heat. Saute the carrot, apple, onion, and leek in the olive oil until soft, stirring occasionally, then season with ginger and allspice, and then add the squash and the chicken stock. Bring to a boil while stirring well, and then reduce heat to a simmer over low heat for 20 – 30 minutes, stirring occasionally. |
| 3. |
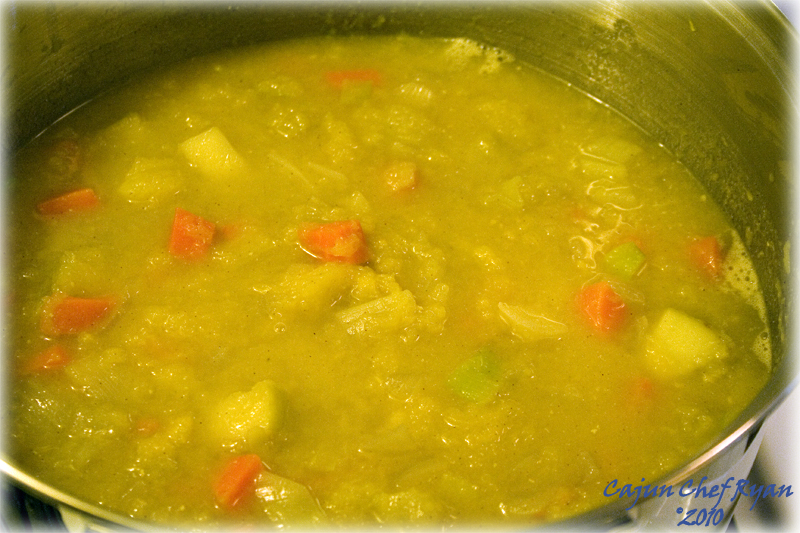
Remove the pot from the heat and puree with a hand-held immersion blender. Alternatively, in batches, puree in a blender or food processor until smooth and return to the pot. |
| 4. |
Stir in the heavy cream and simmer for another 5 minutes then and keep warm. |
| |
Yield: 8 to 10 servings. |
To Serve: Remove the soup pot from the heat and ladle the soup into bowls, then garnish with fresh chopped parsley and serve with the warm bread sticks.
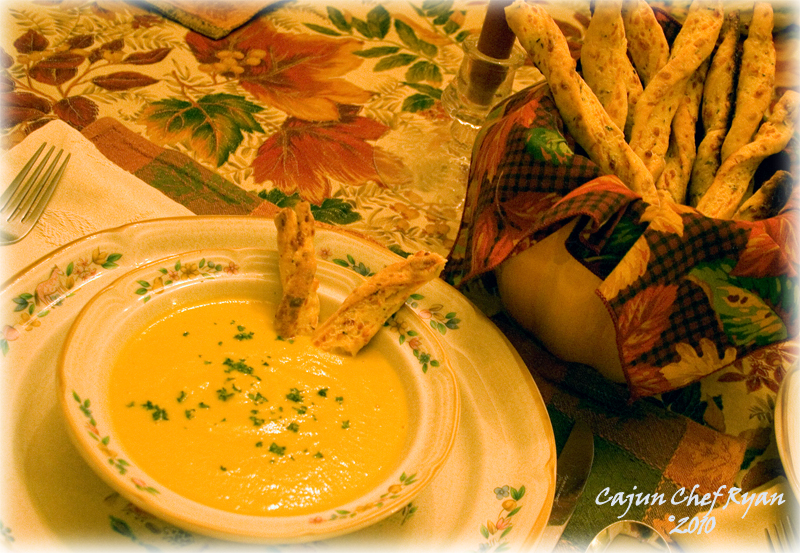
Acorn Squash Soup with Vermont Cheddar Rosemary Bread Sticks
Vermont Cheddar Rosemary Bread Sticks
| Ingredients |
| 1½ |
Cups |
All-purpose flour, unbleached |
| ½ |
Cup |
Cornmeal |
| 1 |
Tbsp |
Baking powder |
| ½ |
Tsp |
Sea salt |
| ¼ |
Lb. |
Butter, unsalted (1 stick), cold, diced |
| 4 |
Oz. |
Vermont Cheddar cheese, shredded |
| 1½ |
Tbsp |
Rosemary, fresh, chopped |
| ½ |
Cup |
Skim milk, non-fat |
| 1 |
Tbsp |
Honey |
| |
|
|
| Procedure Steps: Preheat oven to 425°F. |
| 1. |
Stir together the flour, cornmeal, baking powder, and salt |
| 2. |
Place the dry ingredients in the bowl of a food processor, then add the cold cut butter, and process until the mixture has the consistency of coarse meal. Turn out the mixture into a large bowl, and then stir in the cheese and rosemary. (NOTE: If you do not have a food processor cut the butter into the dry mixture using two knives in a crosscut fashion.) |
| 3. |
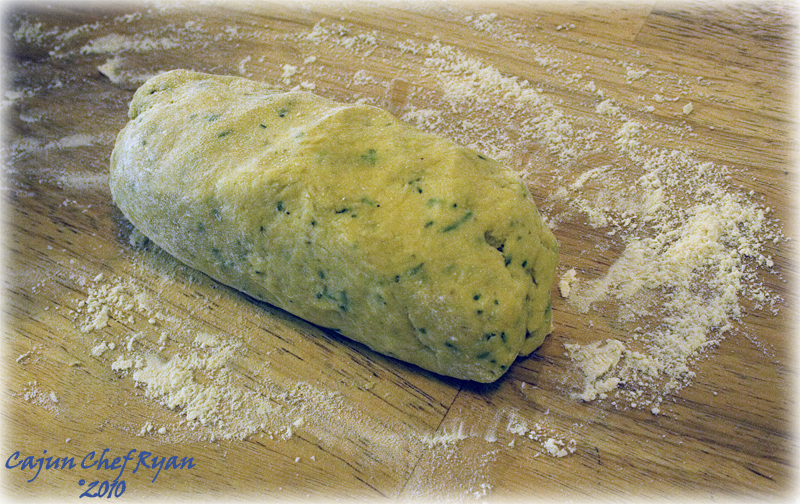
Combine the milk and honey in a separate bowl, make a well in the dry ingredients, and then pour the liquid mixture into the flour mixture, stirring with a large spoon until a soft dough forms. Work quickly and do not over mix. |
| 4. |
On a lightly floured surface, knead the dough for about ten strokes. |
| 5. |
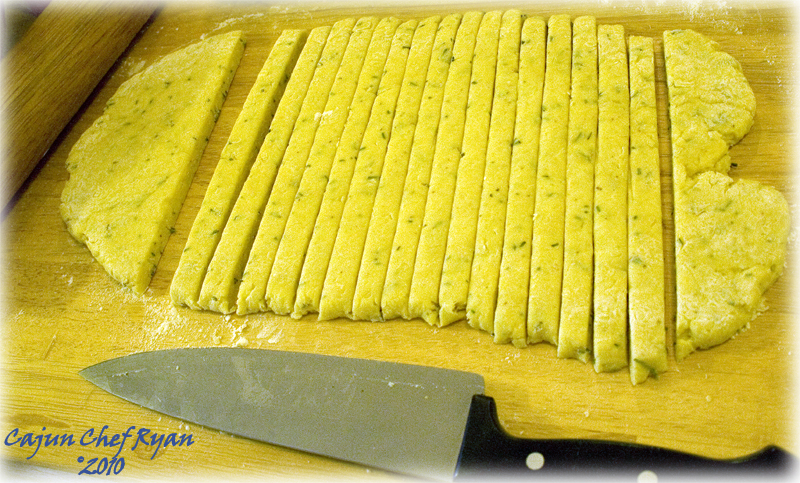
Using a rolling pin roll out the dough in a rectangle until it is about 1/2-inch thick. Using a sharp knife, cut out sticks of dough 1/2-inch wide. Twist them into a spiral and space them about 1/2-inch apart on two un-greased baking sheet pans. Gather up the scraps, gently form into another rectangle, and cut, and then place on the sheet pans. |
| 6. |
Bake the bread sticks in the preheated 425°F oven for 15 minutes or until the tops are golden brown.
Makes about 20 bread sticks.
|
|
TIP: The bread sticks can be prepared, and placed on the sheet pan and covered with plastic wrap and refrigerated up to 4 hours before baking time. When ready to serve, have the pre-heated oven ready and place the sheet pans in the oven about 25 minutes before you are ready serve the soup.
|
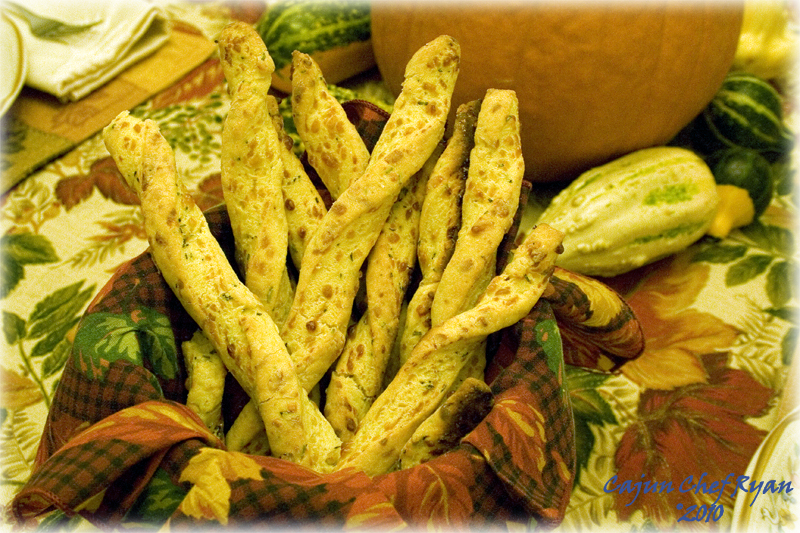
Vermont Cheddar Rosemary Bread Sticks
For the second course I chose to do a chicken breast which is encrusted with pumpkin seeds seasoned with my Cajun spice blend, then sautéed in butter and served with an Artichoke Beurre Blanc sauce, which is one of my variations on the classic French white wine butter sauce. I also selected to do a side item of Braised Belgium Endive with Pears. Our guest Tony said that the chicken was seasoned perfectly, not too spicy, but the subtle hints of Cajun spice added a really nice touch. Dawn said that the chicken was so moist and tender, and the crunchy texture of the crust was amazing. And our guest Cherie said “Wow, look at this, the garnish is so nice” when I served her plate.
The Main Event
Pumpkin Seed Crusted Chicken Breasts with Cajun Artichoke Beurre Blanc
Boneless chicken breasts stuffed with goat cheese, then sautéed with a pumpkin seed Cajun spiced crust, and served over Cajun artichoke hearts in a white wine butter cream sauce
Served with a side of Braised Belgian Endive and Pears
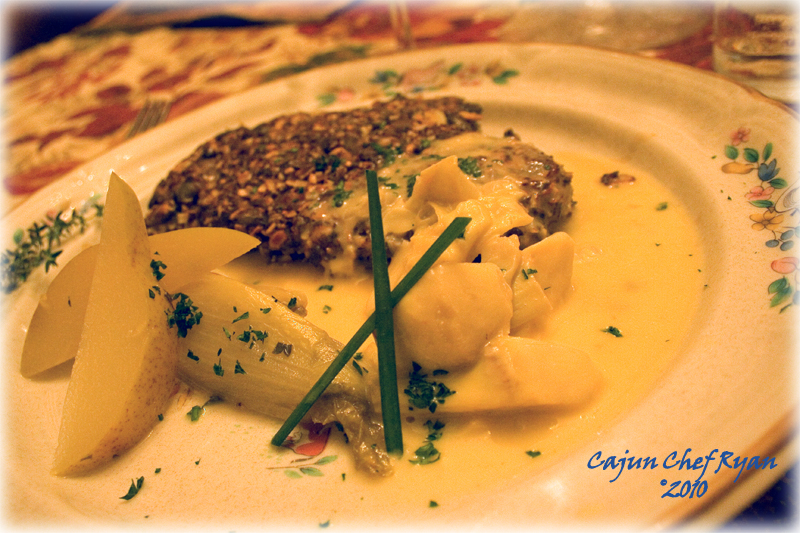
Pumpkin Seed Crusted Chicken Breasts with Cajun Artichoke Beurre Blanc
Pumpkin Seed Crusted Chicken Breasts
| Ingredients |
| 4 |
Each |
Boneless chicken breasts |
| 8 |
Ounces |
Goat cheese, cut into four even pieces |
| 2 |
Cups |
Pumpkin seeds, toasted |
| 1 |
Tbsp |
Cajun spice blend |
| 2 |
Tsp |
Thyme, fresh chopped |
| ½ |
Tsp |
Garlic salt |
| 2 |
Large |
Eggs, beaten |
| ¼ |
Cup |
Milk |
| 2 |
Cups |
Flour, seasoned with salt and white pepper |
| ¼ |
Cup |
Clarified butter |
| To taste |
Salt and white pepper, divided |
| Procedure Steps |
| 1. |
Cover the chicken breasts with plastic wrap and flatten slightly with a mallet. Then cut a slit into each chicken breast and stuff them each evenly with two ounces of goat cheese. Season the outside lightly with salt and white pepper and reserve. |
| 2. |
Place toasted and cooled pumpkin seeds in the bowl of a food processor and grind, leaving them a bit chunky, and then add the Cajun spice blend, thyme, and garlic salt. Transfer this to a large bowl. |
| 3. |
Combine the beaten egg with the milk and then transfer this mixture to another large bowl to make the egg wash. |
| 4. |
Combine the flour with the salt and white pepper and into a third large bowl. |
| 5. |
Take the stuffed and seasoned chicken breasts and dip them first into the flour mixture, then the egg wash mixture, and finally into the pumpkin seeds, shaking off any excess coating, but ensuring an evenly well coated piece of chicken. |
| 6. |
Sauté the coated chicken breasts in the clarified butter for 4-5 minutes on each side or until golden brown. Serve with the Cajun Artichoke Beurre Blanc sauce (see below)
TIP: The chicken breasts can be breaded ahead of time and placed on a parchment paper lined sheet pan, then covered in plastic wrap and refrigerated for up to 1 hour before sautéing. |
Cajun Artichoke Beurre Blanc
| Ingredients |
| ½ |
Lb. |
Butter, softened, divided |
| 1 |
Tbsp |
Shallots, minced |
| 1 ½ |
Cups |
Artichoke hearts |
| 1 |
Tsp |
Cajun spice blend |
| ½ |
Cup |
White wine |
| 1 |
Tbsp |
Lemon juice |
| To taste |
Salt and white pepper |
| Procedure Steps |
| 1. |
Cut butter into small cubes and bring to room temperature. |
| 2. |
In the meantime, coat a sauté pan with just a little butter and then sweat the shallots until soft, and then add the artichoke hearts and Cajun spice blend and allow the artichokes to soften up for about 3 to 5 minutes. |
| 3. |
Add the white wine and lemon juice and bring to a simmer, then reduce to almost dry, or au sec. |
| 4. |
Remove the pan from the heat and slowly stir in the butter cubes until smooth a smooth and creamy consistency, then season to taste with the salt and white pepper.
|
| TIP: This sauce will not keep for long as the butter will solidify within 30 – 40 minutes. To keep the sauce at the proper consistency, you can place it into a double boiler with a lukewarm water bath that is kept at around 76° F. or room temperature. |
Braised Belgian Endive and Pears
| Ingredients |
| 3 |
Tbsp |
Butter |
| 1 |
Tbsp |
Sugar |
| 4 |
Heads |
Belgian endive, brown and damaged leaves removed, halved lengthwise |
| 1 |
Each |
Pear, cored, sliced into 16 segments |
| ¼ |
Cup |
White wine |
| ½ |
Cup |
Chicken stock |
| 1 |
Each |
Lemon, juiced |
| 1 |
Tsp |
Thyme leaves, chopped |
| To taste |
Salt and white pepper |
| 1 |
Tbsp |
Fresh parsley, chopped |
| Procedure Steps |
| 1. |
In a large sauté pan melt the butter over medium heat. When the butter is melted, sprinkle in the sugar and stir well to dissolve. |
| 2. |
Place the endive in the butter-sugar mixture, cut side down. Cook until golden brown, about 5 minutes, lowering the heat if the butter starts to burn. |
| 3. |
Turn the endives over and brown the other side, about 3 to 5 more minutes. Turn the endive back over and add the pear slices, then add the white wine and cook until reduced by half, about 2 minutes. |
| 4. |
Add the chicken broth, cover and cook until tender and the endives can be easily pierced with a knife, about 15 minutes. If the pan gets too dry, add a tablespoon of water. |
| 5. |
Uncover and add the lemon juice and thyme and bring to a simmer for 1 minute. Season, to taste, with the salt and pepper. Add the parsley, toss and serve. |
TIP: If holding the endives before service, transfer them to a heat-proof dish and cover, then keep in a warm oven at 170° F.
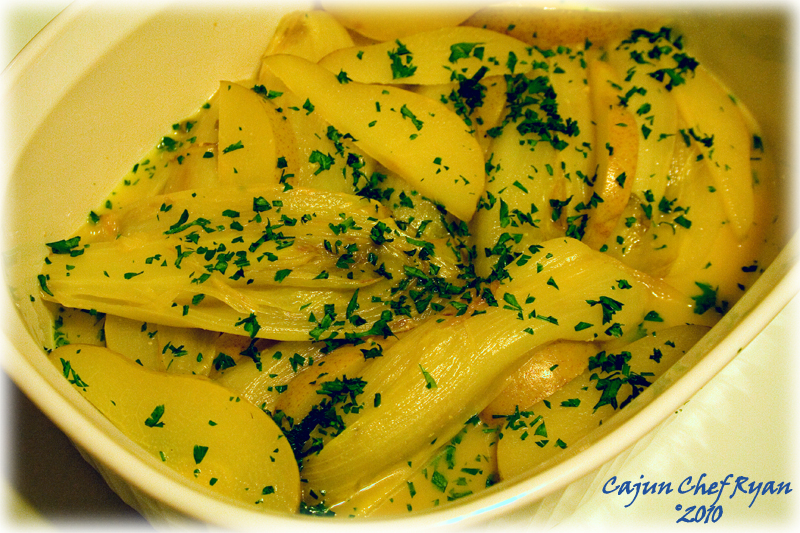
Transfer the braised Belgian endive and pears to a heat-proof dish and cover.
The third and last course is a dessert recipe inspired from a classic Southern side dish served at many a Thanksgiving and Christmas feast. These Bourbon Sweet Potato Cupcakes takes it inspiration from a Bourbon Sweet Potato Casserole that I make every year, and is always a hit, most folks say that it is so sweet it could be a dessert. Here is the dessert treat inspired from a holiday classic side dish, Bourbon Sweet Potato Cupcakes.
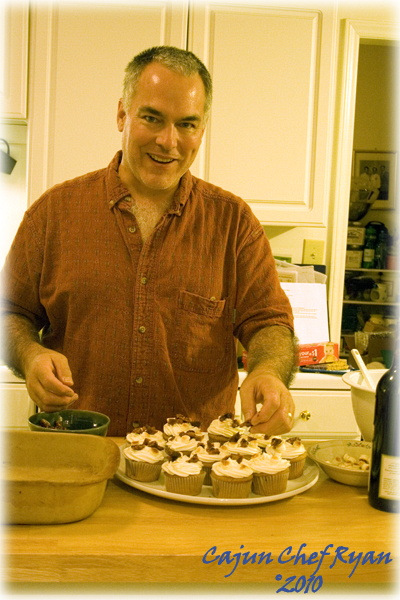
Ryan decorating the cupcakes.
After a short intermission and rest, I went ahead and iced and decorated the cupcakes, I gave Cherie my camera with instructions to snap a few of me icing and decorating. Once a few more final snaps were taken, we served the final course, and everyone went silent. Then Tony said that he really liked the way the bourbon was in the icing and how the explosion of the liquor flavor coated the entire palate. I decorated the cupcakes with the icing, then topped with some toasted mini-marshmallows, candies walnuts, and praline brittle.
A Sweet Finish
Bourbon Sweet Potato Cupcakes
Sweet potato cupcakes with a Bourbon Cream Cheese Icing
Bourbon Sweet Potato Cupcakes
| Ingredients |
| 1 |
Cup |
Un-bleached, All-purpose flour |
| 1 |
Tsp |
Baking powder |
| ½ |
Tsp |
Cinnamon, ground |
| ¼ |
Tsp |
Baking soda |
| ¼ |
Tsp |
Salt |
| ½ |
Cup |
Butter, un-salted, softened> |
| ¾ |
Cup |
Sugar |
| 2 |
large |
Eggs |
| 1 |
Tbsp |
Bourbon |
| 1 |
Cup |
Sweet potatoes (unsweetened), mashed |
| ½ |
Tsp |
Vanilla extract |
| |
|
| 1 |
Recipe |
Bourbon Cream Cheese Icing, see below |
| Procedure Steps |
| 1. |
Preheat oven to 350 degrees F. Line twelve 2-1/2-inch muffin cups with paper bake cups; set cups aside. |
| 2. |
In medium bowl stir together the flour, baking powder, cinnamon, baking soda, and salt; set aside. |
| 3. |
In large mixing bowl beat butter with an electric mixer on medium to high speed for 30 seconds. Add sugar and beat on high speed until light and fluffy, about 2 minutes. Add eggs, one at a time, beating on low speed after each addition until combined. Add sweet potatoes, Bourbon and vanilla, beating until combined. Add flour mixture; beat until combined (batter will be thick). |
| 4. |
Divide batter evenly among prepared muffin cups. Bake about 20 minutes or until tops spring back when lightly touched. Cool in pan on wire rack for 1 minute. Remove from pan and cool completely. |
| 5. |
Using a pastry bag fitted with a large star tip, pipe the frosting on top of the cupcakes. Or if you do not have cake decorating tools, place Cream Cheese Frosting in large resealable plastic bag. Cut a 1/4-inch opening in one corner of bag, then pipe frosting on top of cupcakes. This recipe makes 12 cupcakes. |
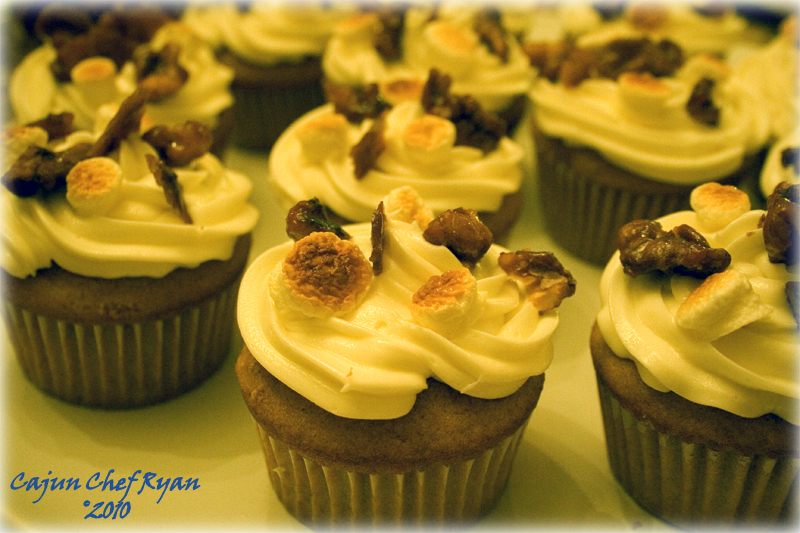
Bourbon Sweet Potato Cupcakes
Bourbon Cream Cheese Icing: In large mixing bowl beat four ounces cream cheese (1/2 package), softened, and 1/3 cup butter, softened, with electric mixer on medium speed for 30 seconds. Add 2 tablespoons bourbon and beat until combined. Beat in 4 cups powdered sugar, about 1/2 cup at a time, until smooth and of a good piping consistency. This is enough icing for twelve cupcakes, plus a little left over.
Make Ahead Tip: Freeze unfrosted cupcakes in airtight containers up to 1 month. Store frosting in an airtight container in refrigerator up to 3 days.
Decorating Tips: For the toasted mini-marshmallows I greased a sheet pan and stood up about 50 or so of them and then browned under the broiler for several minutes, keeping a close eye on them so they would not burn. Once cooled I transferred the toasted mini-marshmallows to a small bowl. For the candied walnuts and brittle, I took about 2 tablespoons of butter and melted it with about 2 tablespoons of sugar then added about 1 cup of walnut pieces and cooked them all down on a high heat, stirring constantly until toasted and a praline-like consistency. Then I poured out the walnuts and sauce onto a sheet pan lined with wax paper. Once cool I transferred the candied walnuts and then broke up the praline brittle into small pieces.
Menu Planning and Meal Preparation Tips
- Get all your recipes together and start building your grocery list, some items you may have on hand and some you will not. List all the ingredients, some will be found in several recipes, just keep adding the total amounts you will need. Once you have all the ingredients listed and totaled up the quantities go to your pantry and kitchen and start crossing out the items you already have on hand to cover the meal. The items you did not cross out will make up your grocery list.
- For this meal you can knock out several items in one step by combining steps. For example, you can roast the acorn squash and bake the cupcakes at the same time in the 350° oven. Typically I will start with making the dessert first for any meal. Set your oven temp to pre-heat, then while you have your acorn squash roasting in the oven you can start preparing the cupcake batter recipe, and start baking them in the oven, you will have knocked out the start of two recipes using the oven for both. In fact you can roast the acorn squash and bake the cupcakes several days in advance of the dinner party, this will be a great jump start when the day of the party arrives.
- You can get all your vegetable chopping done ahead of time also, prep for the soup can be done a day or so ahead, just be sure to wrap all the items well and refrigerate. Chopping and storing all the fresh herbs can also be done a day ahead. Having all your items chopped and ready to go when it comes time to put together all the recipes will save you a lot of time when putting it all together.
I hope you have enjoyed this post entry as much as we and our guests enjoyed this meal with the Fall Luxury Dinner Party.
Enjoying a world of cuisine one fork full at a time!
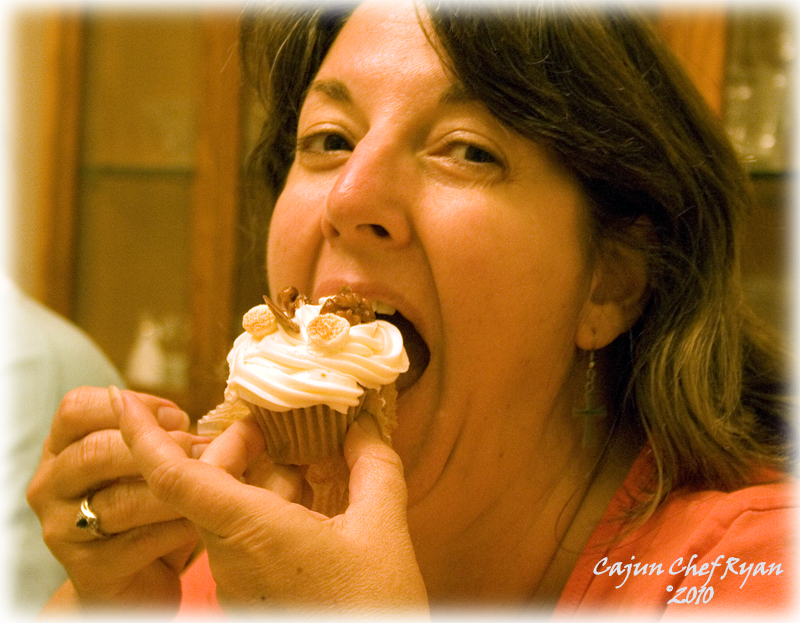
Monique taking her first bite of the Bourbon Sweet Potato Cupcakes
More photos from the evening…
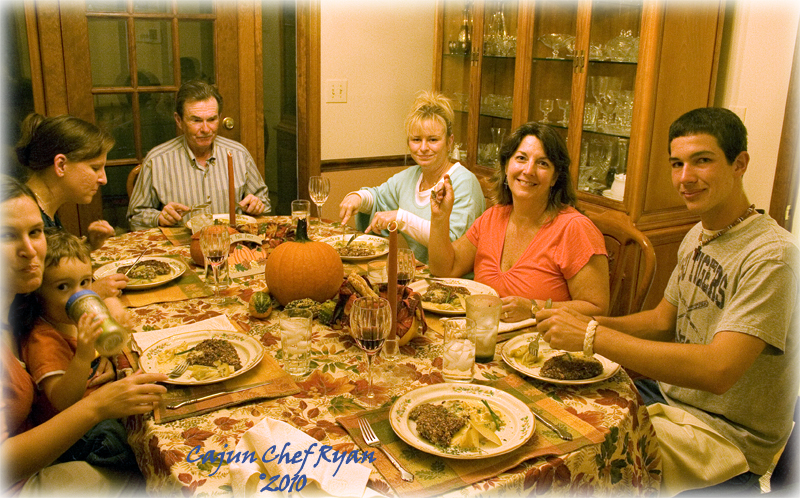
Family and friends enjoying the main dish.

Tony relaxing and looking satisfied after the luxury meal.
Continuing to enjoy a world of cuisine, one fork full at a time!
Bon appétit!
CCR
=:~)
©2010 CCR
Tags: Contests · Recipes
September 30th, 2010 · 26 Comments
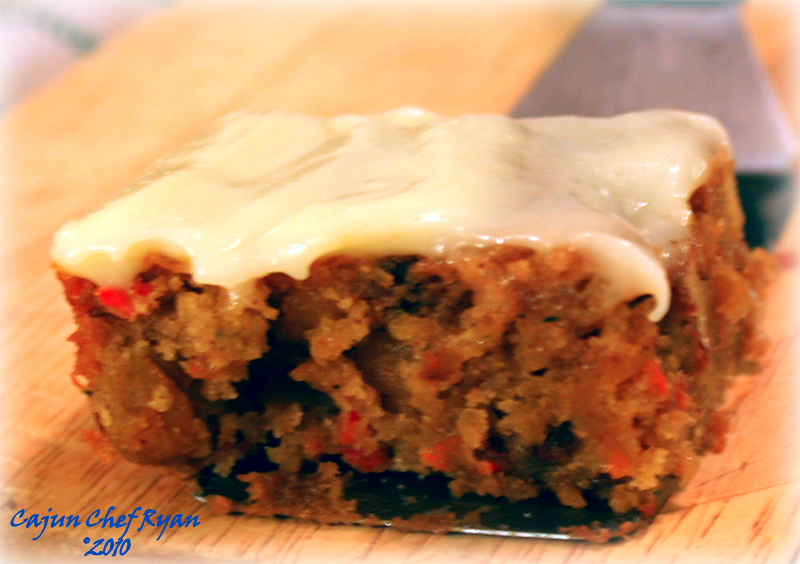
Rum Raisin Carrot and Zucchini Cake
This is another 9×13-inch baking pan recipe, which, in our opinion is one of the most versatile pieces of kitchen equipment in our home next to our slow cooker crock pot.
Therefore, if you love carrot cake, you will love this moist and delicious version with the rum soaked raisins and zucchini.
TIP: The raisins are soaked in dark rum for at least one hour before mixing into the wet and then dry ingredients, however, for better rum flavor soak them overnight, or to speed up the process the raisins and rum can be heated over a low heat for several minutes, then allowed it to cool at room temperature.
| Ingredients |
| ¾ |
Cup |
Raisins |
| ½ |
Cup |
Dark rum |
| 1 ½ |
Cups |
Flour, all-purpose |
| 1 |
Tsp |
Baking powder |
| ½ |
Tsp |
Ginger, ground |
| ¼ |
Tsp |
Baking soda |
| 2 |
Large |
Eggs, beaten |
| 1 ½ |
Cups |
Carrots, grated |
| 1 |
Cup |
Zucchini, grated |
| ¾ |
Cup |
Brown sugar, packed |
| ½ |
Cup |
Walnuts, chopped |
| ½ |
Cup |
Vegetable oil |
| ¼ |
Cup |
Honey |
| 1 |
Tsp |
Vanilla extract |
| 8 |
Ounces |
Cream cheese, softened |
| 1 |
Cup |
Powdered sugar |
| 1 |
Tsp |
Orange or lemon peel (optional) |
| Procedure Steps |
| 1. |
Put the raisins in a small bowl and add the rum, allow them to soak for at least 1 hour or overnight (See tip above). Preheat oven to 350° F when using a metal baking pan, or 325° F if using a stoneware or glass baking dish. |
| 2. |
In a large bowl combine the flour, baking powder, ginger, and baking soda. In a separate bowl combine the beaten eggs, carrots, zucchini, brown sugar, walnuts, oil, honey, vanilla, and the rum soaked raisins. |
| 3. |
Add the wet mixture to the dry mixture and stir until just combined. Spread the wet batter evenly into an ungreased 9×13-inch baking pan or baking dish. |
| 4. |
Bake for 30 minutes, or until a toothpick or cake tester inserted in the center comes out clean. Remove from the oven and cool in the pan on a wire rack. |
| 5. |
While the cake is cooling, combine the softened cream cheese and powdered sugar in a medium bowl and beat with mixer until fluffy and creamy, stir in optional fruit zest. When the cake is room temperature, frost the top then cut into 36 portions. |
Another view…
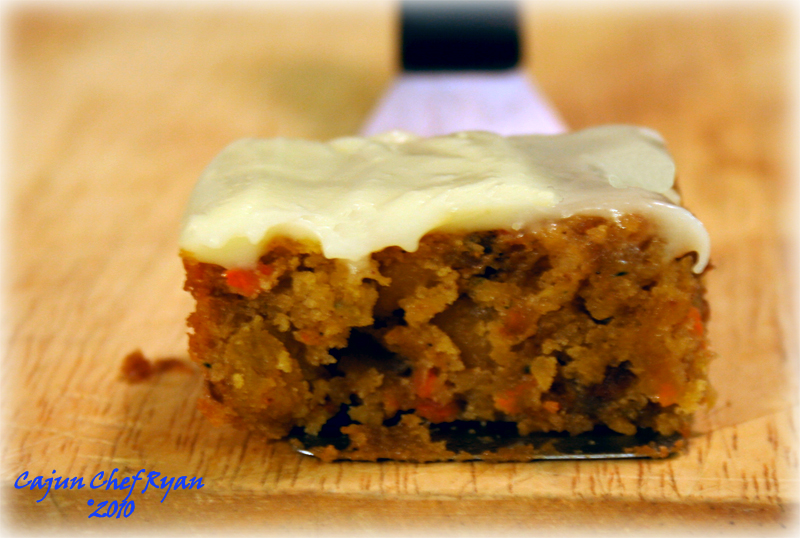
Rum Raisin Carrot and Zucchini Cake…another view!
Bon appetite!
CCR
=:~)
©2010 CCR
Tags: 9x13 pan · Baking · Desserts · Recipes
September 26th, 2010 · 37 Comments
The Classic: Japanese Sushi
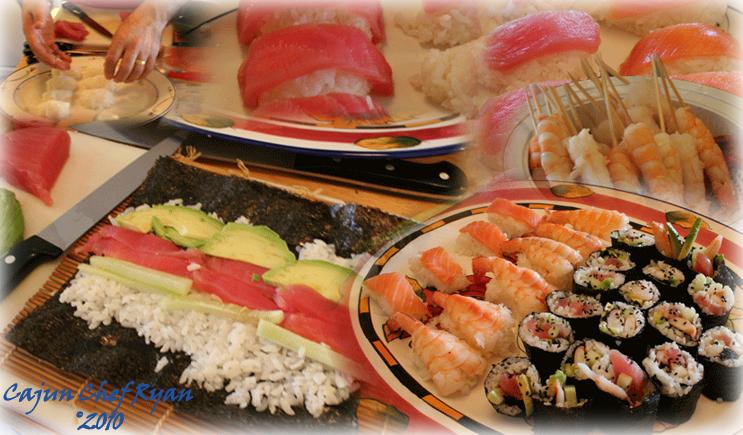
Sushi Montage
The second challenge from the Foodbuzz Project Food Blog contest is to tackle a classic dish from another culture, and for this challenge I have selected to try my hand again at making Japanese Sushi! The Project Food Blog Challenge championed by Foodbuzz is an exciting adventure, and it is great to be a part of this opportunity in the next challenge being among the four-hundred food bloggers that made the cut in the first round.
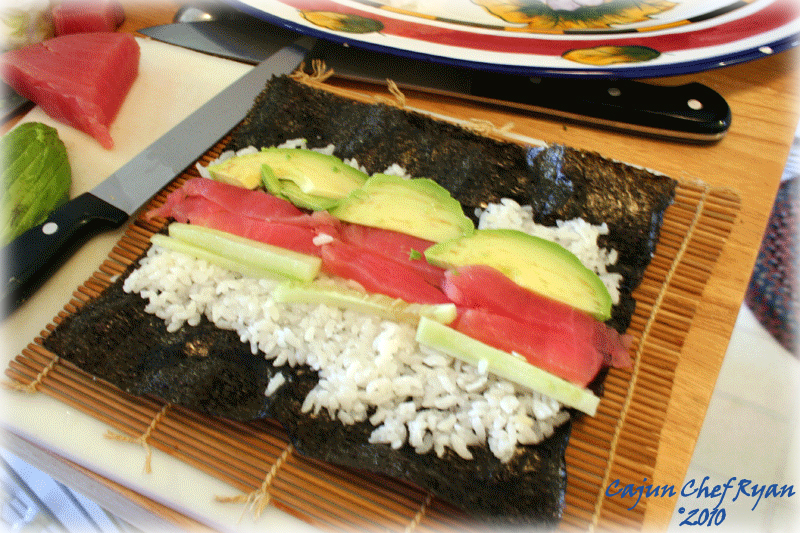
Regular Sushi Roll
Japanese Sushi is one area of cuisine that fascinates and inspires me at the same time, and I will attempt for the first time at making an "inside-out" roll. Japanese Sushi is always fun, and I enjoy exploring, learning new techniques, and perfecting them as I go. The image to the left is a regular sushi roll, not the "inside-out" roll, I will demonstrate them later in this post.
The Foodbuzz Project Food Blog Challenge widget for Cajun Chef Ryan.
Okay, so a Cajun Chef making Japanese sushi, right? Go figure, but it is one of our families favorite meals. At least once a month, give or take a few weeks here or there, we make the trek to our favorite sushi restaurant on Lake Boone Trail in Raleigh, the unbeatable Sushi Thai Restaurant. Their special rolls are to die for, like the Hurricane, Dragon, Spider, Dynamite, Crunchy Shrimp, and the Neptune Roll. They also feature $1.00 sushi special price for dinner every night. But when we can’t make it to Sushi Thai, I like to make my own.
A word of caution here, making sushi is what I would call an advanced preparation method that takes great skill and practice. If you love sushi as much as I do, you too will want to learn how to do it yourself. Practice makes perfect and with practice comes confidence. Some of the sushi making steps were modified when we made ours, but I will present the complete steps as described in the traditional method.
Making Nigiri Sushi
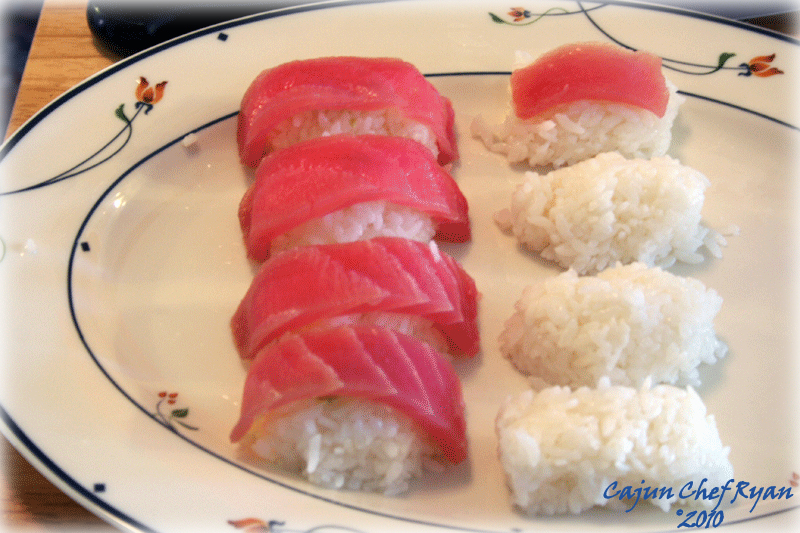
Making Tuna Nigiri Sushi
I’ve made sushi about a half dozen times in my life and it is always a treat to prepare since a challenge is in making the rice, but also in getting the rolls and the sushi just so. Both practice and patience are a plus with putting together both the rolls and the sushi pieces. Just like a roux in Cajun Country you first start with making your sushi rice and this is quite a process to get it prepared. Before you do anything else read the instructions a few times to understand the process, yes, even for me I have to re-read the recipe just about every time I make sushi rice. All of these steps to making sushi have been adapted from the book The Book of Sushi by Kinjiro Omae and Yuzuro Tachibana, which I have owned this copy since 1983.
Sushi Rice (sumeshi)
Making sushi rice is zen for me, as I become one with the rice, as it takes on a personality that transcends any rice I have ever made. The rice starts out in a cool bath of fresh clear water and is rinsed and fondled until the water runs clear, which can be more than a few minutes. As I run my fingers through the rice and the water I reflect on the anticipated treats of fresh tuna, shrimp and avocado awaiting its proper place. Once the rice is washed it is set to rest for 1 hour to drain, then it is sent to the hot water for cooking.
To make a good sushi rice all the steps and ingredients must be followed to near perfect as written.
| Ingredients |
| Rice |
| 1 1/3 |
Cups |
Short-grain rice |
| 4 |
Cups |
Water |
| Vinegar mixture |
| 5 |
Tbsp |
Rice vinegar ( plus 1 tsp) |
| 5 |
Tbsp |
Sugar |
| 4 |
Tsp |
Salt |
| Procedure Steps* |
| 1. |
Wash the rice until the water runs clear then drain in a colander for 1 hour. |
| 2. |
Place the drained rice in a pot with a close fitting lit and add the water. Cover and bring to a boil over medium heat. |
| 3. |
Cover tightly and boil over high heat for 2 minutes. Reduce heat to medium and boil for another 5 minutes. |
| 4. |
Turn heat to low and continue to boil for another 15 minutes, or until all the water has been absorbed. |
| 5. |
Remove from heat then take off the lid and spread a clean kitchen towel over the top of the pot and then replace the lid and let this stand for 10 to 15 minutes. |
| 6. |
While the rice is cooking, combine the vinegar ingredients in a small bowl and heat slowly until the sugar has dissolved. Remove from the heat and cool. |
| 7. |
Empty the rice into a nonmetallic tub or bowl, in Japan they use a hangiri1, and spread the rice evenly over the bottom with a large wooden spoon or spatula, in Japan a shamoji is used. Run the spatula through the rice in a right-and-left slicing motion to separate the grains of rice. While doing this, slowly add the vinegar mixture. You may not need all of the vinegar mixture as adding too much will make it mushy. |
| 8. |
Continue with the slicing motions with the spatula as you add the vinegar. Also have a helper to fan the rice to aid in the cooling process. |
| 9. |
The fanning and mixing take about 10 minutes, or until the rice reaches room temperature. Do not refrigerate the rice, but keep it in the tub and covered with a clean cloth until ready to use. Sushi rice will last only one day and does not lend well to leftovers. |
*Or, follow the package directions for your brand of sushi short-grain rice.
Nigiri-zushi (握り寿司, lit. hand-formed sushi). Consists of an oblong mound of sushi rice that is pressed between the palms of the hands, sometimes with a speck of wasabi, and a slice of fish called neta draped over it. Certain fish are typically bound to the rice with a thin strip of nori, most commonly tako (octopus), unagi (freshwater eel), anago (sea eel), ika (squid), and tamago (sweet egg). Nigiri is generally served in pairs.2
Putting It All Together
To Slice Sushi Topping
Cutting fresh fish into uniform size and thickness appropriate for nigiri-zushi topping takes some skill, which can be acquired with some practice. We bought an 8-ounce piece of sashimi grade tuna, or maguro for our fish topping ingredient. Here are the steps to preparing your fish topping:
| 1. |
For measuring large pieces of tuna lay one hand on the block of tuna. The width of 4 fingers is just about right. Cut this amount off of block. |
| 2. |
Turn the cut-off block 90°. |
| 3. |
The next two steps are the correct way for cutting the fish, and is the traditional method. If you find this part too hard then just skip to step 5 of the cutting method. Measure about 5/8 of an inch from the left side. Using a sharp knife slice diagonally downward to the bottom corner to make a piece of flesh triangular in cross section. |
| 4. |
To cut this triangular piece, lay it down with the side that was cut on the bottom. Placing the knife blade at the middle of the right side of the triangle, cut amount two thirds of the way through the piece, then use the knife to unfold the piece. It is placed on the rice bottom side down to become the topping |
| 5. |
Continuing with the rest of the tuna we simply just cut our pieces about ¼ of an inch thick by slicing across the top and down through the bottom. If you are following steps 3 and 4 then the last piece on the right side will also be triangular in shape, and should be cut in similar fashion as the first triangular shaped piece. Now there should be a number of pieces of tuna for sushi toppings. |
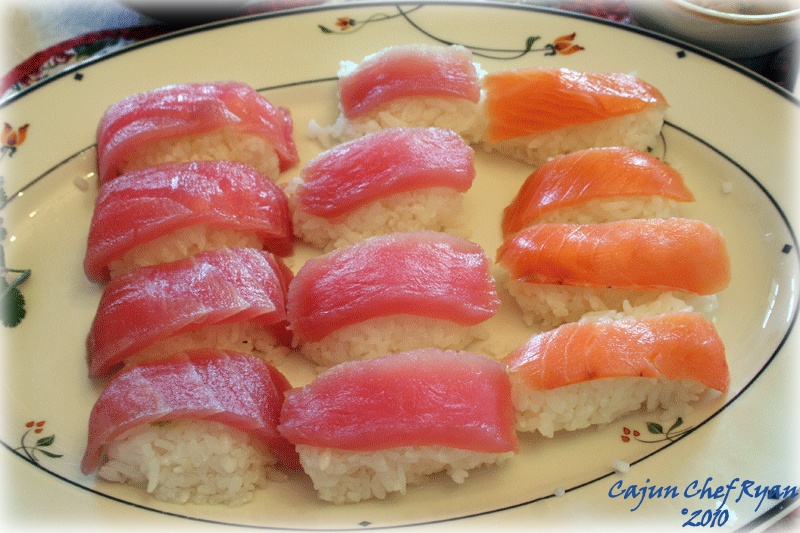
Tuna and Salmon Nigiri Sushi
To Make Nigiri-zushi
The key factor to making really good sushi is a balance between the topping and the rice. The hand-formed rice is gently squeezed together, as the word Nigiri means “squeezing”. For one finger of sushi the topping weights no more than a ½ ounce and the rice weights no more than and ounce.
Before beginning the actual process have all your tools and ingredients ready, such as a sharp knife, a clean, damp kitchen towel, a small bowl of wasabi horseradish, and a bowl of water with a bit of vinegar in it in which to rinse your fingers. The preferred method is to slice the fish fillets as you go which is typical of most sushi shops, but in our case our tuna was already sliced.
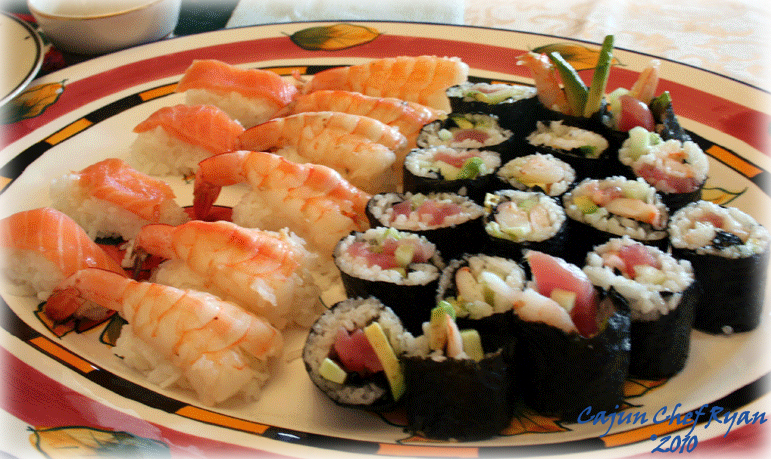
Salmon and Shrimp Nigiri Sushi with rolls
The traditional method of setting up sushi is listed below, which after reading many times I may try this technique the next time. But what I did was take a little bit of rice and shaped into a small elongated block, then placed a tiny pit of wasabi on that and added the topping tuna or shrimp. And continued with this until all the toppings were set up. Some of them I left out the wasabi for variety. Now the 11 step traditional method below seems like a lot of work, but the technique most likely only takes 20 to 30 seconds to complete.
| Traditional method |
| 1. |
First pick up the topping (fish or shrimp) between the left thumb and index and middle fingers of your left hand. Lay it along the base of the fingers of the left hand (not on the palm). |
| 2. |
With your right hand, take the appropriate amount of rice from the container at your right side, hold it lightly and round it by tapping it gently and quickly two or three times on the inside of the container. The rice should be about the size and shape of a Ping-pong ball. |
| 3. |
Holding the rice in your right palm use the tip of your right index finger to place a dab of wasabi in the center of the topping. |
| 4. |
Put the rice on top of this. |
| 5. |
Lightly press the top of the rice with your left thumb, leaving a small depression on the upper surface. Keep the fingers of the left hand, and the topping flat. |
| 6. |
Press the upper end of the rice with your left thumb while simultaneously pressing the bottom end with your right thumb. |
| 7. |
With your right index and middle fingers, press the top of the rice making the depression in the top more shallow. |
| 8. |
Gently push the left upper corner of the sushi forward with your left thumb to turn the piece over, Slide the piece back to the base of the fingers. |
| 9. |
Press the sides of the rice with your right thumb and middle finger. Then press the upper end with your left thumb and the lower end with your right thumb and the topping with your right index finger and middle fingers. |
| 10. |
Taking the sushi between your right thumb, middle and index fingers, turn the piece of sushi around to the right. |
| 11. |
Press the top end with your left thumb and the bottom with your right thumb and the topping with your right index and middle fingers. After the topping is right side up place it on your serving dish. |
Though the explanation sounds complicated in writing, once your go through the steps several times your will get used to them in practice.
To Prepare Sushi Shrimp Topping
Sushi-topping shrimp must be nicely colored, well shaped and opened flat to embrace the finger of sushi rice. Prepare them as follows and then refrigerate until needed. In our case we accidentally shelled the shrimp before we cooked it, and it still came out ok for us.
Take note: diverting from tradition in this procedure by removing the shells prior to inserting the bamboo skewers, I found it easier to work with and the end results were acceptable for this application.
| 1. |

Shrimp with skewers
Before boiling insert a bamboo skewer under the shell on the leg side of each shrimp to keep it from curling. The skewer should not pierce the flesh. |
| 2. |
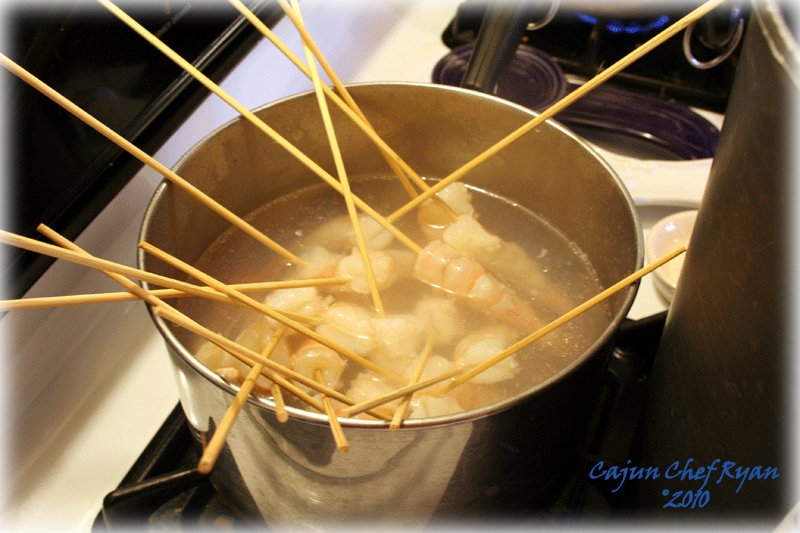
Shrimp in boiling water
Boil the shrimp in lightly salted water just until the shrimp turns pink. Remove from the water, drain and cool, then remove the skewers. |
| 3. |
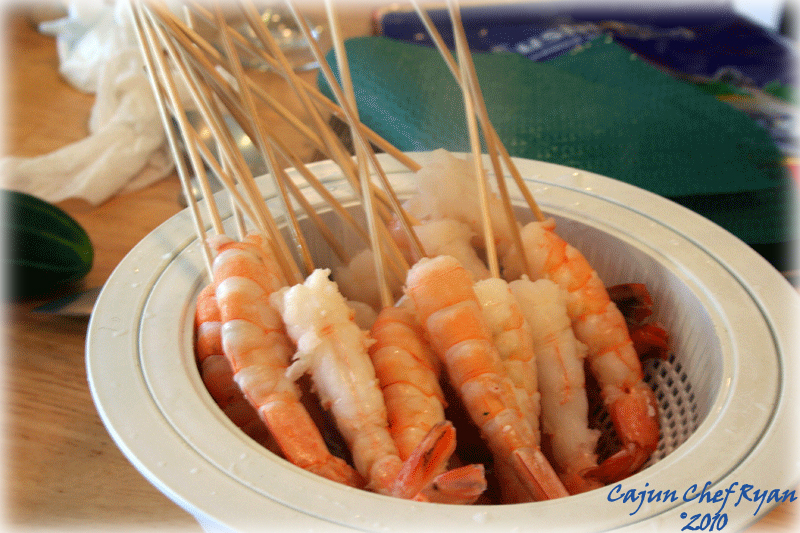
Cooling Sushi Shrimp
Remove the shell but leave the tail attached. |
| 4. |
Carefully make an incision along the leg side of the shrimp, cutting about two-thirds of the way thorough the shrimp, and only enough so that the shrimp can be opened and flattened. Do not cut all the way thorough the flesh. |
| 5. |
De-vein the shrimp. |
| 6. |
Lightly press the shrimp flat and keep refrigerated until ready to prepare for sushi topping. |
NOTE:Images of the Inside-Out Maki will be forthcoming.
How To Roll Inside-Out Maki
Uramaki is the Japanese word for inside-out rolls. They are a little more difficult to make than maki rolls are. These are very similar to maki rolls, only with the rice on the outside instead of inside the nori. This is my first attempt at making the Uramaki inside-out rolls.
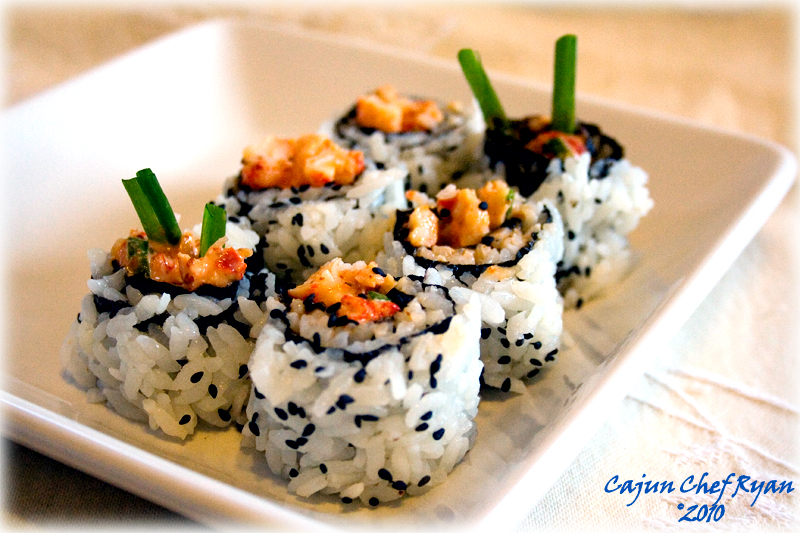
Cajun Crawfish Inside-Out Roll
This is my first experience with making the inside-out rolls, so what I am going to make is two versions of the inside-out rolls, one will be a Cajun Crawfish Roll, and the other a Smoked Salmon Avocado Roll.
Cajun Crawfish Roll
For the Cajun Crawfish Roll filling, combine the following:
- 1 pound Crawfish tails
- 1/3 cup Green onions, chopped
- 2 Tbsp Creole mustard
- 1/4 cup Mayonnaise
- 1 Tsp Cajun Spice Blend
- 1 Tsp Prepared Horseradish
- 1 Tbsp Asian Chili Garlic sauce
Combine all the ingredients in a medium bowl and reserve for filling the sushi rolls.
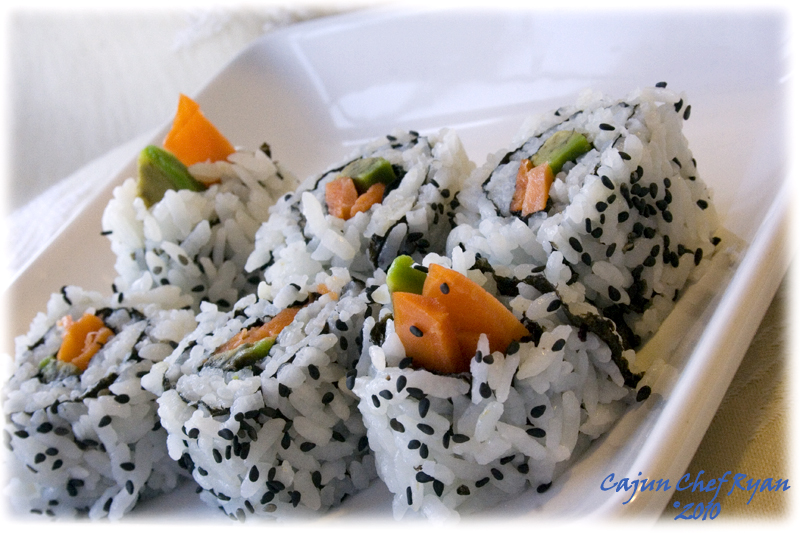
Smoked Salmon Avocado Inside-Out Roll
Smoked Salmon Avocado Roll
For the Smoked Salmon Avocado Roll filling, have the following prepared and ready:
- 4 ounces Smoked Salmon, thinly sliced and julienne
- 1 medium Avocado, peeled and sliced into thin strips
Preparing the Rolling Mat
-
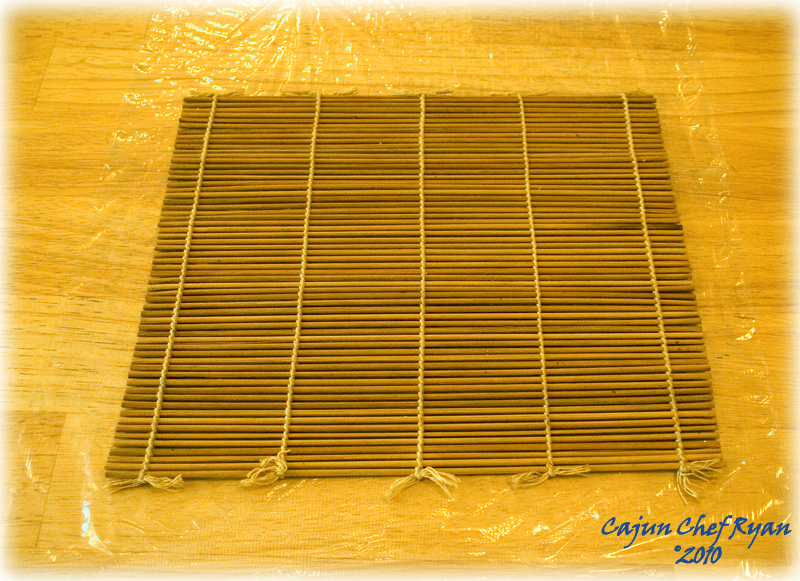
Bamboo mat on plastic wrap
Lay out a piece of plastic wrap twice the length of the bamboo mat. The plastic wrap should be oriented so that the short side is near you. Lay the bamboo mat on the center of the plastic wrap, orienting the little bamboo sticks that make up the mat are parallel to the short end of the plastic wrap.
-
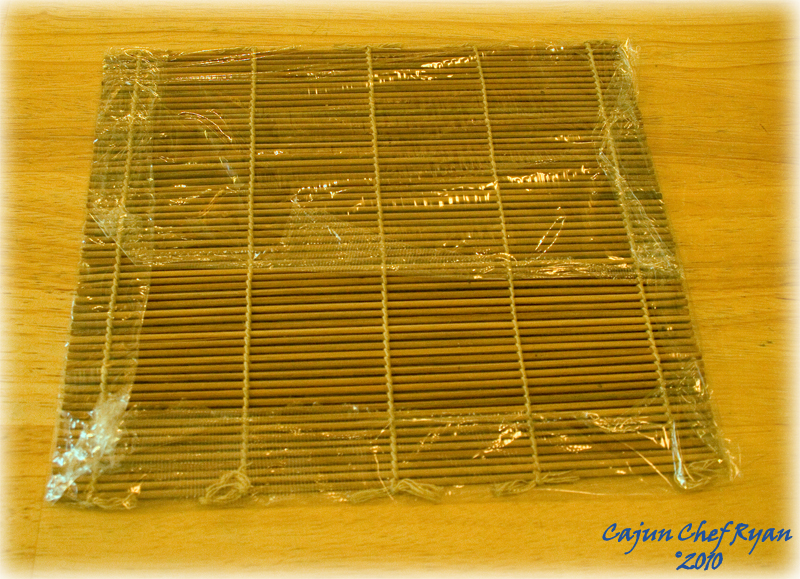
Folded plastic wrap over bamboo mat
Fold the bottom end of the plastic wrap over the bamboo mat.
- Fold the top end of the plastic wrap over the bamboo mat, pressing to make sure it sticks to the part that has already been folded over.
- Fold the corners in little triangles, so they don’t stick out.
-
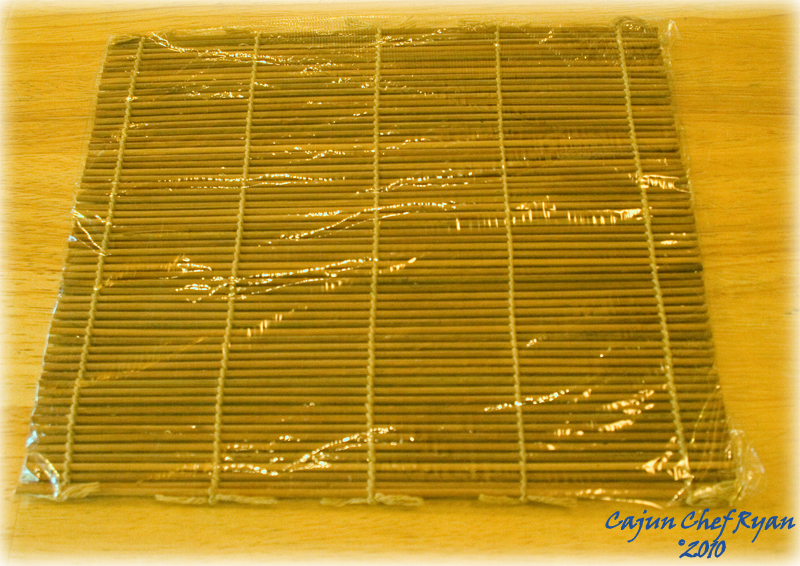
Turn over so the folded parts are down
Fold the two sides in, making sure they stick to the plastic wrap that has already been folded in.
- Turn over so the folded parts are down, and start rolling your sushi!
Rolling the Maki
-
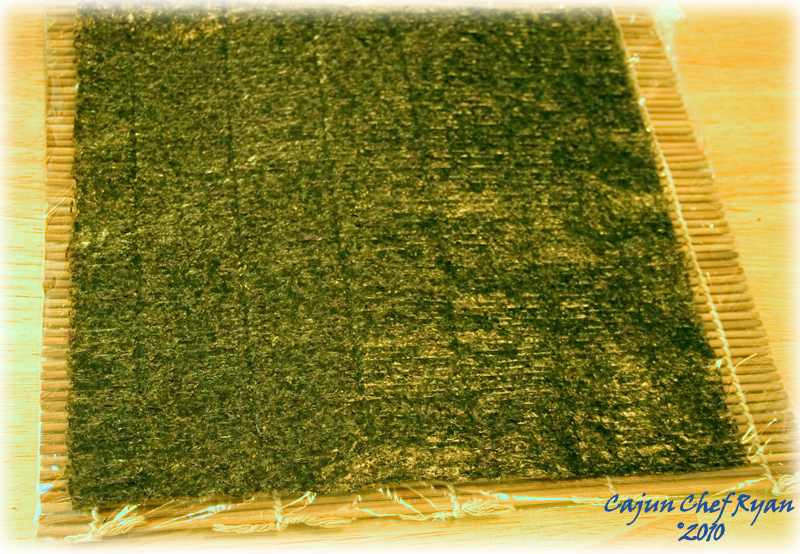
Nori sheet on plastic covered bamboo mat
With the rolling mat prepared with plastic wrap, lay a piece of nori on the plastic side of the rolling mat, shiny side down.
- Place about 3/4 cup of prepared sushi rice (sumeshi) on the nori.
-
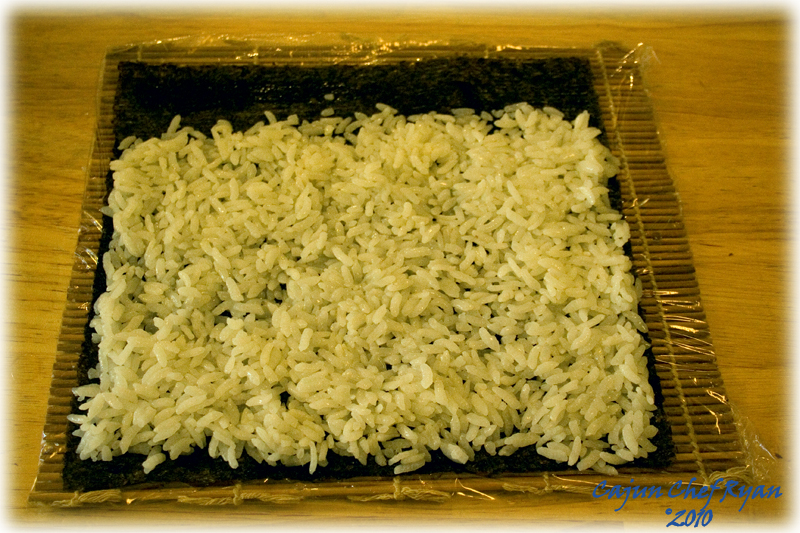
3/4 cup of prepared sushi rice (sumeshi) on the nori
Wet your hands with water so the rice won’t stick to your hands. I find it’s useful to have a small bowl of vinegar water sitting next to my work area so I don’t have to keep running between the sink and my work area to keep my hands wet. Spread the rice over the nori with your water rinsed hands, covering the entire sheet of nori.
-
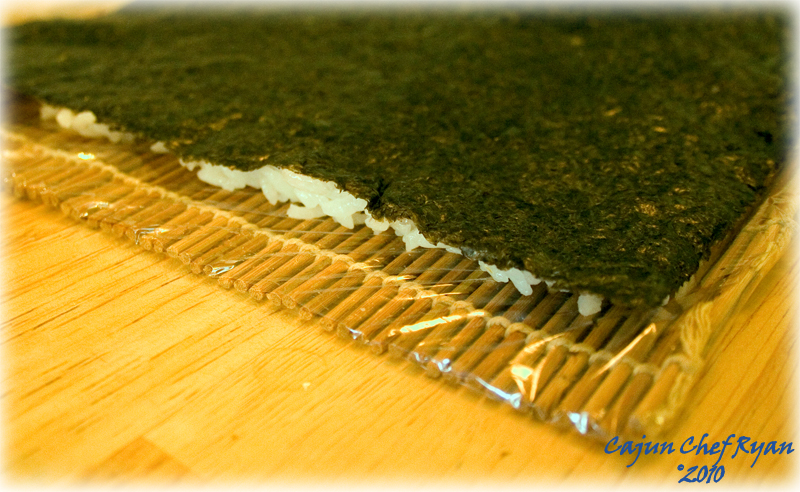
Turn over the nori with the rice down
Turn the nori over, so the rice side is facing the rolling mat (this is why we cover the rolling mat with plastic wrap )
-
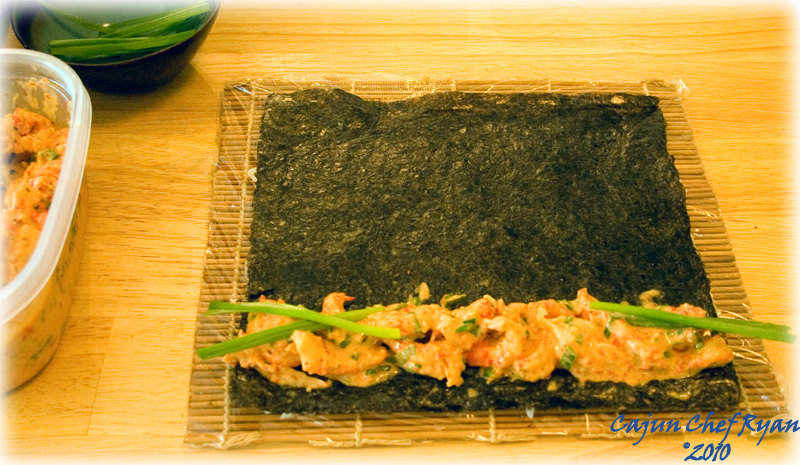
Place your desired fillings along the bottom edge of the nori.
Place your desired fillings along the bottom edge of the nori. In the case of the Cajun Crawfish Roll, place about 1/3 cup of the crawfish filling along the bottom edge of the nori sheet. In the case of the Smoked Salmon Avocado Roll, place strips of sliced salmon and avocado strips on the bottom edge of the nori sheet.
- Using the rolling mat, begin to tightly roll the sushi. Start at the side nearest to you, and roll away from you. Try to roll it without letting the rice stick to the rolling mat. If the rice sticks, try cooling the rice a little more before you make the next roll.
- When the sushi is completely rolled, use the rolling mat to squeeze the sushi so it does not unroll when you are trying to cut it.
- If you are putting some sort of fish or vegetables on top of the roll, lay thin strips overlapping on top of the roll.
- Squeeze the roll again with the rolling mat to press the toppings onto the sushi roll. This will help ensure that the toppings don’t fall off when you cut or eat the sushi.
- If, instead, the recipe asks you to roll the sushi in something such as masago or sesame seeds, you can either put the topping on a plate and roll the entire roll in it, or spoon the topping over the roll and press it into the roll so it does’t fall off.
- Using a very sharp knife, cut the sushi into six or eight pieces, depending on how thick you like your sushi. It helps to have your knife freshly sharpened; otherwise it’s pretty easy to squish your sushi when you are cutting it. This can cause the sushi to fall apart . Also, it helps to wet your knife before cutting the sushi, so the rice and fillings won’t stick to it.
|
1Hangiri ~ In Japanese cuisine it is a round, flat-bottom wooden bowl or tub used in the final steps of preparing rice for sushi.
|
|
2Nigirizushi (http://en.wikipedia.org/wiki/Sushi#Nigirizushi)
|
|
|
Continuing to enjoy a world of cuisine, one chopstick bite at a time!
|
Bon appetite!
CCR
=:~)
©2010 CCR
Tags: Contests · Recipes
September 24th, 2010 · 15 Comments
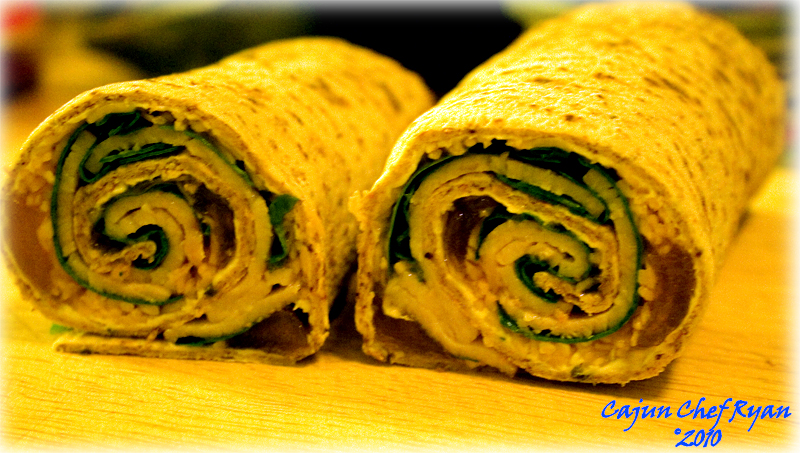
Peachy Turkey Wrap
With our focus on healthy meals for young children and teenagers we have come up with some exciting and new school lunch food ideas for Ben. We want to share one of them with you in this easily prepared wrap.
Years ago and before we knew any better, Ben would take a Lunchable to school for his lunch time meal, turns out they have scores of preservatives, and multi-syllable words that go beyond normal food ingredients. And these ready made “lunches” are not cheap; some can run over $3.00 each, which adds up to over $15.00 a week in lunch time meals for each child. Currently the school lunch program in Wake County costs $2.00 per meal, but the selections are not that great either.
So we decided to make some better lunch meal alternatives for Ben’s school meal break. Recently we have been making some quick to fix sandwiches, and this wrap is another wonderfully tasty lunch that anyone would enjoy at school, or home for that matter. It only takes about 5 minutes to prepare this wrap, between getting up in the morning and breakfast, and then it is placed with a frozen ice pack in the insulated carrier along with a drink and a side item, such as either crackers or cookies.
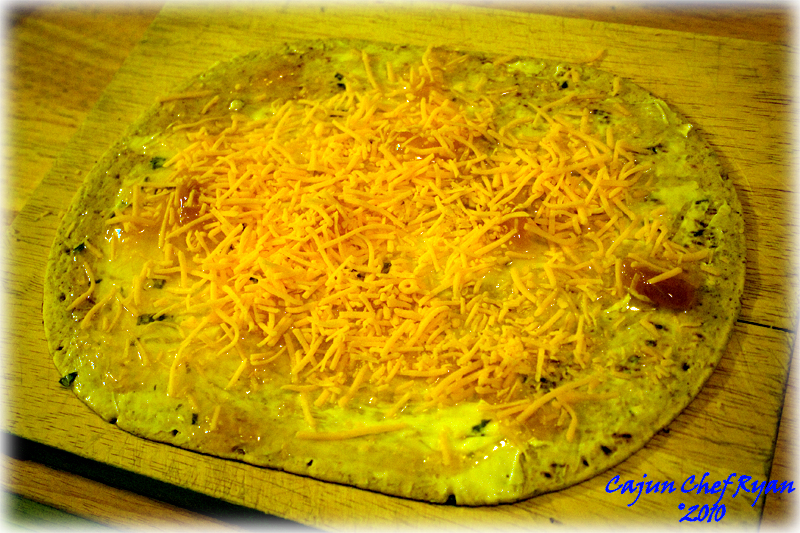
Layering cheese ingredients to the tortilla wrap
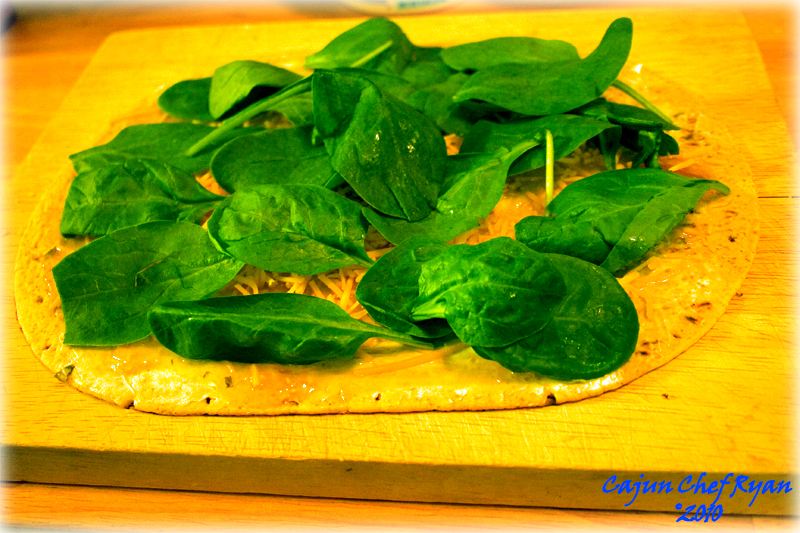
Adding the spinach layer over the cheese layers in the wrap
| Ingredients |
| 1 |
7- to 8-inch |
Whole wheat wrap or tortilla |
| 1 |
Tbsp |
Onion and chive cream cheese, softened |
| 1 |
Tbsp |
Peach preserves |
| ¼ |
Cup |
Cheddar cheese, shredded |
| 20 |
Leaves |
Baby spinach |
| 1 |
Ounce |
Smoked turkey breast, thinly sliced |
| Procedure Steps |
| 1. |
Spread tortilla evenly with the cream cheese, and then cover with an even layer of the peach preserves. Sprinkle the shredded cheddar cheese evenly over the preserves. |
| 2. |
Arrange the baby spinach leaves evenly over the top of the heese, then add the turkey in one even layer. |
| 3. |
Tightly roll the tortilla, leaving the seam side down. Cut in half using a serrated edge knife. |
Options and Variations
Southwest Turkey Wrap – Substitute salsa in place of the peach preserves, use shredded pepper jack cheese in place of the cheddar, and use ½ cup of shredded romaine lettuce in place of the spinach leaves.
Spicy Cajun Ham Wrap – Sprinkle about ½ teaspoon of Cajun Spice blend over the cream cheese, then substitute hot pepper jelly in place of the peach preserves, use ½ cup of thinly shredded cabbage in place of the spinach, and then use thinly sliced ham in place of the turkey. NOTE to parents: Some young children may not be able to handle the spiciness of this wrap.
Make your own wrap variation and let me know what you came up with!
Another view…
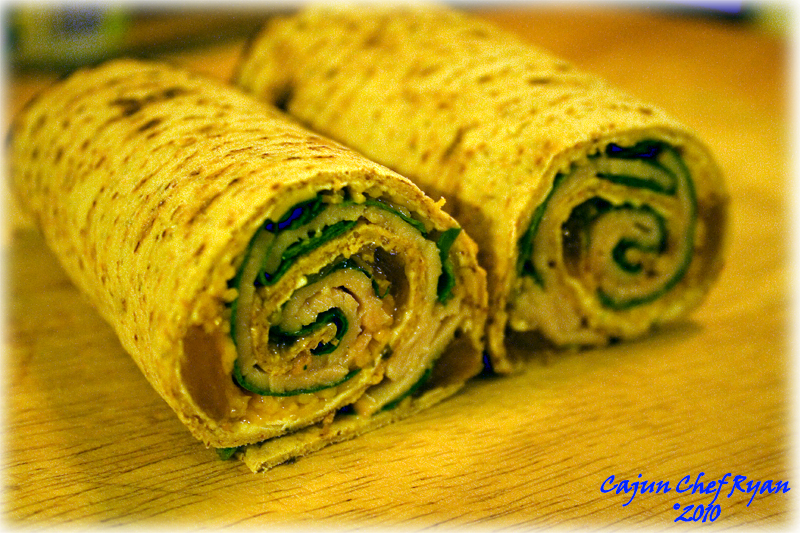
Peachy Turkey Wrap…another view!
Bon appetit!
CCR
=:~)
©2010 CCR
Tags: Children · Recipes · sandwich