Announcing!
Cajun Chef Ryan has been selected to participate in the “One-Pot Blogger Cooking Party“ to celebrate the release of Emeril Lagasse’s upcoming book Sizzling Skillets and Other One-Pot Wonders. The party begins Sunday, September 11th and will run for 3 weeks.
What’s happening next? Glad you asked!!
What does our participation in the promotion for Emeril’s new book, Sizzling Skillets and Other One-Pot Wonders mean for us?
Over the next three weeks (starting September 11, 2011) we will present three posts a week featuring recipes from the cookbook. The recipes will be selected and come from a pre-approved list of recipes from the book. In addition, along with our experiences cooking other recipes from the book, however, we cannot share the un-published recipes at this time.
The participating bloggers will get additional promotion of blog posts by Harper Collins Publishing and other participating bloggers. We will also receive or be eligible to receive the following:
A pre-publication copy of Sizzling Skillets and Other One-Pot Wonders to cook from for the three-week-long program
A jar of Emeril’s Original Essence spice mix to use while preparing recipes from the cookbook.
A set of Emeril – by zak! Table Art 7-piece Flame-Shaped Serving Bowls, for beautiful presentation of the one-pot wonders we will prepare.
The top performing blogger, as selected by T-Fal, will be awarded an Emeril by T-Fal Slow Cooker once the three-week blogging project is over.
And a $50 reimbursement for groceries used to prepare the recipes, and a complete library of Emeril Cookbooks.
What is in it for you?
One additional copy of Sizzling Skillets and Other One-Pot Wonders will be given away through the blog, Twitter feed, or Facebook profile.
One set of Emeril — by zak! Table Art 7-piece Flame-Shaped Serving Bowls will be given away through the blog, Twitter feed, or Facebook profile.

Sizzling Skillets Book Cover
Bon appétit!
CCR
=:~)
Tags: Commentary

Kosher Dill Pickles
As the garden bounty continues in full swing, the kitchen has seen a lot of action with canning, putting up, preserving, and saving our harvest for the coming months. Many days from now, as these jars open up in the deep of winter; they will be a reminder of summer days and wishes for warmer weather which will be floating in our dreams. How can I say that when we have been breaking high temperature records in thousands of cities across America? Because come January and February when snow is blanketing thirty percent of the northeast, we will be cracking open a jar of pickled kosher dills and thinking of our prolific cucumber vines from June, July and August.
The Garden of Cucumbers
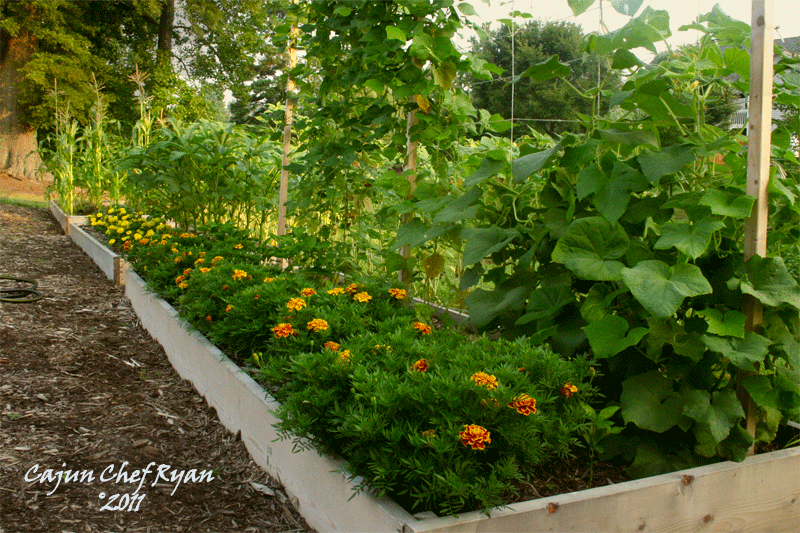
Cucumber Trellis
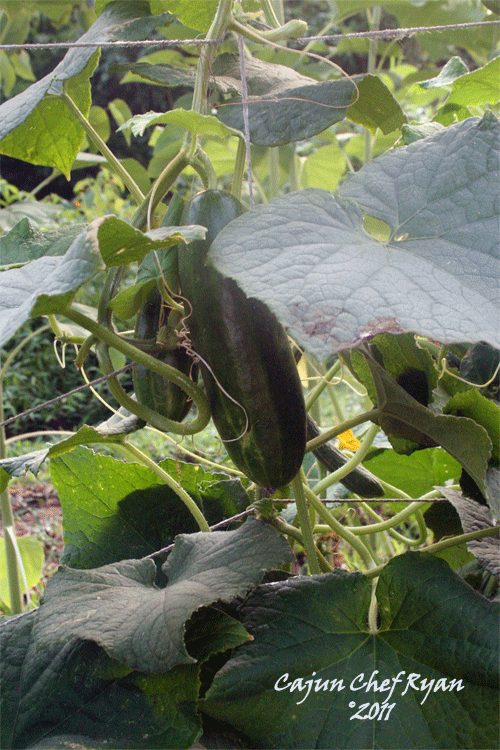
Cucumber on the vine
This recipe is adapted from the Ball Blue Book guide to preserving, 100th Anniversary Edition, 1909-2009 as found on page 50.
This recipe makes about 7 pint jars or 3 quart jars of kosher dill pickles.
Step by step with accompanying photos.
Cut the cucumbers to size fitting the jars and appropriate head space. I used a straw and cut it to fit the correct ¼-inch headspace to fit the jars.
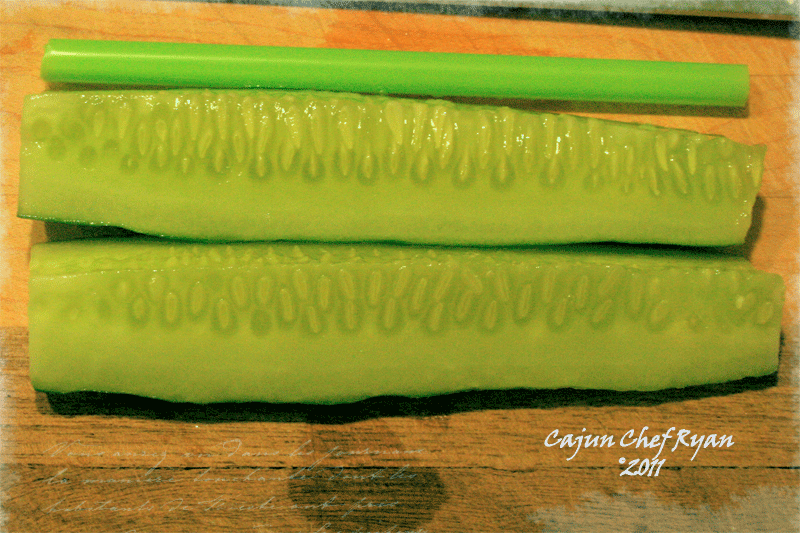
Cucumber sliced into spears
Using the aid of the Ball headspace tool to ensure cucumber spears fit jar.
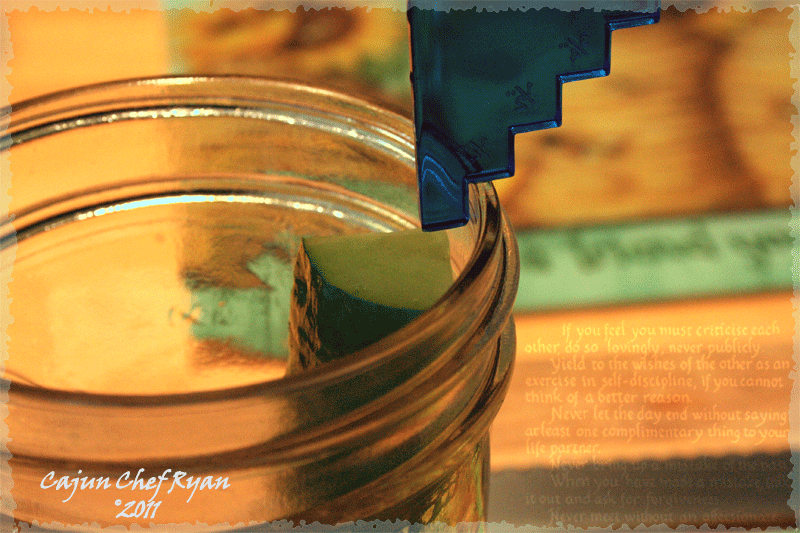
Using a the Ball headspace tool to measure cucumber spears
Wash cucumbers and drain well.

Cucumbers in stainless steel bowl getting a nice cool bath.
Combine the sugar, salt, vinegar and water in a large sauce pot, stir to dissolve the sugar and salt. Add the pickling spices which have been placed into a cheesecloth bag or tea strainer.
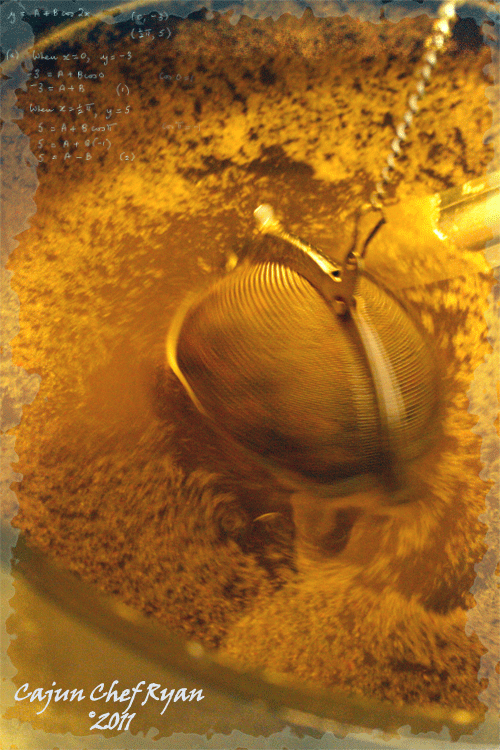
Pickling spice brine
Pickling Spices.

Pickling Spices (Make your own pickling spices, recipe to come)
Pickling Station
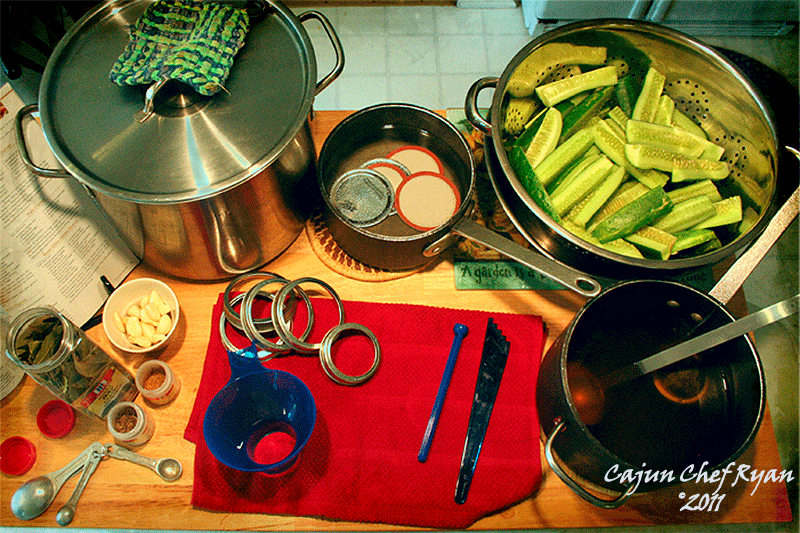
Pickling Station
Pack cucumbers into jars. Ladle hot brine / pickling liquid into jars to within ¼ inch headspace.
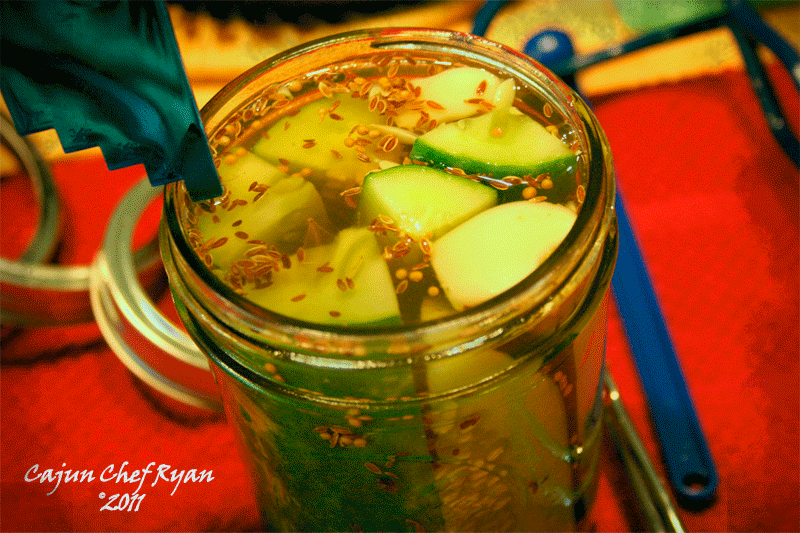
Pack cucumbers into jars
Adjust two-piece lids and bands.
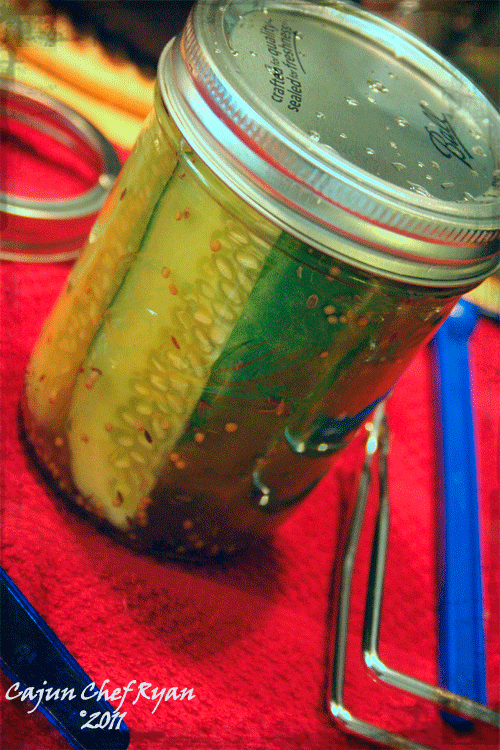
Packed jars are now ready for the canner to be processed
Process jars in water bath for 15 minutes.
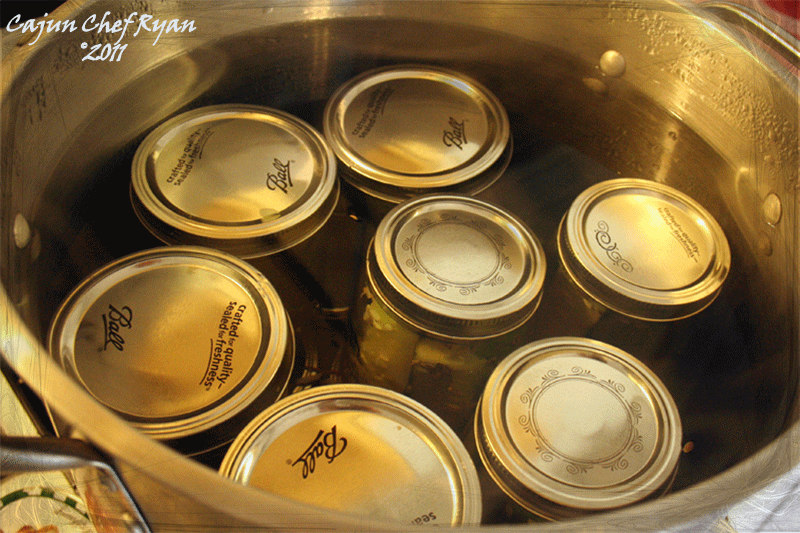
Process jars in water bath for 15 minutes
Allow jars to cool 24 hours then label.
Kosher Dill Pickles
The recipe…
| Ingredients |
| 6 – 8 |
Lbs |
Cucumbers, cut to fit jars and into spears |
| ¾ |
Cup |
Sugar |
| ½ |
Cup |
Pickling or canning salt |
| 1 |
Qt |
White vinegar |
| 1 |
Qt |
Water, filtered |
| 3 |
Tbsp |
Pickling spices |
| 14 |
Cloves |
Garlic |
| 7 |
Each |
Bay leaves |
| 3 ½ |
Tsp |
Dill seed, divided |
| 3 ½ |
Tsp |
Mustard seed, divided |
| Procedure Steps: |
| 1. |
Wash the cucumber spears and then drain well. |
| 2. |
Combine the sugar, salt, vinegar and water in a large sauce pot, stir to dissolve the sugar and salt. Add the pickling spices which have been placed into a cheesecloth bag or tea strainer. Bring to a boil, and then reduce heat to a simmer for 15 minutes. |
| 3. |
Pack cucumbers into cleaned and prepared hot jars. Ladle the hot brine / pickling liquid into jars and over cucumbers, leaving a 1/4 inch head space. Add 1/2 tsp each of the dill seed and mustard seed, 2 cloves garlic, and 1 bay leaf into each jar. Remove any air bubbles, and then adjust liquid again to 1/4 inch head space. |
| 4. |
Adjust the two-piece lids and screw bands finger tight onto jars. |
| 5. |
Bring water processing pot to a boil with jars, and process pints and quarts for 15 minutes. Turn off heat and remove lid and allow jars to rest in hot water for 5 more minutes. Then remove jars from hot water bath and allow to cool on a kitchen towel, evenly spaced with room to cool for 24 hours. Check bands and lids for proper seal, if not sealed properly, process again. Label and date, then store pickles for two weeks before opening and for up to one year. Once jars are opened, refrigerate for up to two weeks. |
Bon appétit!
CCR
=:~)
©2011 CCR
Tags: Canning · Preserving · Recipes
It’s early morning and Monique is tending to the garden, picking fruits of our labor, and finding it difficult to make room in the baskets for the bounty of fresh ingredients which bless us this time of year. Strolling down the mulch path and toward the front garden, she checks into the eggplant vegetation which has been chugging along in the raised bed, and now is showing signs of profit. She found and picked two large perfect eggplants, our first in what should be several months of fruiting still ahead.
As Monique and her pickings arrived in our kitchen my first thoughts were “I know what I am going to do with this wonderful eggplant!” The garden has provided for so much treasure this spring and summer season, we are already setting our sights on our fall crops to be planted soon.
I posted another version of this recipe last year during the Lenten season because it is a no meat dish. Today’s version is a low fat but high in flavor recipe, we’ve eliminated most of the olive oil and instead of pan sautéing the breaded eggplant we are broiling them until golden brown. Resulting in a just as tasty yet healthier version of the classic preparation! If you want to take away even more calories from this dish you can use egg substitute for whole eggs, and also replace the whole mozzarella with part-skim options.
The eggplant patch, a few angles from the garden!
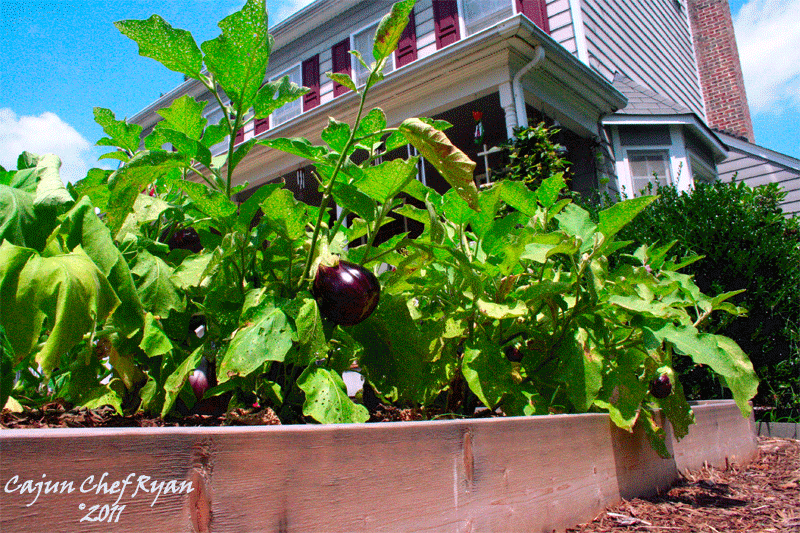
Eggplant Patch

Eggplant On The Vine
Taking a peek under the plant.
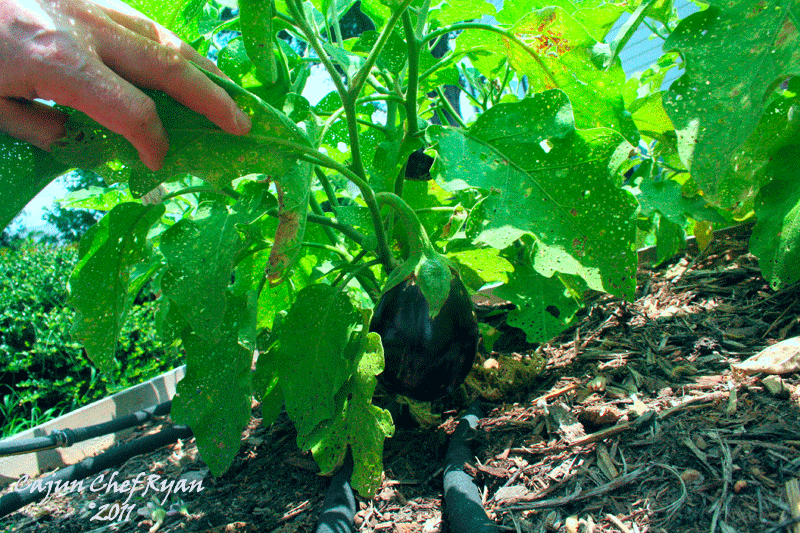
Taking a peek under the plant
The recipe…
| Ingredients |
| 3 |
Lg |
Eggs, beaten |
| 1 |
Cup |
Milk |
| 1 ½ |
Cups |
Breadcrumbs |
| 1 ½ |
Cups |
Cracker crumbs |
| 2 |
Tbsp |
Italian seasoning |
| 1 |
Tbsp |
Cajun spice blend |
| 2 |
large |
Eggplant, cut into ¼-inch slices |
| 4 |
Cups |
Fire roasted tomato sauce, divided |
| 2 |
Cups |
Mozzarella cheese, shredded, divided |
| 1 |
Cup |
Parmesan cheese, divided |
| |
|
Olive Oil Cooking spray |
| Procedure Steps |
| 1. |
Preheat the oven to 400° F. Coat a 9×13 pan with cooking spray. Coat 2 sheet pans with the cooking spray. |
| 2. |
Arrange the sliced eggplant into a single layer on the prepared sheet pans and bake in the oven for 15 minutes, or until the eggplant slices are soft. |
| 3. |
In the meantime, combine the beaten eggs and milk in a medium bowl to create an egg wash. In another medium bowl combine the breadcrumbs and cracker crumbs with the Italian seasoning and Cajun spice blend. |
| 4. |
Using two pair of tongs (one for the egg wash and one for the breadcrumbs) dip the eggplant slices one at time into the egg wash and then into the breadcrumb mixture to evenly coat on all sides. Return each breaded eggplant slice to the sheet pans. Once a sheet pan is full then lightly coat each breaded slice with olive oil spray. |
| 5. |
Preheat the broiler and broil the breaded eggplant slices 4 inches from the flame for 3 to 5 minutes or until golden brown. Be sure to check every minute or so and turn the pan if necessary to evenly brown the slices and not to burn others. |
| 6. |
Preheat oven to 350°F. |
| 7. |
Using a spoon and spread 1 cup of the tomato sauce on the bottom of the 9×13 pan. Top the sauce with half of the breaded and broiled eggplant slices into one layer. Sprinkle evenly with 1 cup of the mozzarella cheese and ½ cup of the Parmesan cheese. Spoon and spread 1 ½ cups of the tomato sauce. Top with the remaining eggplant slices in one even layer. Spoon and spread the remaining tomato sauce and then sprinkle with the remaining mozzarella and Parmesan cheese. |
| 8. |
Bake in the oven uncovered for 30 minutes, or until cheese is melted and the sides are bubbling. Remove from the oven and allow to cool for 10 minutes before cutting into eight even portions. |
Dinner is served!
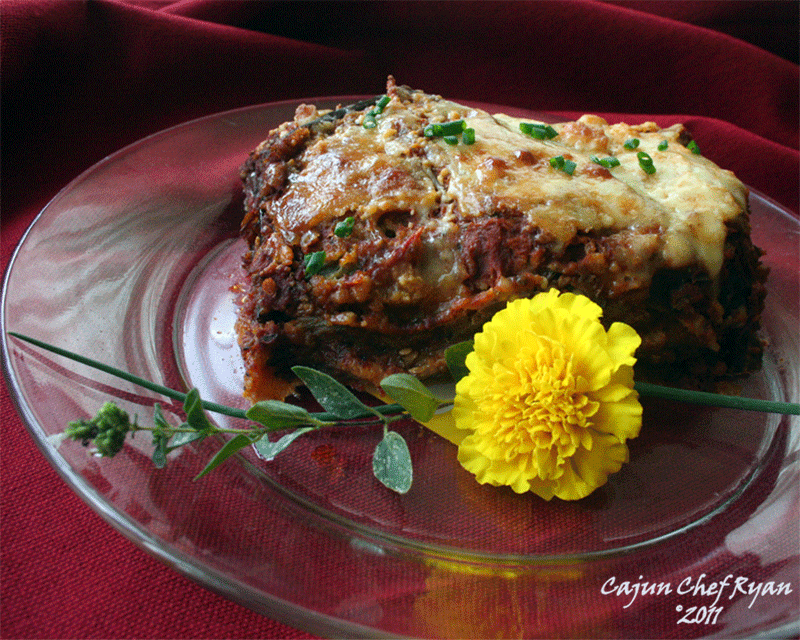 From Step 7.
Eggplant Parmesan Served
Another angle…
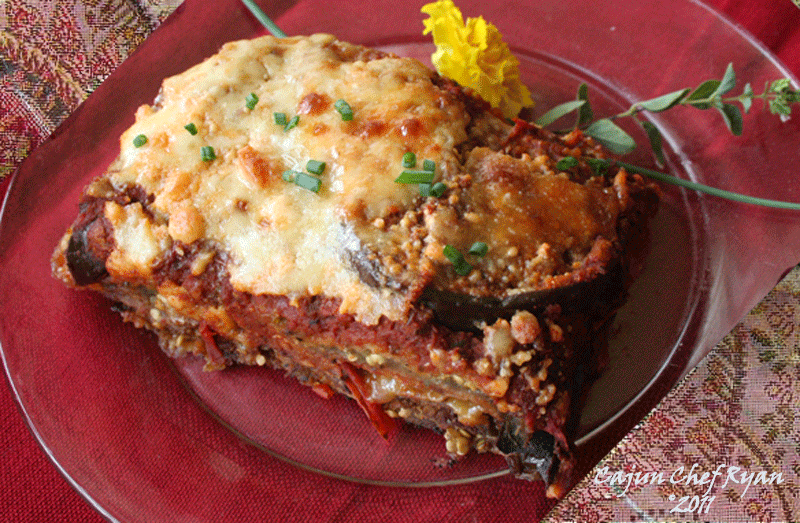
Eggplant Parmesan Plated
Bon appétit!
CCR
=:~)
©2011 CCR
Tags: 9x13 pan · Recipes
By personal request, this one’s for you Alan H.! Enjoy!
This is a variation on a traditional squash casserole recipe that we prepared in the restaurant almost on a weekly basis, but it always contained yellow squash as the main ingredient. With the plethora of patty pan squash produced from our garden this growing season we have had to come up with various ways of utilizing this fabulous vegetable.
Protein Substitution Ideas
Shrimp can be used in place of or in addition to the smoked sausage in this recipe. If you decide to go with shrimp as a full or partial replacement you should add the two pounds of shrimp to the squash just before the breadcrumbs. I would also recommend using small shrimp such as 70-90 count or 90-110 count, peeled and deveined.
Pork can be used also for a full or partial replacement of the sausage, utilizing cubed pork butt or port shoulder and sautéing it in the same steps as the sausage in the original recipe.
Vegetarian options would of course mean leaving out any animal protein and include adding ingredients such as cubed tofu, or other types of hearty vegetables such as zucchini, eggplant, or portabella mushrooms. Cutting them into large chunks and adding them along with the main squash in step 2. Another option would be to sauté the mushrooms along with the onions.
“Yes my son, food does come from the Earth!”
Views of the patty pan squash patch today!
Tender flowering bud from the vibrant squash plants.
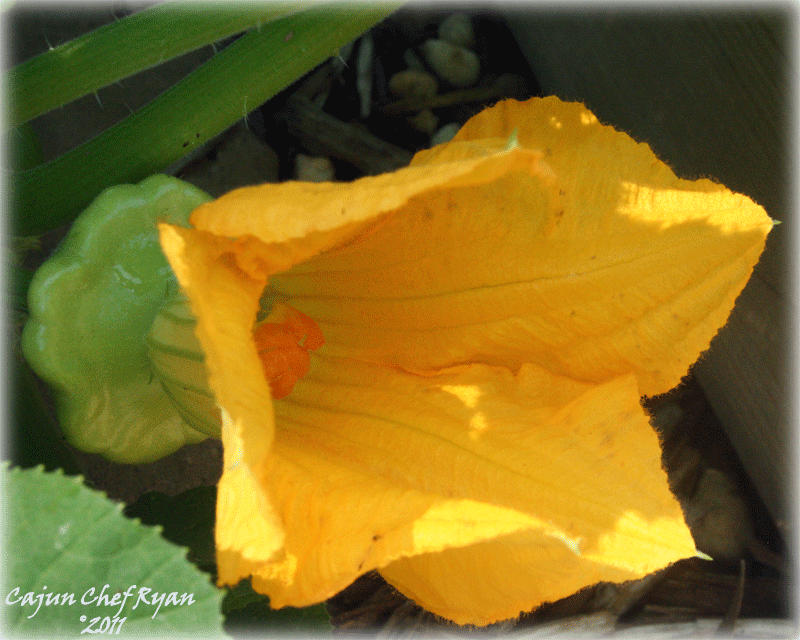
Patty Pan Squash Flower
The patty pan squash patch has overgrown into the two-foot wide pathway.

Patty Pan Squash Patch
Fresh picked patty pan squash.
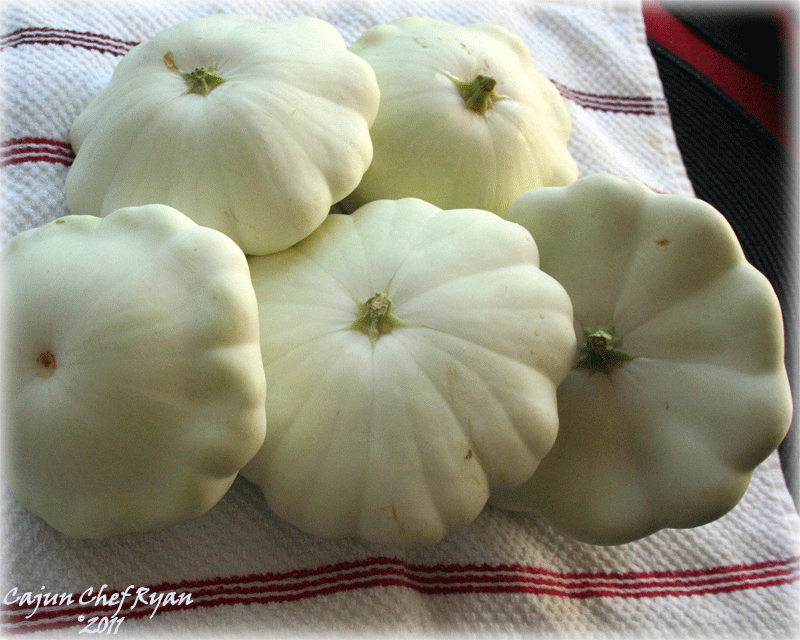
Close to 6 pounds of patty pan squash.
| Ingredients |
| 5 |
Lbs* |
Patty Pan Squash, sliced |
| 1½ |
Cups |
Onions, diced |
| 2 |
Lb. |
Smoked sausage, chunked |
| 1 |
Bulb |
Garlic, minced (12 -14 bulbs) |
| 2 |
Quarts |
Chicken stock |
| 1 |
Tbsp |
Italian seasoning |
| 1 |
Tbsp |
Cajun spice |
| 1 |
Tbsp |
Worcestershire sauce |
| 4-6 |
Cups |
Bread crumbs or cracker crumbs |
| To taste |
Garlic salt |
| |
Olive oil or non-stick spray |
*I actually had 5 lbs 12 oz of patty pan squash, so 5 to 6 pounds works. Also, any summer squash will substitute easily for this recipe, yellow squash especially.
A few preparation photos
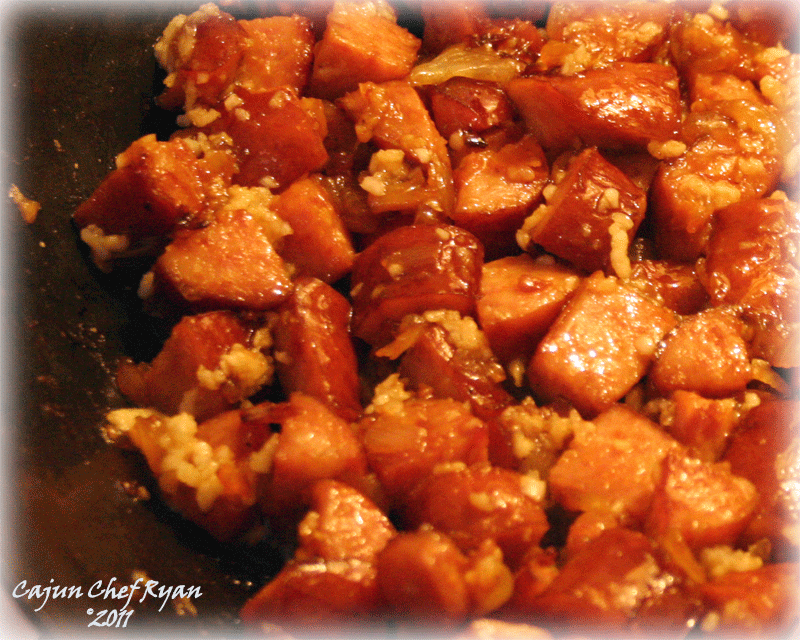 From step 1.
 Sautéed smoked sausage, onions, and garlic.
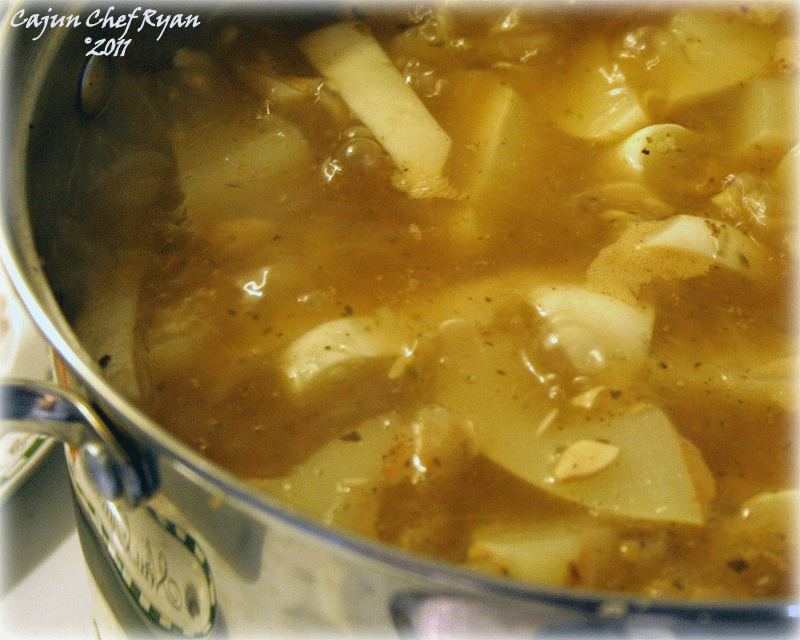 From step 2.
 Cooking down the squash.
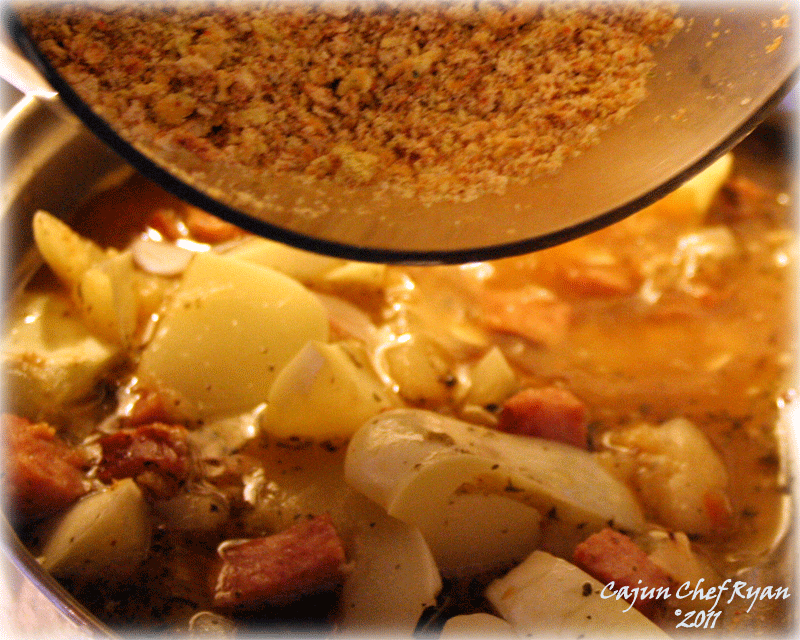 From steps 3 & 4.
 Folding in the bread crumbs.
| Procedure Steps: |
| 1. |
Sauté onions and sausage until browned, stirring occasionally, and then add the garlic and continue browning until soft. |
| 2. |
In a separate large pot add the patty pan squash and cover with the stock, then bring to a boil. It is okay if the stock does not completely cover the squash at first, as it comes to a boil it will shrink and drop into the liquid. Simmer until all squash is soft. |
| 3. |
Add the onion, sausage and garlic mixture to the squash mixture, stir well. Add the Italian seasoning, Cajun spice, Worcestershire and stir well. |
| 4. |
Add the bread crumbs or cracker crumbs or combination of both and stir well until mixture is tight and all liquid is absorbed. |
| 5. |
Lightly coat a 9×13-inch pan with olive oil or non-stick spray then transfer the squash mixture evenly into the pan and then sprinkle about 1 cup or so of breadcrumbs on top. |
| 6. |
Bake in a 375° F for 45 minutes or until browned on top and bubbling on the sides. |
| 7. |
Remove from oven and allow to cool for about 10 minutes before serving. |
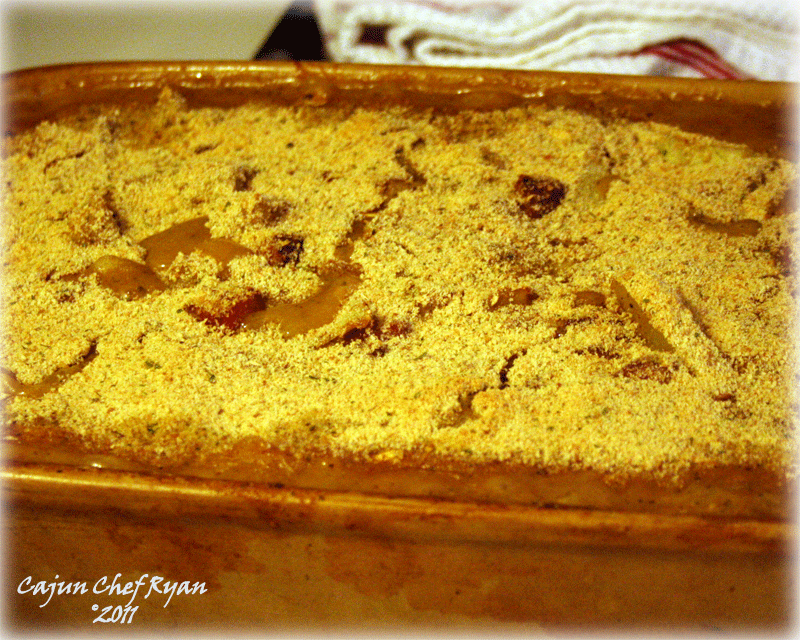 From Step 7.
 The baked casserole cooling
Dinner is served!
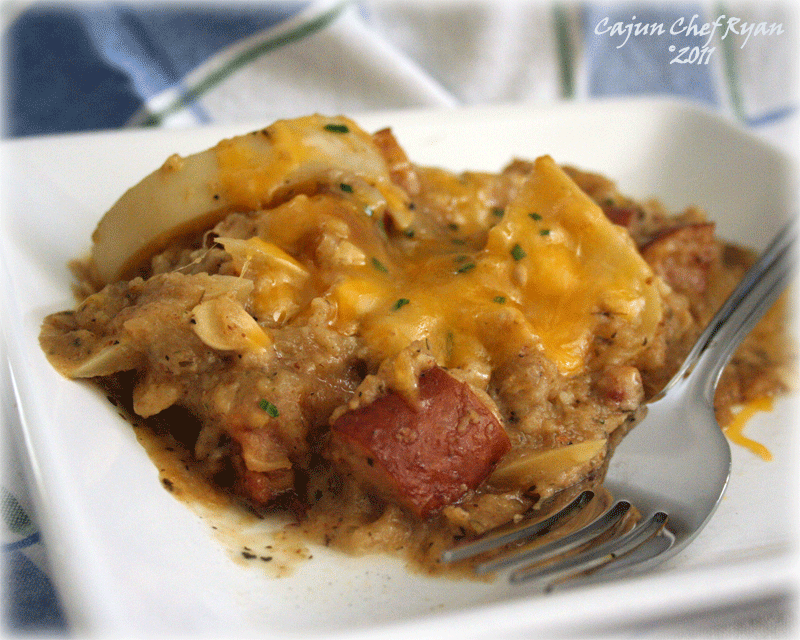
Patty pan squash casserole!
Bon appétit!
CCR
=:~)
©2011 CCR
Tags: 9x13 pan · Homestead · Recipes