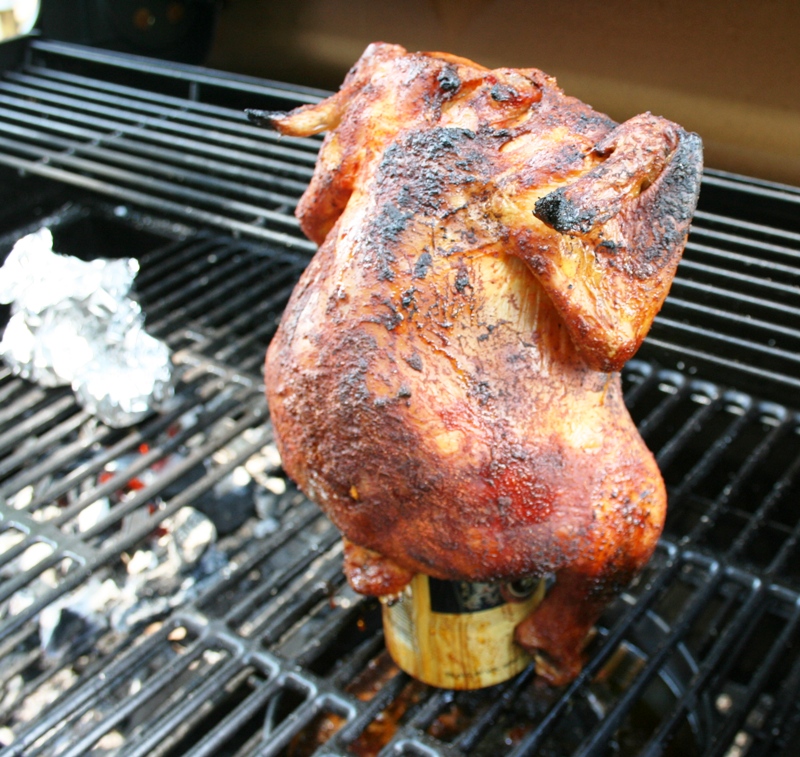
This unusual recipe makes some of the moistest, succulent, flavorful barbecued chicken we have ever tasted. The secret: an open can of beer is inserted into the cavity of the bird, which is cooked upright on the grill. Besides being incredibly tender, the bird makes a great conversation piece. The proper beverage? Beer, of course. I also find that the larger 18 to 24 ounce tall beer cans work better for standing up the bird in all its glory! The beer adds moisture in addition to flavor during the slow grill roasting process, and if wood chips are added a nice smoke flavor also imparts the most wonderful tasting chicken. My own Finger Lickin Rub adds just the right spice and you can order it from the links provided below. And since summer officially is still on until Tuesday, this is one more shot at getting the grill fired up before the Autumnal Equinox on the 22nd.
Serves 4 to 6
Ingredients
1 large whole chicken (4 to 5 pounds)
3 tablespoons Finger Lickin Rub¹
1 can (18-24 ounces) beer
Preparation
1. Remove and discard the fat just inside the body cavities of the chicken. Remove the package of giblets, and set aside for another use. Rinse the chicken, inside and out, under cold running water, then drain and blot dry, inside and out, with paper towels. Sprinkle 1 tablespoon of the rub inside the body and neck cavities, the rub another 1 tablespoon all over the skin of the bird. If you wish, rub another 1/2 tablespoon of the mixture between the flesh and the skin. Cover and refrigerate the chicken while you preheat the grill.
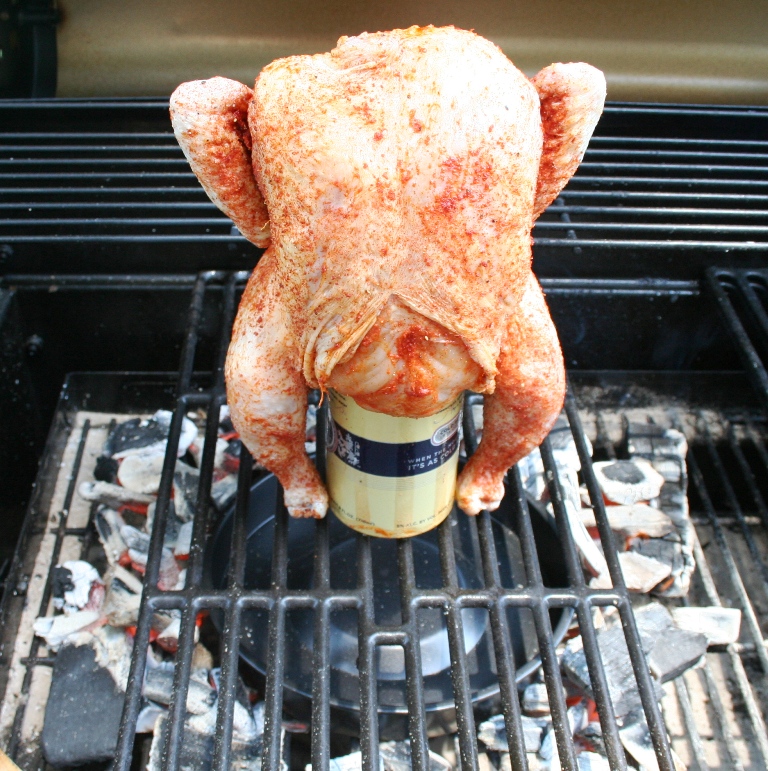
2. Set the drip pan in the center of the grill, between the mounds of coals. Place the food on the grate over the drip pan, and cover the grill. You’ll need to add about 10 to 12 fresh briquettes to each side after an hour of cooking. If you want to add a smoke flavor, add 1 to 2 cups of presoaked wood chips, or 2 to 4 chunks, to the coals just before you start to cook, and again whenever you replenish the coals. Set up the grill for indirect grilling* placing a drip pan in the center. If using a charcoal grill, preheat it to medium. If using a gas grill, place all the wood chips in the smoker box and preheat the grill to high; then, when smoke appears, lower the heat to medium. (NOTE: Click image for a larger view.)
3. Pop the tab on the beer can and take a good sip or until it is within an inch of the top. Using a “church key” –style can opener, make 6 or 7 holes in the top of the can. Then spoon the remaining dry rub through the holes into the beer. Holding the chicken upright, with the opening of the body cavity down, insert the beer can into the cavity.
4. When ready to cook, if using charcoal, toss half the wood chips on the coals. Oil the grill grate. Stand the chicken up in the center of the hot grate, over the drip pan. Spread out the legs to form a sort of tripod, to support the bird.
5. Cover the grill and cook the chicken until fall-off-the-bone tender, 2 hours. If using charcoal, add 10 to 12 fresh coals per side and the remaining wood chips after 1 hour.
6. Using tongs lift the bird to a cutting board or platter, holding the metal spatula underneath the beer can for support. (Have the board or platter right next to the bird to make the move shorter. Be careful not to spill hot beer on yourself.) Let stand for 5 minutes before carving the meat off the upright carcass. (Toss the beer can out along with the carcass.)
* Indirect grilling on a Charcoal Grill:
To set up you grill for indirect grilling, light the coals.
When they are blazing red, use tongs to transfer them to opposite sides of the grill, arranging them in two piles. Some grills have special half-moon-shaped baskets to hold the coals at the sides; others have wire fences that hook onto the bottom gate. Let the coals burn until they are covered with a thin layer of gray ash.
Set the drip pan in the center of the grill, between the mounds of coals. Place the food on the grate over the drip pan, and cover the grill. You’ll need to add about 10 to 12 fresh briquettes to each side after an hour of cooking.
If you want to add a smoke flavor, add 1 to 2 cups of presoaked wood chips, or 2 to 4 chunks, to the coals just before you start to cook, and again whenever you replenish the coals.
¹Finger Lickin’ Que Rub Spice Blend
Man oh man, this stuff really is finger lickin good! We use it for all our barbecues on chicken, pork, beef, shrimp, scallops…you name it, if you can grill it you can season it with our Finger Lickin’ Que Rub!
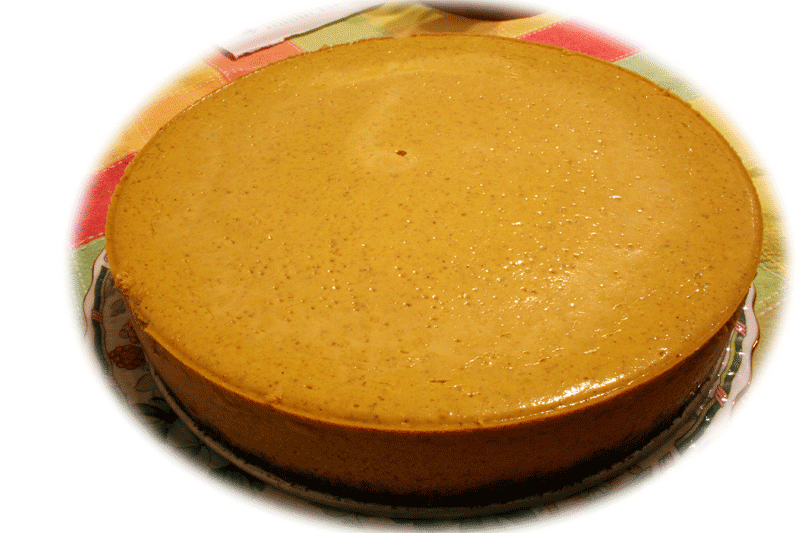
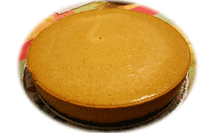 Another one from the Weight Watchers Annual Recipes for Success, this time the 2005 edition and found in the dessert section on page 37. The original recipe yields 12 servings; however, I sliced our cheesecake into 16 portions, therefore cutting the point’s value from 6 to 4.5. This recipe utilizes creamed fat-free cottage cheese and 1/3-less-fat cream cheese, the substitutions with using the lower fat dairy products does not take away from the ultimate flavor and texture of the cheesecake. In fact, I processed the cottage cheese in the food processor for several minutes until it was silky smooth. This pumpkin cheesecake recipe is perfect for the fall flavor menus starting to make their appearances around North America’s kitchens this time of year. (Note: Click images for a larger view)

| Ingredients |
| 1 |
Cup |
Gingersnap cookies, crushed (about 20 cookies) |
| 1/3 |
Cup |
Oatmeal, quick-cooking, uncooked |
| 3 |
Tbsp |
Butter, melted |
| |
|
Cooking spray |
| 1 |
Carton |
Cottage cheese, fat free (24-ounces) |
| 1 |
Package |
1/3-less-fat cream cheese (8-ounces) |
| 2 |
Tbsp |
All-purpose flour |
| 1 |
Tsp |
Cinnamon, ground |
| ¾ |
Tsp |
Ginger, ground |
| ¼ |
Tsp |
Salt |
| ¼ |
Tsp |
Nutmeg, ground |
| ¼ |
Tsp |
Allspice, ground |
| 1 |
Cup |
Pumpkin, unsweetened |
| 2/3 |
Cup |
Sugar |
| 2 |
Large |
Eggs |
| 2 |
Large |
Egg whites |
| 1 |
Tsp |
Vanilla extract |
| Procedure Steps |
| 1. |
Preheat oven to 350° F. |
| 2. |
Place cookie crumbs and oats into the bowl of a food processor and blend until fine crumbs. Add the melted butter and blend until smooth. Firmly press the crumb mixture on the bottom and 1/2 –inch up the sides of a 9-inch springform pan coated with cooking spray. |
| 3. |
Bake in 350° F oven for 10 minutes, or until browned, then cool on a wire rack. Reduce oven temperature to 325° F. |
| 4. |
Place cottage cheese in the bowl of a food processor and process until very smooth. Add the cream cheese and continue to process until smooth. Combine the flour in a separate bowl with the cinnamon, ginger, salt, nutmeg and allspice. Add the flour mixture, pumpkin and sugar to the cheese mixture and process until smooth. Add the eggs and egg whites to the cheese/pumpkin mixture, 1 at a time and blend until smooth. Blend in the vanilla extract. Pour the cheese/pumpkin mixture into the prepared crust. |
| 5. |
Bake in the 325° F oven for 1 hour and 10 minutes or until almost set. Remove the cheesecake from the oven and then run a knife around the outside edge. Cool to room temperature on a wire rack, then cover and chill for 8 hours. Serve each portion with about 1 tablespoon of whipped cream. |
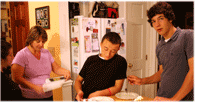
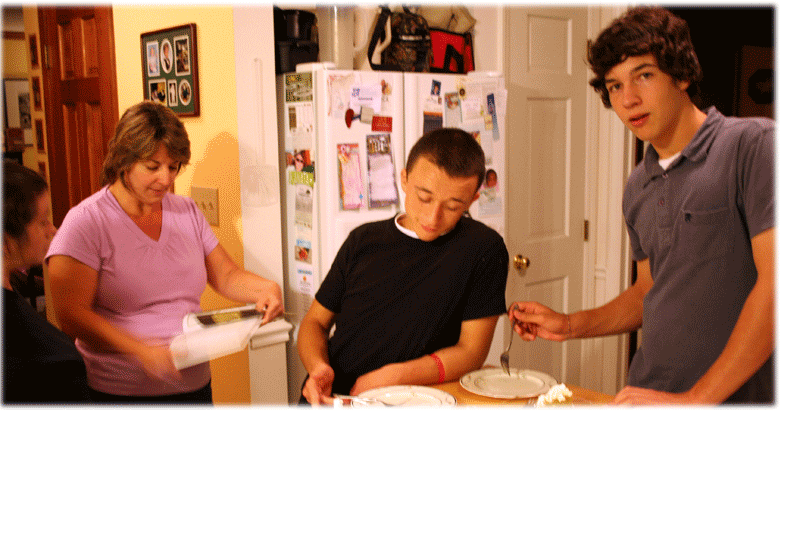
Family and friends enjoy the pumpkin cheesecake!

Looking for some comfort food this past weekend Monique and I decided to put together a pot roast along with the Lemon Meringue Pie. We found a nice 5-pound section of top round chuck roast at BJ’s which saved us a lot from one 15-pound bottom round I was eyeing a few minutes before the butcher pointed out the “roast” meats section. Roasting anything larger than 5 to 7 pounds requires a larger pan….err…pot! At the Hyatt Regency Hotel, every Sunday brunch had a carving station and many times, I can remember panning up, seasoning and roasting up to a dozen top rounds each weighing in at around 15 to 20 pounds each. Now that is a lot of roast beef.
We have really enjoyed the Pot Roast Sandwich at Bob Evan’s since we started eating there on occasion and Monique said it reminded her of the pot roast her grandmother made years ago. The pot roast recipe we came up with is a close attempt at duplicating the two flavors; we have been eating leftovers every night since.
| Ingredients |
| 5 |
Lb. |
Beef top round or chuck roast |
| 1 |
Lb. |
Carrots, peeled and large diced |
| 1 |
Large |
Sweet onion, large diced |
| 1 |
Lb. |
Mushrooms, baby Bella, halved |
| 1 |
Lb. |
Shallots, peeled |
| 1 |
Bulb |
Garlic, cloves peeled whole |
| 1 |
Lb. |
Baby new potatoes, halved |
| 2 |
Cups |
Beef stock, warm |
| 1 |
Cup |
Merlot or red wine |
| ¼ |
Cup |
Soy sauce |
| 2 |
Tbsp |
Worcestershire sauce |
| 1 |
Packet |
Lipton onion soup mix |
| ½ |
Cup |
Fresh rosemary, chopped |
| ¼ |
Cup |
Fresh basil, chopped |
| 1 |
Tbsp |
Fresh thyme, chopped |
| ½ |
Tbsp |
Fresh sage, chopped |
| To taste |
Salt and fresh cracked black pepper |
| |
|
| Procedure Steps Pre-heat oven to 425° F. |
| 1. |
Under cool water, rinse the roast then pat dry with paper towels. Then evenly coat the entire top, bottom and sides of the roast with salt and fresh cracked black pepper. |
| 2. |
Evenly spread the carrots and onions into the bottom of the roasting pan, and then place the roast over them. |
| 3. |
Take whole garlic cloves and evenly stuff in-between the sections of the roast on the top side only. |
| 4. |
Arrange the mushrooms, shallots and baby new potatoes evenly around the roast. |
| 5. |
Mix together the warm beef stock with the merlot soy sauce and the Worcestershire sauce. Then add the Lipton onion soup mix packet and stir well. Then evenly pour this over the roast and other ingredients. |
| 6. |
Combine the fresh chopped herbs and then sprinkle them evenly over the roast and other ingredients. Cover. |
| 7. |
Place the covered roast in the pre-heated 425° F oven for one hour, then turn down the oven temperature to 275° and continue to roast for another 4 hours. Do not lift the cover from the roast at any point during the roasting. |
| 8. |
Remove from the oven and allow to sit for 10 minutes to cool. Then slice or pull the meat into portions.’Serve with peas and mashed potatoes for a complete meal. Also makes great pot roast sandwiches. |
|

Before Roasting
|
|

After Roasting
|
(Click on images for a larger view)

We were looking for some real comfort food this weekend and decided for our dessert that some good ole fashioned lemon meringue pie would fit the bill. I found this recipe in my copy of the recent 2006 and 75th anniversary edition of The Joy of Cooking and since the only ingredients we needed to buy were the crust and some lemons, it was a not hard to say yes! By the way, this is my fourth copy of The Joy, still one of my all time favorite cookbooks.
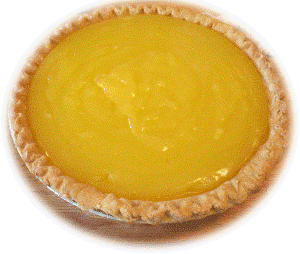
Adapted from The Joy, notice that after reading the entire procedures steps that the actual first thing you want to do after browning the crust is to make the cornstarch paste for the meringue, then you can go onto the pie crust and filling and finish with completing the meringue. This ensures that your pie filling is still piping hot in the crust when you top it with the meringue just before the final baking step. (NOTE: Click images for a larger view.)
The Lemon Filling
| Ingredients for the filling |
| 1 |
9-inch |
Pie crust |
| 1 ½ |
Cups |
Sugar |
| 6 |
Tbsp |
Cornstarch |
| ¼ |
Tsp |
Salt |
| ½ |
Cup |
Cold water |
| ½ |
Cup |
Fresh squeezed lemon juice (3 lg. lemons) |
| 4 |
Each |
Large egg yolks, well beaten |
| 2 |
Tbsp |
Unsalted butter, cut into small pieces |
| 1 ½ |
Cups |
Boiling water |
| 1 |
Tsp |
Lemon zest, grated |
| |
|
|
| Procedure steps for filing |
| 1. |
Using a fork poke holes in the sides and bottom of the crust every few inches or so to allow air to escape while baking, thus preventing the crust from bubbling. Bake the crust in a 425° F oven for 20 minutes or until evenly browned. Remove and cool the crust. Turn oven temperature down to 350° F. (Now go to step 1 in the meringue section below.) |
| 2. |
Combine the sugar and cornstarch in a 2-3 quart saucepan. |
| 3. |
Gradually blend in until smooth the cold water and fresh lemon juice. |
| 4. |
Add the egg yolks and blend thoroughly then add the butter and fold in stirring constantly. |
| 5. |
While stirring gently slowly add the boiling water. Bring to a boil and allow thickening slightly, reducing the heat to very low and simmering slowly for 1 minute. |
| 6. |
Fold in the lemon zest then pour into the baked pie shell. |
| 7. |
Spread the meringue (see recipe below) onto the outside edges and anchoring it to the crust and filling, then working toward the center with the remaining meringue. Use a rubber spatula to create peaks throughout the top of the meringue. Bake for 20 minutes in the 350° F oven or until meringue peaks are golden brown. |
| 8. |
Cool completely on a rack and then serve or refrigerate for up to 3 days. |
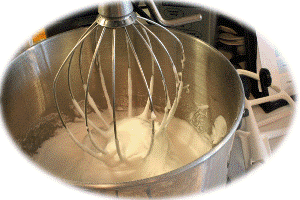 The Meringue
Because stabilization is achieved with the cornstarch paste, this meringue topping will not weep, leak, or deflate, even when refrigerated for several days. Since the pie filling should be piping hot when the meringue is added, measure out and prepare the cornstarch paste in step 1 below before embarking on the filling recipe above.
| Ingredients for the meringue |
| 1 |
Tbsp |
Cornstarch |
| 1 |
Tbsp |
Sugar |
| 1/3 |
Cup |
Water |
| 4 |
Each |
Large egg whites, room temperature |
| ½ |
Tsp |
Vanilla |
| ¼ |
Tsp |
Cream of tartar |
| ½ |
Cup |
Sugar, preferably superfine |
| Procedure steps for meringue |
| 1. |
Mix the cornstarch and sugar in a small saucepan, then add the water and bring to a boil over medium heat. Using a wire whisk stir briskly and boil for 15 seconds. Remove the thick paste from the heat and cover. (Now go ahead and start the filling in step 2 from the top section of this recipe.) |
| 2. |
In a clean and grease-free mixing bowl add the room temperature egg whites and beat until foamy. |
| 3. |
Add the vanilla and cream of tartar and beat until soft peaks form. |
| 4. |
Slowly and gradually add the sugar and beat in well on high speed until very stiff and glossy but not dry. |
| 5. |
Reduce the mixer speed to very slow and add the cornstarch paste 1 tablespoon at a time. When the paste is incorporated increase the mixer speed to medium-high and beat for another 10 to 15 seconds. |
| 6. |
Spread over hot pie filling as described in step 7 from the section above. |