Update! New Updated King Cake Recipe.
Click King Cake, Traditional Recipe: v3.02 for the latest recipe with step-by-step images, the new and improved recipe available now!

The Carnival Season in New Orleans commences on January 6, or Twelfth Night, and concludes at Midnight of Mardi Gras (Fat Tuesday), which is February 24th this year. The first seasonal King Cake is baked for Twelfth Night parties and the first parade rolls on the St. Charles Streetcar lines in Uptown New Orleans. Originally an uncooked dry bean, but more recently a small plastic baby figure is inserted into the bottom of the baked cake. The lucky person who finds the “baby” in their slice of cake is crowned “king or queen” for the day. The traditional Carnival colors of purple, green and gold (yellow) are depicted in tinted sugar on the top of cake.
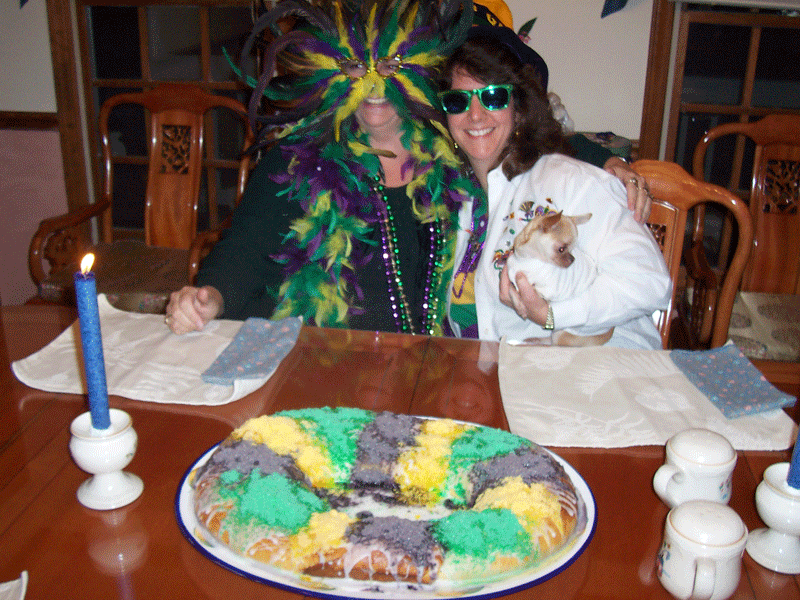
This traditional King Cake recipe goes back to before the 1980’s and is a classic. It will yield 1 average 12 to 14-inch ring of King Cake. In the restaurant I would make a much larger batch that would yield 6 King Cakes this size. The size will also increase a bit with the addition of a filling. This is typically a small sized King Cake, however, in the bakeries and stores you have a choice of small, medium or large cakes available. Extra large King Cakes have been known to be made on special orders, but for very large parties it is customary to order a number of them to fulfill the crowds.
King Cake Dough
| ½ |
Cup |
Warm water (110 degrees F.) |
| 2 |
Pkg |
Active dry yeast |
| ½ |
Cup |
Sugar (plus 2 tsp) |
| 4½ |
Cups |
All purpose flour, un-sifted |
| 1 |
Tsp |
Nutmeg, ground or fresh grated |
| 2 |
Tsp |
Salt |
| 1 |
Tsp |
Lemon zest |
| ½ |
Cup |
Warm Milk (110 degrees F.) |
| 5 |
Each |
Egg yolks |
| 1 |
Stick |
Butter, (plus 2 Tbsp) softened |
| 1 |
Each |
Egg and 1 Tbsp milk beaten (egg wash) |
| 1 |
Tbsp |
Cinnamon |
| Procedure Steps |
| 1. |
In a small bowl add the warm water and sprinkle in the yeast with 2 teaspoons of sugar. Allow the yeast and sugar to rest for 5 minutes then mix well. Set the bowl in a warm place for 10 minutes, or until the yeast bubbles and mixture almost doubles in volume. |
| 2. |
Combine 3½ cups flour with ½ cup sugar, nutmeg and salt, then sift into a large mixing bowl. Stir in the lemon zest. |
| 3. |
Create a “hole” in the middle of the bowl with the flour mixture on the sides of the bowl. Gently pour in the yeast mixture and the warm milk into the flour mixture. Add the egg yolks and combine the dry ingredients with the wet mixture. When the dough is smooth cut in the stick of butter 1 Tbsp at a time and continue to fold and combine until the dough can be formed into a soft ball shape. |
| 4. |
Place the ball of dough on a lightly floured surface and knead adding up to another cup of flour in small tablespoon portions at a time. Continue to knead the dough until smooth, shiny and elastic, about 10 minutes or so. |
| 5. |
Using a pastry brush, coat the inside of a large bowl evenly with 1 Tbsp softened butter. Place the dough ball in the bowl and rotate until the entire surface is buttered. Cover the bowl with a kitchen towel and place in a draft-free place for about 1½ hours, or until the dough doubles in volume. Using a pastry brush coat a large baking sheet pan with 1 Tbsp of butter and set aside. |
| 6. |
Remove the dough from the bowl and place on a lightly floured surface. Using your fist punch down the dough with a heavy blow. Sprinkle cinnamon over the top and roll the dough into a cylinder or tube shape. Twist the dough to form a curled cylinder and loop it onto the buttered baking sheet pan. Pinch the ends of the dough together to complete the circle. |
| 7. |
Cover the dough with a kitchen towel and allow to rise again in a draft-free warm location for about 45 minutes or until the dough circle doubles in volume. |
| 8. |
When ready to bake the dough, pre-heat oven to 350 degrees F. Brush the top and sides of the dough with the egg wash and bake on the middle rack of the oven for 30 minutes, or until golden brown. Cool cake to room temperature on a wire rack. Now is the time to hide the bean or plastic baby. |
| Tinted Sugars |
| 1½ |
Cups |
Granulated sugar |
| ¼ |
Tsp |
Purple food color |
| ¼ |
Tsp |
Green food color |
| ¼ |
Tsp |
Yellow food color |
| Procedure Steps |
| 1. |
While the cake is cooling prepare the tinted sugars by taking three separate bowls with ½ cup of sugar in each. Then take the purple food color and slowly drop a dot or two at a time into the sugar. Using a spoon stir to mix and spread the color around until all sugar is tinted. Add more food color as needed. Repeat the process for the green and then the yellow in their own bowls as well. Set the tinted sugars aside. |
| Icing |
| 3 |
Cups |
Powdered confectioners sugar |
| ¼ |
Cup |
Fresh lemon juice, strained |
| 3 to 6 |
Tbsp |
Water |
| Procedure Steps |
| 1. |
Combine the sugar, lemon juice and 3 tablespoons of water in a deep bowl whisking until smooth. If icing is too stiff whisk in 1 tablespoon water at a time until spreadable. |
| 2. |
Place cooled cake onto a serving platter or heavy cake cardboard and coat the top and sides of the cake with the icing. I like to dip my fingers into the icing and then drizzle it over the top of the cake. While the icing is still fresh immediately sprinkle the tinted sugars in individual rows about 2 to 3 inches wide of the purple, green and gold (yellow). |
If preparing in advance allow the icing and tinted sugars to set up a bit then cover with a plastic bag or plastic wrap. Typically a King Cake can last 2-3 days un-refrigerated.
Note On Fillings: If filling the cake you will want to have your filling prepared prior to the step where you are twisting the dough. In fact, for filled King Cake dough’s I will roll the dough out similar to cinnamon roll or danish dough style, instead of the cylinder shape as described above. Then I will sprinkle more cinnamon sugar and then add the filling. Then the dough will get rolled up around the filling jelly roll style. Then the filled dough is added to the baking sheet pan and looped into the circle and pinched before the second rising and baking stages. Typical fillings include sweetened and softened cream cheese, cherry pie filling, blueberry pie filling, lemon filling, custard filling, and my favorite is a double chocolate chocolate cake filling. Typically any pie or doughnut filling will work, you are only limited by your imagination.
Here is a typical cream cheese and fruit filling recipe:
| Cream Cheese and Fruit Filling |
| 1 |
Can |
Cherry, apple or apricot pie filling (16-ounces) |
| 8 |
Ounces |
Cream cheese, softened |
| ¼ |
Cup |
Sugar |
| 2 |
Tsp |
Flour |
| 2 |
Each |
Egg yolks |
| 1 |
Tsp |
Vanilla extract |
| Procedure Steps |
| 1. |
Using a floured roller on a floured surface, roll out the dough into a 30-by-9-inch rectangle as thin as pie crust. Let dough rest. |
| 2. |
If necessary, drain extra juice from pie filling. Mix the softened cream cheese with the sugar, flour, egg yolks and vanilla. Spoon an inch-wide strip of fruit filling the length of the dough, about 3 inches from the edge. Spoon the cream cheese mixture alongside the fruit, about 3 inches from the edge. Brush the exposed dough with egg wash. |
| 3. |
Fold or roll one edge of dough over the cream cheese and fruit in jelly roll fashion, and continue to roll the dough to the end, then brush with a little egg wash. Gently place one end of the filled rolled dough onto the buttered baking sheet pan, and then ease the rest of the roll onto the pan, joining the ends to form the loop or circle. Add more egg wash to “glue” the ends together. And then pick up from step 7 in the dough procedures above. |
Tags: Baking · Cajun · Creole · Desserts · Mardi Gras · Pastry · Recipes
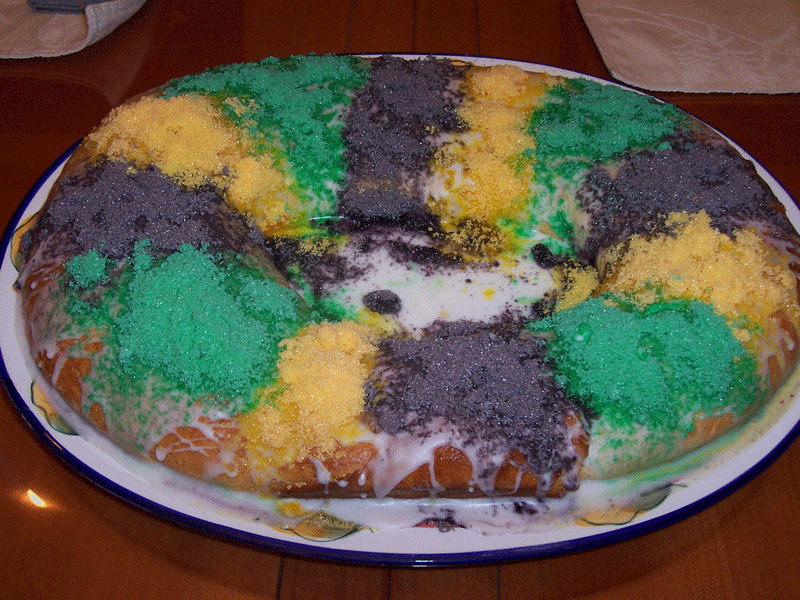
We southerners joke about the fact that our seasons are not reflected in the changing of the leaves but rather in the ebb and flow of the foods we eat. We have crab season, crawfish season, deer season, Creole tomato season, strawberry season, Vidalia onion season and one of my favorites since I was a kid, king cake season.
While the days they are available at local bakeries and groceries in and around southeast Louisiana, in particular New Orleans seem to get extended a few days every year, traditionally king cakes are only available during the Mardi Gras holidays. The typical king cake is an oval or round shaped dough which is formed from a yeast risen sweet dough similar to cinnamon roll or danish dough. Recipes vary from bakery to restaurant to grocery, but the basic king cake dough is laced with lots of cinnamon and sugar and topped with icing and then sprinkled with tinted sugars of purple, green and gold. Many variations of fillings are available also depending on the shop, but some of my favorite fillings are cream cheese, raspberry, lemon, cherry, blueberry and my all time favorite is my chocolate filled King Cake. Inside each king cake is a small plastic baby which the baker gently hides after it is baked and cooled. At Mardi Gras gatherings whoever finds the piece of cake with the baby is crowned king or queen for the day and must bring a king cake to the next party. From junior through high school every Mardi Gras season some of our classes would celebrate a weekly party to honor the long tradition.
A select few bakery’s offer to ship king cakes including Haydel’s, Randazzo’s and others, usually overnight or 2 day shipping is preferred. When I operated Boudreaux’s Restaurant I sold about 2 to 3 dozen king cakes a week during the Mardi Gras season, I wished they were as popular the rest of the year too!
A Little King Cake History
The Mardi Gras season officially begins on the Twelfth Night of Christmas which is January 6, and is also known as Epiphany. It marks the day the wise men brought gifts to the Christ Child. By doing so they ‘revealed’ or ‘made known’ Jesus to the world as Lord and King.
The New Orleans custom began in the late 1800’s and celebrates Epiphany with cakes that are baked to honor the three kings. The oval or round shape signifies their circular journey to confuse King Herod. The plastic baby represents Jesus. And the search for the baby is represented by the mystery of who will get the slice with the plastic baby in it. However, with legalities the way they are many do not place the baby in the cake, but will leave it out for the customer to place it, removing any liability from the shop for supposed folks who may swallow the plastic baby. For more history about Mardi Gras and King Cakes, check out the links at the end of this post.
Ever wonder why Mardi Gras colors are purple, green and gold? The traditional colors of Mardi Gras are purple (symbolic of justice), green (symbolic of faith) and gold (symbolic of power). The accepted story behind the original selection of these colors originates from 1872 when the Grand Duke Alexis Romanoff of Russia visited New Orleans. It is said that the Grand Duke came to the city in pursuit of an actress named Lydia Thompson. During his stay, he was given the honor of selecting the official Mardi Gras colors by the Krewe of Rex…thus, did these colors also become the colors of the House of Romanoff. The 1892 Rex Parade theme (“Symbolism of Colors”) first gave meaning to the representation of the official Mardi Gras colors. Interestingly, the colors of Mardi Gras influenced the choice of school colors for the Louisiana arch-rival colleges, Louisiana State University and Tulane University. When LSU was deciding on its colors, the stores in New Orleans had stocked-up on fabrics of purple, green and gold for the upcoming Mardi Gras Season. LSU, opting for purple and gold, bought a large quantity of the available cloth. Tulane purchased much of the only remaining color …green (Tulane’s colors are green and white).
If you have never been to Mardi Gras or seen or eaten a King Cake, now is the time to share in the enduring New Orleans tradition! Tomorrow I will post my favorite King Cake recipe so you too can make your own. Or you can have one shipped and you too can celebrate one of the biggest Aha! moments in recorded history.
References
Have your king cakes shipped
Tags: Baking · Cajun · Creole · Culture · Desserts · Heritage · Mardi Gras
A family tradition of holiday fun
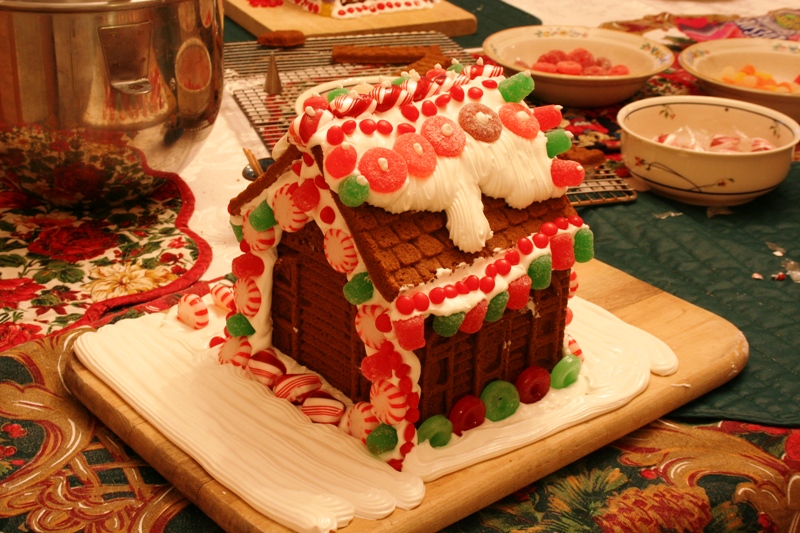
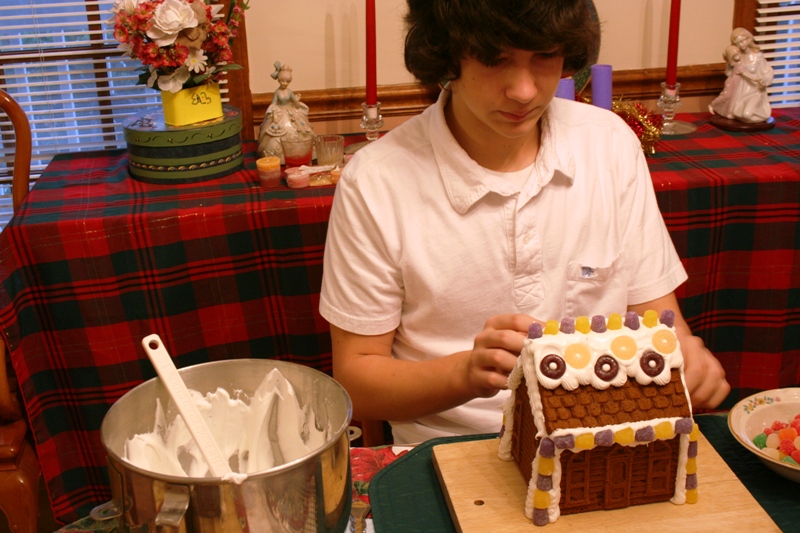
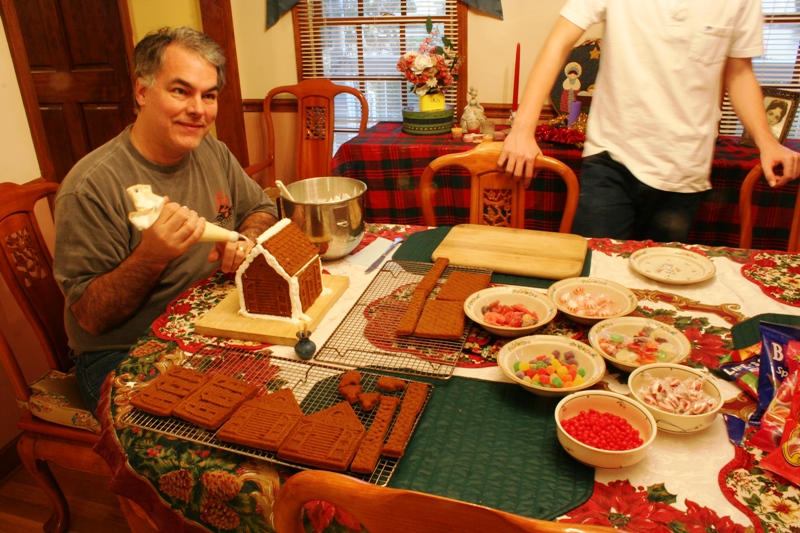
Every year for the past 10 or so we have taken the weekend before Christmas typically on Saturday to bake and build ginger bread houses. Years ago Monique hosted and attended Pampered Chef parties and one year she got a hold of the ginger bread mold stoneware and ever since I have taken to the fun task of helping the boys build each their own ginger bread house. This year we were without Bryan so Monique and I decorated one together. Ben did his all up in purple and gold LSU colors, it is quite a unique little ginger bread house.
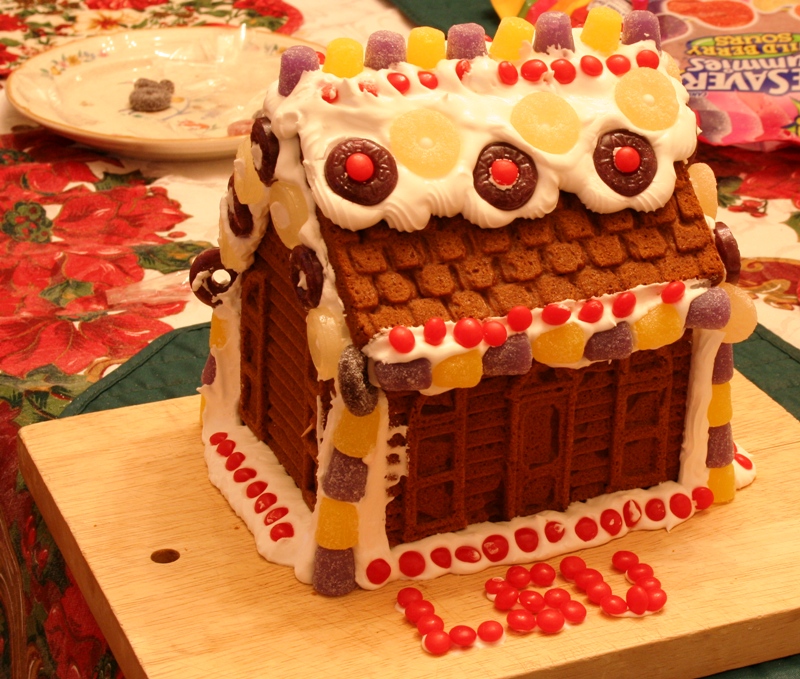
I typically make a double batch of ginger bread dough and a double batch of royal icing as well to complete two houses from the mold. Over the years I have perfected the art of making even and smooth walls, roofs and chimney. The trick is to hand press the dough into the mold until filled over the top edges, then taking a sharp knife I will run the blade parallel to the top and slice off the excess using a sawing motion, the exess dough is added back to the ball.
Usually there will be some dough left over and I will roll out this to about 1/4 inch thickness and then cut out Christmas shapes using tiny cookie cutters. We typically will have a few dozen stars, ginger bread men, bears, candy cane and sleigh shaped ginger bread cookies to eat while we build and decorate the houses.
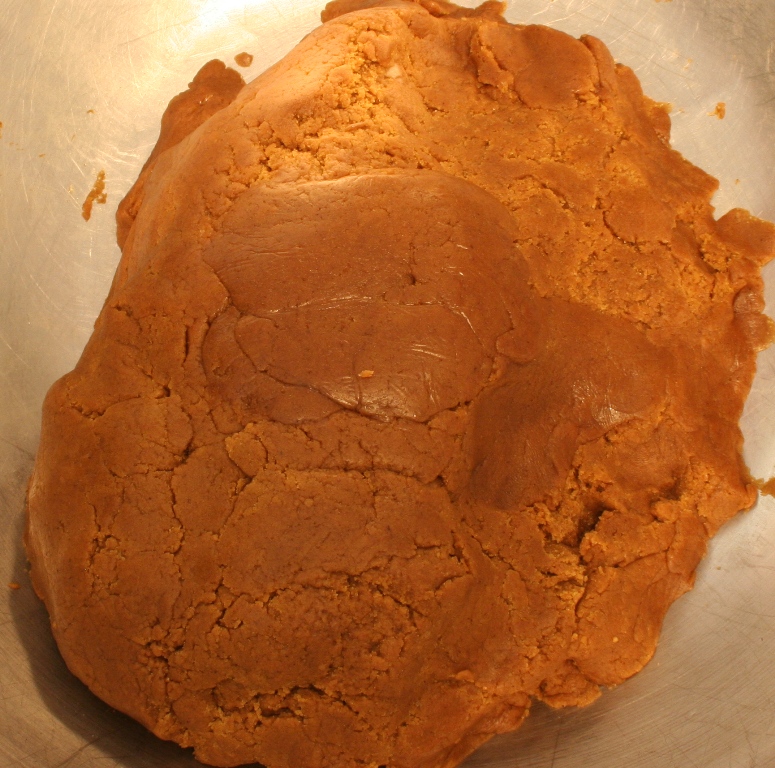
| Gingerbread House Dough (Single batch, yield: 1 house) |
| Ingredients |
| 3 |
Cups |
All-purpose flour |
| 1 ½ |
Tsp |
Cinnamon |
| 1 |
Tsp |
Ginger |
| ½ |
Tsp |
Baking soda |
| ½ |
Tsp |
Salt |
| ¼ |
Tsp |
Cloves, ground |
| ½ |
Cup |
Solid vegetable shortening |
| ½ |
Cup |
Granulated sugar |
| ½ |
Cup |
Molasses |
| 1 |
Large |
Egg |
| Procedure Steps (Pre-heat oven to 350 º F.) |
| 1. |
Combine the first 6 dry ingredients and mix well. |
| 2. |
Combine the shortening and suger and whip until creamed smooth. |
| 3. |
Add the molasses and egg to the sugar shortening mixture and whip until smooth. |
| 4. |
Gradually add the dry flour mixture to the wet mixture until well incorporated into a dough. |
| 5. |
Press dough into lightly greased mold and cut excess. Or on a lightly greased sheet pan roll out dough to an even shape about ½ inch thick. |
| 6. |
Bake in the oven for 20 minutes or until edges of dough are lightly browned. Place mold or sheet pan on cooling rack for 5 minutes then un-mold or remove from pan. |
| 7. |
If using a single sheet pan method use the template below to cut out the walls and roof shapes. If using the mold allow it to cool somewhat before adding the next batch of dough. |
| 8. |
Once cooled the house sections are ready to build. |
| Royal Icing |
| Ingredients |
| 4 |
Cups |
Powdered confectioners sugar |
| 3 |
Each |
Egg whites |
| 2 |
Tsp |
Cream of tartar |
| |
| Procedure Steps |
| 1. |
Blend together the confectioners sugar and cream of tarter, then add the egg whites and whip on medium speed until in electric mixer until glossy and hit holds stiff peaks. |
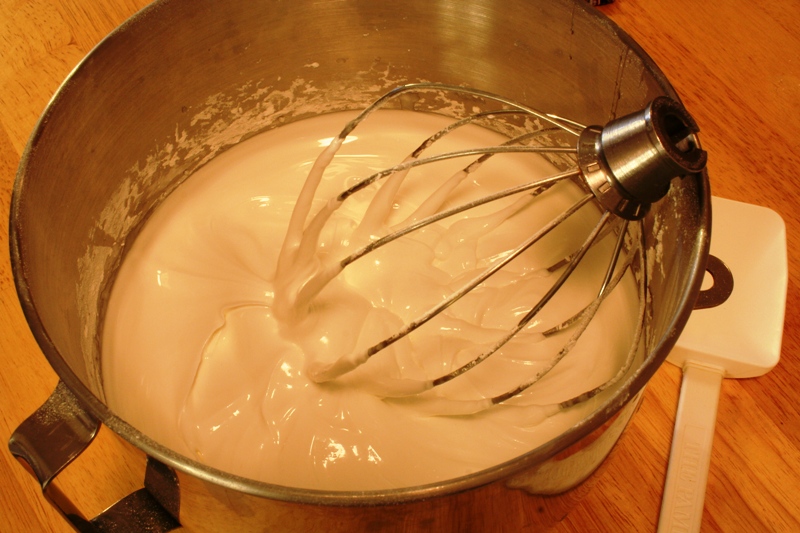
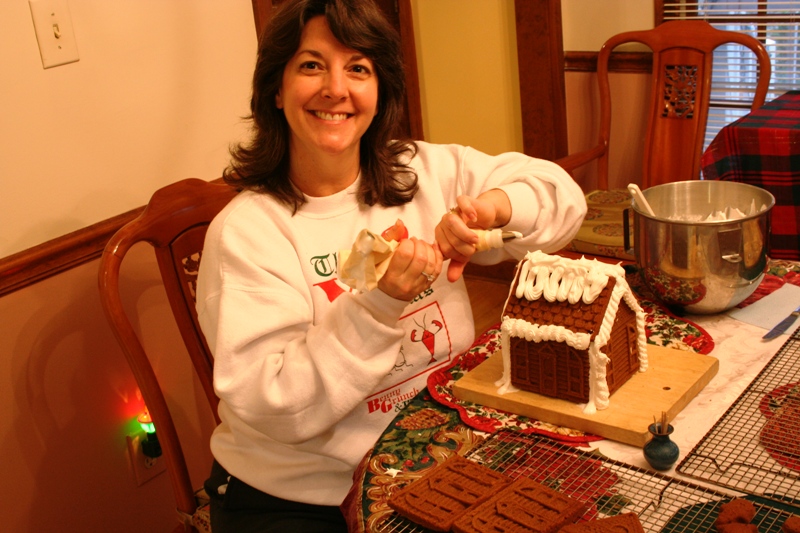
This icing will start to dry very quickly so keep covered with a damp towel or plastic wrap. Transfer to a piping bag fitted with a small star tube and use the icing as the “glue” for attaching the walls then the roof sections. Add more icing and then decorate with various candy pieces. Add more icing on the roof to simulate snow and then decorate that too.
| Now everyone is ready to decorate their houses, Monique and Ben start adding candy pieces after I have set up the walls and roof sections with the royal icing “glue”. The fun begins and goes really quickly too. |
 |
 |
 |
Tags: Baking · Holidays · Traditions
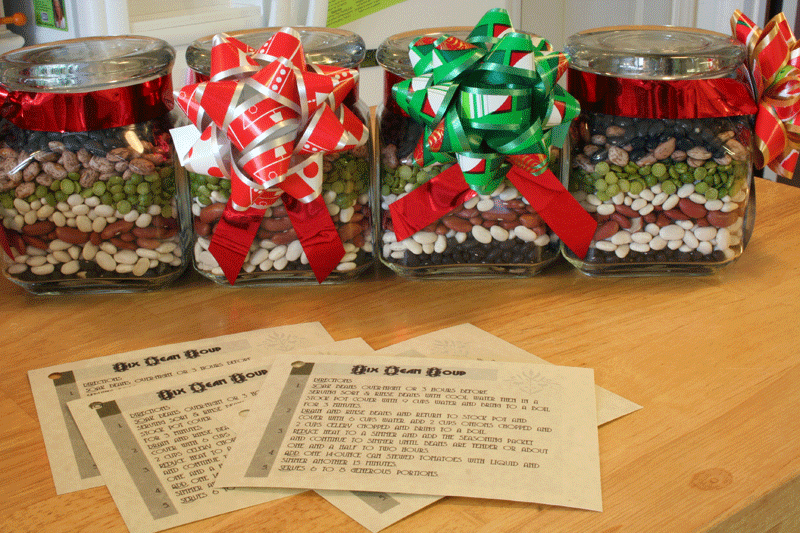
It is always nice getting presents for Christmas, but what is more exciting than receiving is giving, and what a better way to give than by making something. The real spirit of Christmas is about giving of yourself in time and spirit, and making gifts from the kitchen is a perfect way to send those you love a message of good tidings and cheer.
For the past 20 + years my kitchens have seen a variety of foodie and scratch made edible gifts ranging from home made smoked meats and sausages, beef jerky, meringue mushroom cookies, chocolate bouchettes de noel (miniature yule logs), corn flake and red hots wreath cookies, sugar cookies, pecan pralines, divinity, sugar and spiced pecans, spice mixes, gourmet ingredient gift baskets, bourbon chocolate pecan pies, and many others I cannot recall.
This year I decided to put together some of my spice mixes and give those away, and I also put together a bean soup in a jar with recipe too! With our family focused on high fiber dieting now a bean soup would be the perfect gift from the heart and soul and to the stomach with love. They say the way to a man’s heart is through his stomach, well I can say the way to a woman’s heart is the same, and it was fun making the jars too. So here is how I put the “Six Bean Soup” jars together and the associated recipe card too!
Six Bean Soup
This recipe makes 6 each 3-cup canisters but you can modify the amount based on the size of the mason jar or canister.
Ingredients |
| 2 |
Lb. |
Black beans |
| 1 |
Lb. |
Navy beans |
| 1 |
Lb. |
Red Kidney beans |
| 1 |
Lb. |
Green split peas |
| 1 |
Lb. |
Great Northern beans |
| 1 |
Lb. |
Pinto beans |
| Spice Packet Ingredients (Individual bag portion measure) |
| 6 |
Tbsp |
Beef bouillon powder (1 Tbsp) |
| 6 |
Tbsp |
Italian Seasoning (1 Tbsp) |
| 18 |
Tbsp |
Chives, dried (3 Tbsp) |
| 6 |
Tsp. |
Salt (1 Tsp) |
| 3 |
Tsp |
Cumin (1/2 Tsp) |
| 3 |
Tsp |
Black Pepper (1/2 Tsp) |
| 6 |
Each |
Bay leaves (1 each) |
Preparation Steps |
| 1. |
Layer the beans in order evenly between the jars, start with one pound of black beans, then layer in the Navy, Red, Split Pea, Great Northern, Pinto, and finish with the other pound of black beans on top. |
| 2. |
Fill 6 small plastic bags with the spices and seal then top each jar with the enclosed bag. |
| 3. |
Seal each jar and wrap for the holiday theme. |
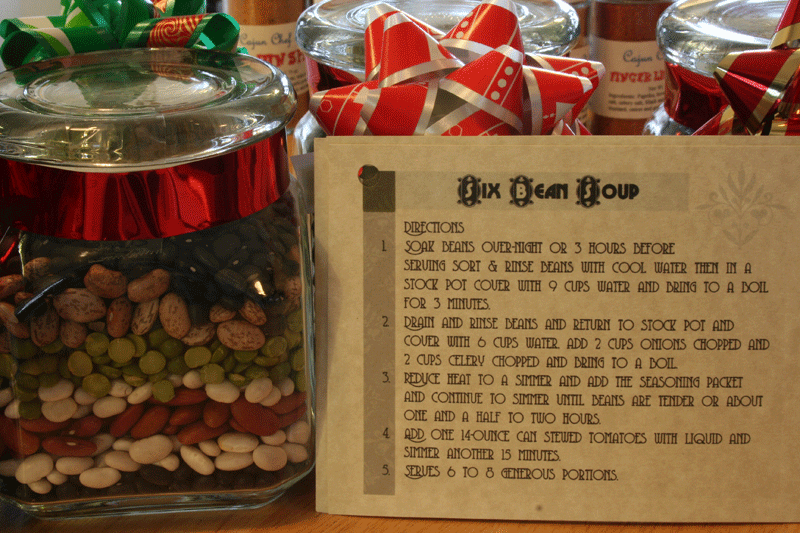
The accompanying recipe card is in the image below, feel free to write up your own version, I have the recipient add 2 cups of onions and 2 cups of celery in addition to a can of stewed tomatoes. You could add a couple cups carrots to other vegetable to your recipe to make it your own!
 |
| |
| Recipe Card Directions |
| 1. |
Soak beans over-night or 3 hours before serving sort and rinse beans with cool water then in a stock pot cover with 9 cups water and bring to a boil for 3 minutes. |
| 2. |
Drain beans and rinse beans and return to stock pot and cover with 6 cups water. Add 2 cups onions chopped and 2 cups celery chopped and bring to a boil. |
| 3. |
Reduce heat to a simmer and add the seasoning packet and continue to simmer until beans are tender or about one and a half to two hours. |
| 4. |
Add one 14-ounce can stewed tomatoes with liquid and simmer another 15 minutes. |
| 5. |
Serves 6 to 8 generous portions. |
Tags: Holidays