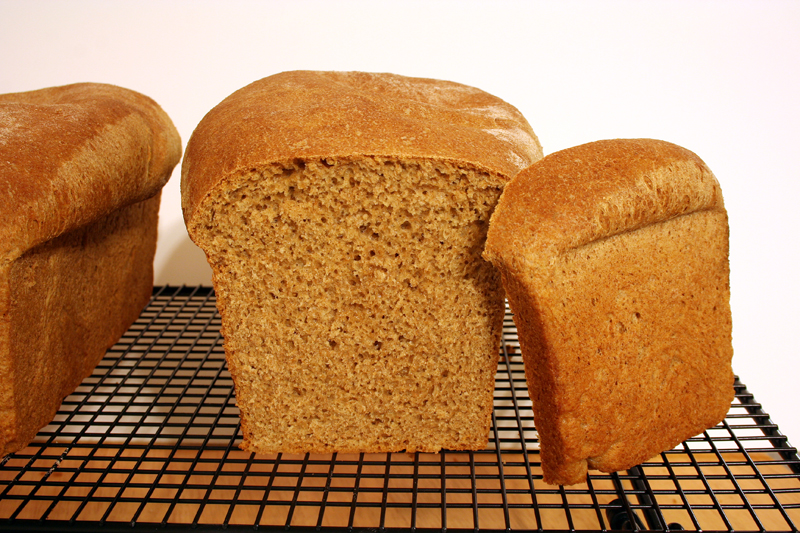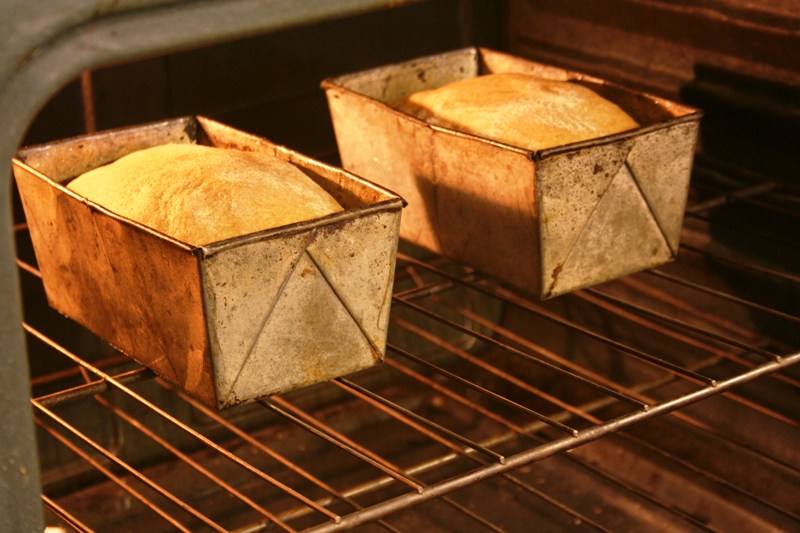
Bought a five pound bag of King Arthur Whole Wheat flour last week and have made one of their recipes from the back of the container, it is called No-Knead 100% Whole Wheat Bread and this is an amazing bread indeed. It has orange juice and molasses or maple syrup as part of the liquid ingredients, and they lend a slight sweetness and tanginess to the loaf. The first batch came out good, but the top flattened out and did not raise enough to form a nice crown. The second batch, featured in the photographs in this post, came out about as well as can be expected, but we are still striving for perfection.
The recipe from the back of the flour package is already available online at the King Arthur web site, and it displays a systematic procedure with images: No-Knead 100% Whole Wheat Bread. I doubled the recipe to yield the two loaves shown in this blog post.
Here are some tips on how I work to prefect my baking products and now shared them with you here.
Yeast Breads 101
While a complete class is typically taught, this is a short tutorial and lesson on some of the basics for working with yeast breads.
Yeast is an amazing living organism; it is a singular-celled fungus. There was a debate several years ago over it either being a living animal or plant, but that seems to have been quelled with the fact that it is actually neither, the fungus kingdom is separate from the plants, animals and bacteria. Not to get too deep in the biological taxonomy here, but in any case it is a living organism in your bread! The yeast utilized in baking and fermenting alcoholic beverages is actually the species Saccharomyces cerevisiae and is safe for human consumption.
Yeast feeds on carbohydrates and converts them into carbon dioxide and alcohol in an organic process known as fermentation, the basic formula below:
Yeast + Carbohydrates = Alcohol & Carbon Dioxide
Yeast is the secret ingredient that allows bread to rise and give it texture, the carbon dioxide gas that releases as the yeast digests the carbohydrates creates tiny pockets of air bubbles between the strands of gluten in the dough network. During baking the alcohol by-product of the fermentation process evaporates.
Like any living organism, yeasts have a certain temperature zone where they are dormant, active, or die.
Temperature ranges that affect yeast.
At 34° F (2° C) or below yeast is inactive
34 – 70° F (2 – 21° C) Slow activity
70 – 90° F (21 – 32° C) Best temperature for growth of fresh yeast
105 – 115° F (41 – 46° C) Best temperature for growth of active dry yeast
125 – 130° F (52 – 54° C) Best temperature for activating instant yeast
138° F (59° C) Yeast dies
Production Stages for Yeast Breads
Unbelievably there are up to ten stages in the general production of yeast-raised breads, some can be combined, and however the divisions are:
- Scaling ingredients
- Mixing and kneading dough
- Fermenting dough
- Punching down dough
- Portioning dough
- Rounding portions
- Shaping portions
- Proofing products
- Baking products
- Cooling and storing finished products
Did you know that there are two basic methods of mixing dough?
Yes, the two are Straight Dough Method and Sponge Method.
The Straight Dough method is the simplest and easiest in the all the ingredients are combined together and mixed in one-step. In some cases, the yeast is first activated in warm (110° F) liquid and then added to the ingredients, and kneading will also vary depending on the particular dough.
The Sponge Method of mixing yeast dough is broken down into two steps. In the first step, the liquid and yeast are mixed with about half of the dry ingredients including mostly flour to make a thick batter or sponge. The sponge is then allowed to rest until doubled in size. Then, in the second step, any fat, salt, sugar, and remaining flour are added to create the final dough. This dough is kneaded and allowed to rise again, giving the bread a different flavor and lighter texture.
Did you know that dough weights are typically associated with pan sizes?
This quick guide assists the baker in knowing the approximate weights of raw dough and the pans that they would typically fit into when preparing for baking.
| Pan | Typical Size (L x W x H) |
Weight |
| Sandwich Loaf | 16” x 4” x 4” | 4 lb. |
| Pullman Loaf | 13” x 4” x 3-4” | 3 lb. |
| Large | 9” x 5” x 3-4” | 2 lb. |
| Medium | 8” x 4” x 2-4” | 1 lb. 8 oz. |
| Small | 7” x 3” x 2” | 1 lb. |
| Mini | 5” x 3” x 2” | 8 oz. |
Proofing doubles your product!

Proofing your dough product before baking ensures that you are getting the full effects of the yeast activity, letting your little organisms work for your dough’s benefit. Typically, in restaurants and bakeries a proofing box is utilized where the temperature and humidity are controlled, typically the perfect proofing environment is a temperature between 95° and 115° F (35-46° C) and a pan containing warm water also brings the humidity up near 80% or above to prevent thick crusts and keeps the dough from drying out. But remember, yeast dies above 138° F, so if you are using an oven at home as a proofing box, heat it to your lowest setting (typically 140-170° F) and then turn it off to cool some before adding your dough product to rise.
Continue to proof your dough product until it doubles in size and when slightly touched it should spring back. Too short a proofing results in lower volumes and too long a proofing time results in a sour tasting and paler color in the final product.
Did you know that different washes create varied finishing effects?
The type of wash brushed on or sprinkled onto the top of proofed dough will change and improve the outside appearance and crust texture of the finished product. The crust can be made shiny, or matte finished, hard or soft, lighter or darker depending on the wash.
The table below highlights the various uses and effects of certain washes. For example, French bread typically is coated with a water wash and even a hot pan of water in the oven to aid in building a crispy and crunchy crust.
| Wash | Uses and Effects |
| Whole eggs and water | Shine and color |
| Whole eggs and milk | Shine and color with a softer crust |
| Egg white and water | Shine with a firm crust |
| Water | Crisp crust |
| Flour, oats, meals | Texture and contrast |
| Milk or cream | Color with a soft crust |
 |
| Cooling the bread after baking. |


18 responses so far ↓
1 Brad // Mar 5, 2010 at 11:52 am
Thanks for all of the great info and the finer pounts of baking bread. Nothing like toasted wheat bread with butter and agave syrup.
2 Biz // Mar 5, 2010 at 1:19 pm
I love homemade bread! Thanks for all the info! I recently tried America’s Test Kitchen bread and it is hands down the best bread I’ve ever made.
The secret? It bakes in a hot dutch oven with the lid on – my guess is that it steams the bread, then the last 20 minutes it browns up without the lid.
Let me know if you give it a try! 😀
http://biz319.wordpress.com/2010/03/01/best-bread-ever/
3 Emily // Mar 5, 2010 at 2:48 pm
This is fantastic, Ryan. Love it!
4 OC2Seattle // Mar 5, 2010 at 4:00 pm
I can’t wait to try this! I love making home made bread, store bought just doesn’t compare.
5 Trix // Mar 5, 2010 at 4:56 pm
This is so funny – Just what we’re doing in culinary school right now! I should print your post out and use it for my midterm study guide!
6 pegasuslegend // Mar 5, 2010 at 7:13 pm
ok, you totally know I am a bread fiend by reading my blog I love this! You have outdone yourself CajunChefRyan, I cant wait to try this one~ the information here is fantastic~
7 HoneyB // Mar 5, 2010 at 9:03 pm
This post is making me want to make bread!!
8 Drick // Mar 5, 2010 at 9:04 pm
oh my – a must save … even though I am not a bread maker, I hope to be one day and this will be my guide – thanks, Ryan
9 Shirley // Mar 5, 2010 at 11:36 pm
Its wholemeal bread for me any day.
10 Conor @ HoldtheBeef // Mar 6, 2010 at 3:29 am
Very informative post, and your bread looks great!
11 Sook @ My Fabulous Recipes // Mar 6, 2010 at 3:38 am
I just went and bought whole wheat today. I am so excited to make this bread!
12 penny aka jeroxie // Mar 6, 2010 at 8:15 am
This is really good information. And the bread looks so good.
13 Beth // Mar 6, 2010 at 10:13 pm
Awesome information – thanks!!
14 kathy gori // Mar 7, 2010 at 3:28 am
what beautiful looking bread. Love the recipe love the pictures
15 Divina // Mar 7, 2010 at 7:57 am
That’s a beautiful whole wheat bread. Thanks for all the tips.
16 Chef Aimee // Mar 7, 2010 at 1:37 pm
The education on this blog is much appreciated! I eat so much whole wheat bread and pasta now that I prefer it to white!
17 sweetlife // Mar 8, 2010 at 3:26 pm
Great pics…so much valuable info!!
sweetlife
18 Doc // Mar 8, 2010 at 10:25 pm
Excellent tutorial Chef! I can smell the bread as I read your post, in fact we may have to bake some bread to get the scent in the air and sell the house!